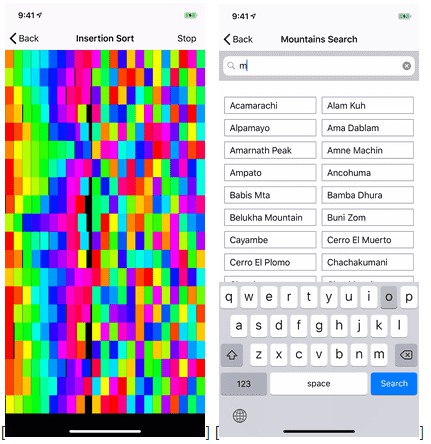
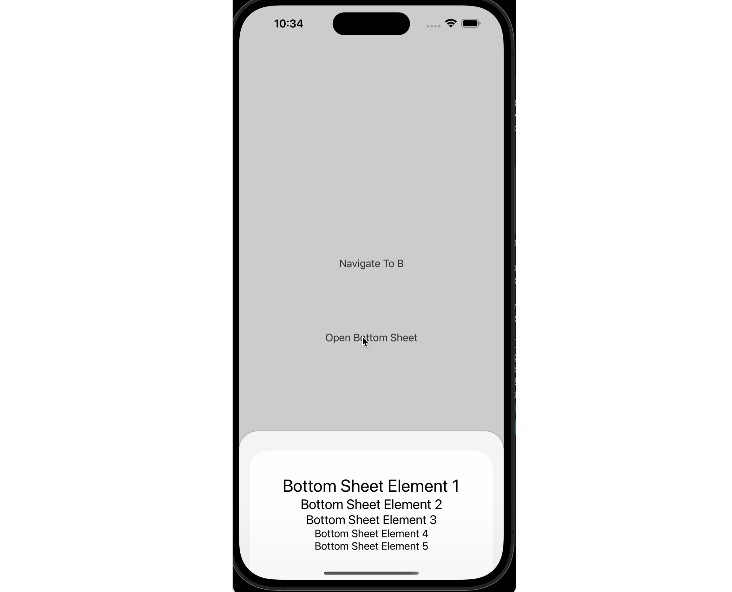
BottomSheet
A sliding Sheet from the bottom of the Screen with 3 States build with SwiftUI.
Why
There have been many different attempts to recreate the BottomSheet from Apple Maps, Shortcuts and Apple Music, because Apple unfortunately does not provide it in their SDK.
However, all previous attempts have a common problem: The hight does not change in the different states. Thus, the BottomSheet is always the same size (e.g. 800px) and thus remains 800px, even if you only see e.g. 400px - the rest is inaccessible unless you pull the BottomSheet up to the very top.
There are also many implementations out there that only have 2 states - not 3 like e.g. Apple Maps.
Unfortunately, my implementation currently only supports 1 state (height cannot be changed) and 3 states (such as Apple - Top, Middle, Bottom (, Hidden)). But I'm working on a solution for 2 states.
Here are some alternatives:
- https://swiftwithmajid.com/2019/12/11/building-bottom-sheet-in-swiftui/
- https://gist.github.com/mecid/78eab34d05498d6c60ae0f162bfd81ee
- https://github.com/weitieda/bottom-sheet
- https://github.com/fernandodelafuente/BottomSheetModal
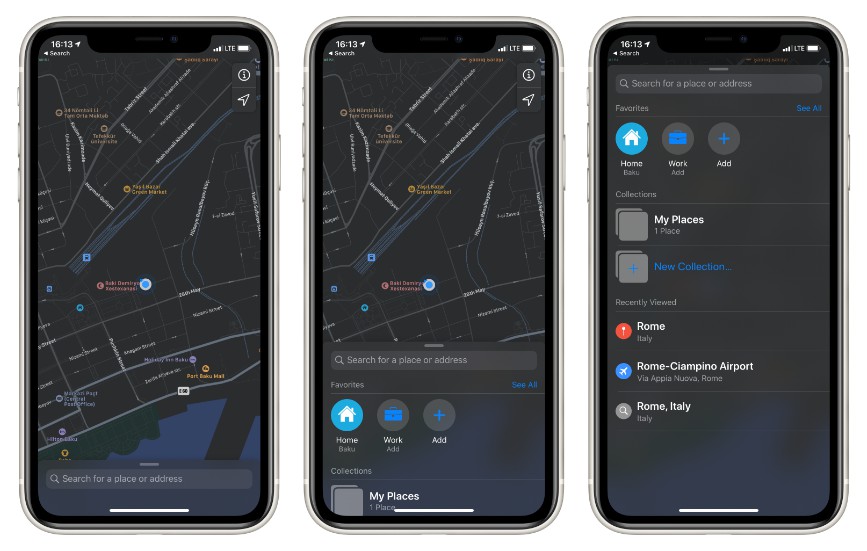
Here you can see the states mentioned above:
Requirements
- iOS 13
- Swift 5.3
- Xcode 12
Installation
The preferred way of installing BottomSheet is via the Swift Package Manager.
Xcode 11 integrates with libSwiftPM to provide support for iOS, watchOS, and tvOS platforms.
- In Xcode, open your project and navigate to File → Swift Packages → Add Package Dependency...
- Paste the repository URL (
https://github.com/LucasMucGH/BottomSheet) and click Next. - For Rules, select Branch (with branch set to
main). - Click Finish.
Usage
Basic Usage
WARNING:
This is Sample Code for visualisation where and how to use, without a working initializer. Please see Examples for working code
Same way you use Sheet in SwiftUI
struct ContentView: View {

    @State var bottomSheetPosition: BottomSheetPosition = .middle //1

    var body: some View {

        Map() //2
            .bottomSheet() //3
    }
}
//1 This is where you store the current State of the BottomSheet
The following States are posible: .hidden, .bottom, .middle and .top.
If you don't want to be able to change the state, you can use .constant(.hidden) for Example (should be used with resizeable: false).
//2 This is the view you want the BottomSheet to overlay on
//3 This is how you add the BottomSheet - easy right?
Parameters
Title as Header Content
WARNING:
This is Sample Code for visualisation of the parameters and their default values and value types, without a working initializer. Please see Examples for working code
.bottomSheet(
    bottomSheetPosition: Binding<BottomSheetPosition>,
    resizeable: Bool = true,
    showCancelButton: Bool = false,
    title: String? = nil,
    @ViewBuilder content: () -> mContent,
    closeAction: @escaping () -> () = {}
)
-
bottomSheetPosition
This is where you store the current State of the BottomSheet.
The following States are posible:.hidden,.bottom,.middleand.top.
If you don't want to be able to change the state, you can use.constant(.hidden)for Example (should be used withresizeable: false). -
resizeable
This parameter controls whether you can drag it.
Iffalse, the drag indicator disappears. -
showCancelButton
Toggles the visibility of the Close (X) button. -
title
The title of the BottomSheet.
Can benil. -
content
Here you declare the view that should be inside of the BottomSheet. -
closeAction
Here you declare the action that should be executed if you tap on the Close (X) button.
IF YOU WANT SOMETHING TO HAPPEN YOU NEED TO DECLARE ITFor Example
  {
   self.bottomSheetPosition = .hidden
  }
Custom Header Content
WARNING:
This is Sample Code for visualisation of the parameters and their default values and value types, without a working initializer. Please see Examples for working code
.bottomSheet(
    bottomSheetPosition: Binding<BottomSheetPosition>,
    resizeable: Bool = true,
    showCancelButton: Bool = false,
    @ViewBuilder headerContent: () -> hContent?,
    @ViewBuilder mainContent: () -> mContent,
    closeAction: @escaping () -> () = {}
)
-
bottomSheetPosition
This is where you store the current State of the BottomSheet.
The following States are posible:.hidden,.bottom,.middleand.top.
If you don't want to be able to change the state, you can use.constant(.hidden)for Example (should be used withresizeable: false). -
resizeable
This parameter controls whether you can drag it.
Iffalse, the drag indicator disappears. -
showCancelButton
Toggles the visibility of the Close (X) button. -
headerContent
Here goes your Custom Header Content.
Any view is possible - this can lead to problems if the views are too large. Label, a Small Image or Text is recommended.
Can benil. -
mainContent
Here you declare the view that should be inside of the BottomSheet. -
closeAction
Here you declare the action that should be executed if you tap on the Close (X) button.
IF YOU WANT SOMETHING TO HAPPEN YOU NEED TO DECLARE ITFor Example
  {
   self.bottomSheetPosition = .hidden
  }
Examples
The simplest Version of a BottomSheet
import SwiftUI
import BottomSheet

struct BottomSheetTest1: View {

    @State private var bottomSheetPosition: BottomSheetPosition = .middle

    var body: some View {
        ZStack {
            //A simple Black background
            Color.black
                .edgesIgnoringSafeArea(.all)

                .bottomSheet(bottomSheetPosition: self.$bottomSheetPosition, content: {
                    //The Numbers from 0 to 99 as Main Content in a Scroll View
                    ScrollView {
                        ForEach(0..<100) { index in
                            Text(String(index))
                        }
                        .frame(maxWidth: .infinity)
                    }
                    .padding(.top)
                })
        }
    }
}
A not draggable, but dismissable Bottom Sheet to show aditional Information
import SwiftUI
import BottomSheet

struct BottomSheetTest2: View {

    @State private var bottomSheetPosition: BottomSheetPosition = .middle

    var body: some View {
        ZStack {
            //A simple Black background
            Color.black
                .edgesIgnoringSafeArea(.all)

                .bottomSheet(bottomSheetPosition: self.$bottomSheetPosition, resizeable: false, showCancelButton: true, title: "Hello World", content: {
                    //A Tag, with some sample Text and a Read More and Bookmark Button
                    VStack(alignment: .leading, spacing: nil) {

                        Text("BottomSheet")
                            .foregroundColor(.white)
                            .bold()
                            .padding(8)
                            .background(Color.red)
                            .cornerRadius(10)
                            .padding(.horizontal)

                        Divider().padding(10)

                        Text("Lorem ipsum dolor sit amet, consectetur adipiscing elit, sed do eiusmod tempor incididunt ut labore et dolore magna aliqua. Ut enim ad minim veniam, quis nostrud exercitation ullamco laboris nisi ut aliquip ex ea commodo consequat.")
                            .fixedSize(horizontal: false, vertical: true)
                            .padding(.horizontal)

                        Divider().padding(10)

                        HStack {
                            Button(action: {}, label: {
                                Text("Read More")
                                    .foregroundColor(.white)
                            })
                            .padding(.vertical)
                            .padding(.horizontal, 50)
                            .background(Color.black)
                            .cornerRadius(20)

                            Button(action: {}, label: {
                                Image(systemName: "bookmark")
                                        .foregroundColor(.white)
                            })
                            .padding()
                            .background(Circle())
                            Spacer()
                        }
                        .padding([.horizontal, .bottom])

                        Spacer()
                    }
                    .padding(.top)
                }, closeAction: {
                    //The Close (X) moves the Bottom Sheet to the bottom
                    withAnimation(.linear) {
                        self.bottomSheetPosition = .hidden
                    }
                })
        }
    }
}
A simple BottomSheet with a Search bar as Header Content
import SwiftUI
import BottomSheet

struct BottomSheetTest3: View {

    @State private var bottomSheetPosition: BottomSheetPosition = .middle
    @State private var searchText: String = ""

    var body: some View {
        //A simple Black background
        Color.black
            .edgesIgnoringSafeArea(.all)

            .bottomSheet(bottomSheetPosition: self.$bottomSheetPosition, resizeable: true, showCancelButton: true, headerContent: {
                //A Search Bar as Header Content
                HStack {
                    Image(systemName: "magnifyingglass")
                    TextField("Search", text: self.$searchText)
                }
                .foregroundColor(.secondaryLabel)
                .padding(.vertical, 8)
                .padding(.horizontal, 5)
                .background(
                    RoundedRectangle(cornerRadius: 10)
                        .fill(Color.quaternaryLabel)
                )
            }, mainContent: {
                //The Numbers from 0 to 99 as Main Content in a Scroll View
                ScrollView {
                    ForEach(0..<100) { index in
                        Text(String(index))
                    }
                    .frame(maxWidth: .infinity)
                }
                .padding(.top)
            }, closeAction: {
                //The Close (X) moves the Bottom Sheet to the bottom
                withAnimation(.linear) {
                    self.bottomSheetPosition = .bottom
                }
            })
    }
}

