Message Bridge
A simple solution for accessing iMessage and SMS chats from older computers.
Requirements
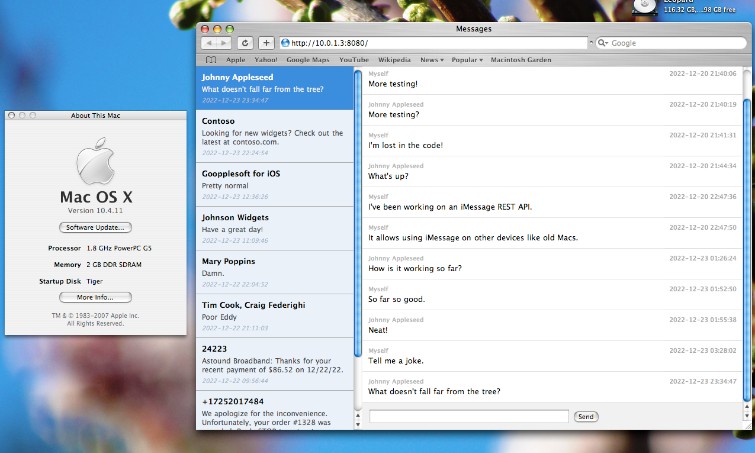
Message Bridge runs on a modern Mac signed into iMessage. Once running, you can access it via a web browser on older computers.
- Modern Mac to run Message Bridge:
- macOS 10.15 or later (tested on macOS 10.15.7 and macOS 13.1)
- Messages signed into iMessage with at least one existing chat
- Accessing Message Bridge on an old machine:
- Connected to the same network as the modern Mac running Message Bridge
- Running a web browser that supports
XMLHTTPRequest:- Safari 1.2 or later (tested 1.3 and 3.0)
- Camino (tested 1.0.6, 1.6.11, and 2.1.2)
- Firefox (tested 1.0 and later)
- Probably others!
Installation
Perform the following steps on your modern Mac signed into iMessage.
- Download from the releases page.
- Uncompress the downloaded archive and open the MessageBridge directory.
- Right-click (or control-click)
MessageBridge, select Open, then click Open in the alert to start Message Bridge. - Important: You must grant permissions so that Message Bridge can send messages, access received messages, and access contacts:
- You may be prompted to allow Terminal to access the folder where Message Bridge resides; click OK if so.
- You will be prompted to allow Terminal to control Messages. Click OK.
- Then, you will be prompted to allow Terminal to access contacts. Click OK.
- Finally, we must manually enable Full Disk Access for Terminal. To do so, perform these steps:
- On Ventura (macOS 13) or later, open System Settings > Privacy & Security > Full Disk Access
- On Monterey (macOS 12) or earlier, open System Preferences > Security & Privacy > Privacy > Full Disk Access, then click the lock at the bottom of the window to enable access to the settings.
- Find Terminal in the list, then click the toggle to enable it.
- You will be prompted to restart Terminal to provide full access. Click “Later”–we already have the necessary access.
- On Ventura (macOS 13) or later, open System Settings > Privacy & Security > Full Disk Access
- All set! On the desired machine, open a web browser to the URL shown in the Message Bridge window (
To access Message Bridge, open a browser to: ___).
Security
There is none, so don’t configure your router NAT to port forward Message Bridge.
Tweaks
Running Message Bridge on a port other than 8080
Edit the MessageBridge.command file in the MessageBridge folder, and change the line MBPORT=8080 to the desired port. Then, run Message Bridge again.
Modifying the Message Bridge web client
The Public folder within the MessageBridge folder contains the web client HTML/CSS/JS, which you may modify to fit your preferences.
REST API
If you’d like to integrate Message Bridge into your own client, you can use the REST API, which is the same API used by the provided web client.
Getting chats
GET /messages
Query parameters:
- limit (default: 5) Controls the number of chats to return.
Response
Array of Chat:
- id Unique chat ID, used to request a chat’s messages
- replyId Unique chat reply ID, used when sending a message to a chat
- name Display name for the chat (group name or recipient name)
- lastMessage Latest message received for the chat
- lastReceived Date/time the latest message was received
- service Service for the chat,
iMessageorSMS
Getting chat messages
GET /messages/{chatId}
Query parameters:
- limit (default: 5) Controls the number of chat messages to return.
Response
Array of ChatMessage:
- id Unique message ID
- chatId Unique chat ID
- isMe Boolean indicating if the message was sent by the local user
- from Chat participant who sent the message (ignore if
isMeistrue) - body Message body text
- lastReceived Date/time the message was received
Sending messages to a chat
POST /messages
Headers:
- Content-Type: application/json
Parameters:
- address Chat
replyIdretrieved fromGET /messages(or address of desired recipient for a new chat) - service Service for the chat,
iMessageorSMS - message Message body text
