Composing custom layouts with SwiftUI
Arrange views in your app’s interface using layout tools that SwiftUI provides.
Overview
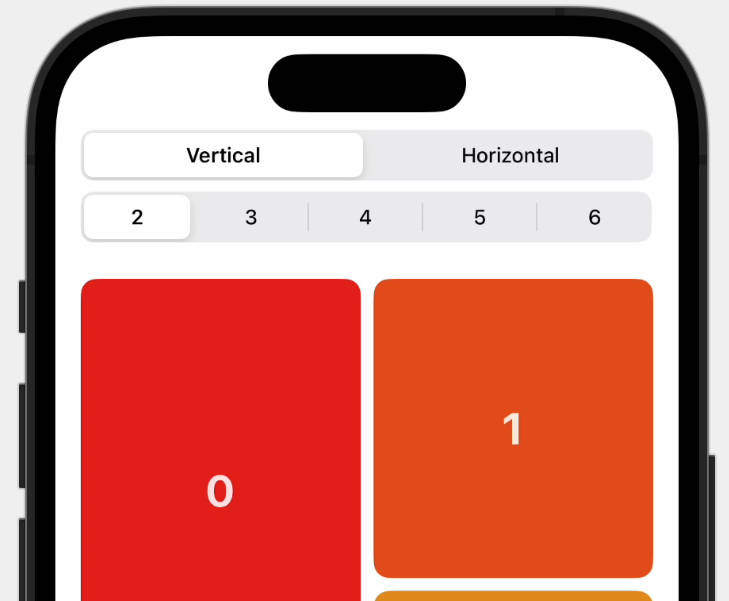
This sample app demonstrates many of the layout tools that SwiftUI provides by building an interface that enables people to vote for their favorite kind of pet. The app offers buttons to vote for a specific pet type, and displays the vote counts and relative rankings of the various contenders on a leaderboard. It also shows avatars for the pets, arranged in a way that reflects the current rankings.
- Note: This sample code project is associated with WWDC22 session 10056: Compose custom layouts with SwiftUI.
Arrange views in two dimensions with a grid
To draw a leaderboard in the middle of the display that shows vote counts and
percentages, the sample uses a Grid view.
Grid(alignment: .leading) {
    ForEach(model.pets) { pet in
        GridRow {
            Text(pet.type)
            ProgressView(
                value: Double(pet.votes),
                total: Double(max(1, model.totalVotes))) // Avoid dividing by zero.
            Text("\(pet.votes)")
                .gridColumnAlignment(.trailing)
        }

        Divider()
    }
}
View in Source
The grid contains a GridRow inside a ForEach,
where each view in the row creates a column cell. So the first view appears in
the first column, the second in the second column, and so on. Because the
Divider appears outside of a grid row instance, it creates a row
that spans the width of the grid.
The sample initializes the grid with leading-edge alignment, which applies to
every cell in the grid. Meanwhile, the
gridColumnAlignment(_:) view modifier that appears
on the vote count cell overrides the alignment of cells in that column
to use trailing-edge alignment.
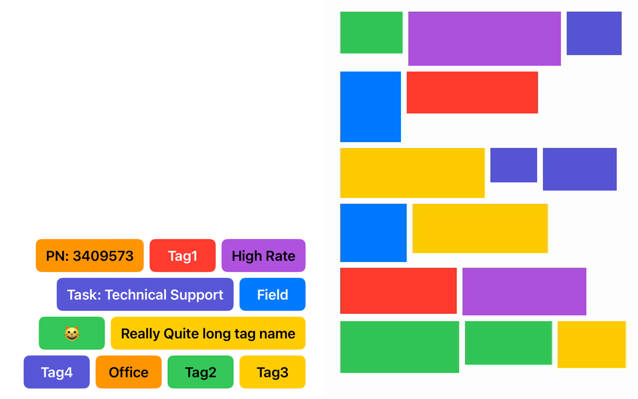
Create a custom equal-width layout
The app offers buttons for voting at the bottom of the interface. To ensure
the buttons all have the same width, but are no wider than the widest button
text, the app creates a custom layout container type that conforms to the
Layout protocol. The equal-width horizontal stack
(MyEqualWidthHStack) measures the ideal sizes of all its subviews, and offers
the widest ideal size to each subview.
The custom stack implements the protocol’s two required methods. First,
sizeThatFits(proposal:subviews:cache:) reports the
container’s size, given a set of subviews.
func sizeThatFits(
    proposal: ProposedViewSize,
    subviews: Subviews,
    cache: inout Void
) -> CGSize {
    guard !subviews.isEmpty else { return .zero }

    let maxSize = maxSize(subviews: subviews)
    let spacing = spacing(subviews: subviews)
    let totalSpacing = spacing.reduce(0) { $0 + $1 }

    return CGSize(
        width: maxSize.width * CGFloat(subviews.count) + totalSpacing,
        height: maxSize.height)
}
View in Source
This method combines the largest size in each dimension with the horizontal
spacing between subviews to find the container’s total size. Then,
placeSubviews(in:proposal:subviews:cache:)
tells each of the subviews where to appear within the layout’s bounds.
func placeSubviews(
    in bounds: CGRect,
    proposal: ProposedViewSize,
    subviews: Subviews,
    cache: inout Void
) {
    guard !subviews.isEmpty else { return }

    let maxSize = maxSize(subviews: subviews)
    let spacing = spacing(subviews: subviews)

    let placementProposal = ProposedViewSize(width: maxSize.width, height: maxSize.height)
    var nextX = bounds.minX + maxSize.width / 2

    for index in subviews.indices {
        subviews[index].place(
            at: CGPoint(x: nextX, y: bounds.midY),
            anchor: .center,
            proposal: placementProposal)
        nextX += maxSize.width + spacing[index]
    }
}
View in Source
The method creates a single size proposal for the subviews, and then uses that, along with a point that changes for each subview, to arrange the buttons in a horizontal line with default spacing.
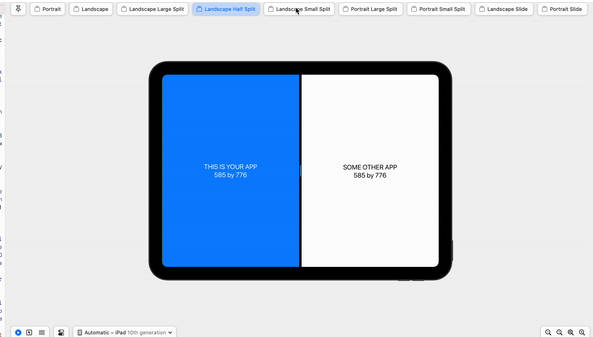
Choose the view that fits
The size of the voting buttons depends on the width of the text they contain.
For people that speak another language, or that use a larger text size,
the horizontally arranged buttons might not fit in the display. So the app uses
ViewThatFits to let SwiftUI choose between a horizontal and
a vertical arrangement of the buttons for the one that fits in the
available space.
ViewThatFits { // Choose the first view that fits.
    MyEqualWidthHStack { // Arrange horizontally if it fits...
        Buttons()
    }
    MyEqualWidthVStack { // ...or vertically, otherwise.
        Buttons()
    }
}
View in Source
To ensure that the buttons maintain their equal-width property when arranged
vertically, the app uses a custom equal-width vertical stack
(MyEqualWidthVStack) that’s very similar to the horizontal version.
Improve layout efficiency with a cache
The methods of the Layout protocol take a bidirectional cache
parameter. The cache provides access to optional storage that’s shared among
all the methods of a particular layout instance. To demonstrate the use of a
cache, the sample app’s equal-width vertical layout creates storage to share
size and spacing calculations between its
sizeThatFits(proposal:subviews:cache:) and
placeSubviews(in:proposal:subviews:cache:) implementations.
First, the layout defines a CacheData type for the storage.
struct CacheData {
    let maxSize: CGSize
    let spacing: [CGFloat]
    let totalSpacing: CGFloat
}
View in Source
It then implements the protocol’s optional makeCache(subviews:)
method to do the calculations for a set of subviews, returning a value of
the type defined above.
func makeCache(subviews: Subviews) -> CacheData {
    let maxSize = maxSize(subviews: subviews)
    let spacing = spacing(subviews: subviews)
    let totalSpacing = spacing.reduce(0) { $0 + $1 }

    return CacheData(
        maxSize: maxSize,
        spacing: spacing,
        totalSpacing: totalSpacing)
}
View in Source
If the subviews change, SwiftUI calls the layout’s
updateCache(_:subviews:) method. The default implementation
of that method calls makeCache(subviews:) again, which
recalculates the data. Then the sizeThatFits(proposal:subviews:cache:) and
placeSubviews(in:proposal:subviews:cache:) methods make
use of their cache parameter to retrieve the data. For example,
placeSubviews(in:proposal:subviews:cache:) reads the size and the spacing
array from the cache.
let maxSize = cache.maxSize
let spacing = cache.spacing
View in Source
Contrast this with the equal-width horizontal stack, which doesn’t use a cache, and instead calculates the size and spacing information every time it needs that information.
- Note: Most simple layouts, including the equal-width vertical stack, don’t gain much efficiency from using a cache. Developers can profile their app with Instruments to find out whether a particular layout type actually benefits from a cache.
Create a custom radial layout with an offset
To display the pet avatars in a circle, the app defines a radial layout
(MyRadialLayout). Like other custom layouts, this layout needs the two
required methods. For sizeThatFits(proposal:subviews:cache:),
the layout fills the available space by returning whatever size its container
proposes.
return proposal.replacingUnspecifiedDimensions()
View in Source
The app uses the proposal’s replacingUnspecifiedDimensions(by:) method to convert the proposal into a concrete size. Then, to place subviews, the layout rotates a vector, translates the vector to the middle of the placement region, and uses that as the anchor for the subview.
for (index, subview) in subviews.enumerated() {
    // Find a vector with an appropriate size and rotation.
    var point = CGPoint(x: 0, y: -radius)
        .applying(CGAffineTransform(
            rotationAngle: angle * Double(index) + offset))

    // Shift the vector to the middle of the region.
    point.x += bounds.midX
    point.y += bounds.midY

    // Place the subview.
    subview.place(at: point, anchor: .center, proposal: .unspecified)
}
View in Source
The offset that the app applies to the rotation accounts for the current
rankings, placing higher-ranked pets closer to the top of the interface. The
app stores ranks on the subviews using the LayoutValueKey
protocol, and then reads the values to calculate the offset before placing
views.
Animate transitions between layouts
The radial layout can calculate an offset that creates an appropriate
arrangement for all but one set of rankings: there’s no way to show a three-way
tie with the avatars in a circle. To resolve this, the app detects
this condition, and uses it to put the avatars in a line instead, using a
built-in HStack. To transition between these layout types, the
app uses the AnyLayout type.
let layout = model.isAllWayTie ? AnyLayout(HStack()) : AnyLayout(MyRadialLayout())

Podium()
    .overlay(alignment: .top) {
        layout {
            ForEach(model.pets) { pet in
                Avatar(pet: pet)
                    .rank(model.rank(pet))
            }
        }
        .animation(.default, value: model.pets)
    }
View in Source
Because the structural identity of the views remains the same throughout, the
animation(_:value:) view modifier creates animated transitions
between layout types. The modifier also animates radial layout changes
that result from changes in the rankings because the calculated offsets
depend on the same pet data.