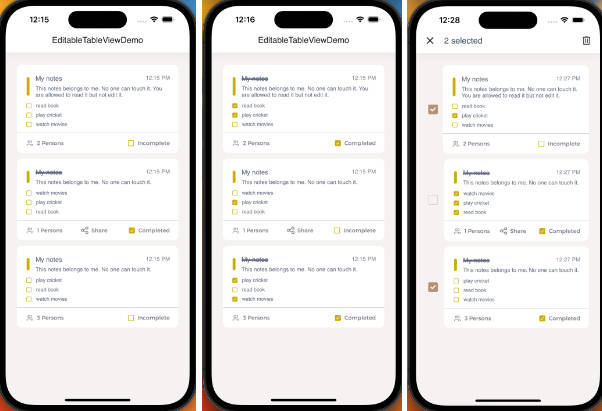
CoreTableView
CoreTableView module for Data-Driven-UI Architecture
Integration
if as local package
    dependencies: [
        .package(path: "../CoreTableView")
    ],
if as shared package
    dependencies: [
        .package(name: "CoreTableView", url: "https://github.com/MosMetro-official/CoreTableView.git", from: "0.0.1")
    ],
Structure
The Package is a wrapper for BEST UITableView perfomance, that is includes DifferenceKit lib inside. Available for iOS 11+.
Usage
First of all, you need to set BaseTableView – main actor for the lib. You can host it in Xib / Storyboard file or natively by code.
IBOutlet weak private var tableView : BaseTableView!

======OR======

private lazy var tableView : BaseTableView = {
    var tableView : BaseTableView!
    if #available(iOS 13.0, *) {
        tableView = BaseTableView(frame: .zero, style: .insetGrouped)
    } else {
        tableView = BaseTableView(frame: .zero, style: .grouped)
    }
    tableView.separatorColor = .clear
    tableView.showsVerticalScrollIndicator = false
    tableView.showsHorizontalScrollIndicator = false
    return tableView
}()
Anyway, this tableView wrapper created for convenient table management in Data-Driven-UI Architecture. So this Arch is built on States, that you schould strictly type. So. your view will be setted like:
final class MyView : UIView {

    @IBOutlet weak private var tableView: BaseTableView!

    struct ViewState {

        struct Loading : _Loading {
            let title : String
            let descr : scting
        }

        struct ErrorData : _ErrorData {
            let title : String
            let descr : String
            let onRetry : (() -> Void)?
        }

        struct Header : _TitleHeader {
            let title : String
            let style : TitleHeaderView.Style
            let height : CGFloat
            let isInsetGrouped : Bool
            let backgroundColor : UIColor
        }

        struct Row : _StandartImage {
            let icon : UIImage?
            let title : String
            let onSelect : (() -> Void)
        }

        struct Footer : _BaseFooter {
            var text : String
            var isInsetGrouped : Bool
        }
    }

    public var viewState: ViewState = ViewState(state: []) {
        didSet {
            DispatchQueue.main.async {
                self.tableView.viewStateInput = self.viewState.state
            }
        }
    }
}
In this case you should STRICTLY describe all possible screen states with a table, accordingly, if the screen has several states (for example, working, error and loading), then at least 3 cells should be created in the table (actually, working, with error and with loading).
Updating your UI we offer from controller, that is preparing states for us. For example, making loading state:
    let nestedView = MyView.loadFromNib()

    override func loadView() {
        self.view = self.nestedView
    }

    private func makeLoadingRow() -> Element {
        return MyView.ViewState.Loading(
            title : "Loading",
            descr : "Wait a bit"
        ).toElement()
    }

    private func makeState() {
        let stateModel = SectionState()
        let blockModel = State(model: stateModel, elements: [
            self.makeLoadingRow()
        ])
        self.nestedView.viewState.state = [blockModel]
    }
If you want to add Header / Footer, it easy:
======SAME STUFF======

    private func makeHeader() {
        return MyView.ViewState.Header(
            title : "Header"
            style : .medium
            height : 50
            isInsetGrouped : true
            backgroundColor : .clear
        )
    }

    private func makeState() {
        let stateModel = SectionState(header: self.makeHeader())
        let blockModel = State(model: stateModel, elements: [
            self.makeLoadingRow()
        ])
        self.nestedView.viewState.state = [blockModel]
    }
Perfomance
Your UITableViewCell file will be pretty the same, but you need to implement some usefull stuff. With CoreTableView your file will be looked by that:
protocol _StandartImage : CellData {
    var title : String   { get set }
    var leftImage : UIImage? { get set }
    var separator : Bool     { get set }
    var backgroundColor: UIColor? { get }
}

extension _StandartImage {

    var backgroundColor: UIColor? { return nil }

    func hashValues() -> [Int] {
        return [title.hashValue, leftImage.hashValue, separator.hashValue]
    }

    static func calculateHeight(title: String, hasAccesory: Bool, margin: CGFloat) -> CGFloat {
        let leftMargin = 64.0
        let rightMargin = 16.0 + (hasAccesory ? ((UIScreen.main.bounds.width - 32) * 0.08) : 0)
        let topAndBottomMargin = 22.0

        let titleSize = title.height(withConstrainedWidth: finalWidth, font: .Body_17_Regular)
        let finalWidth = UIScreen.main.bounds.width - leftMargin - rightMargin - margin * 2
        return topAndBottomMargin + titleSize + 4 + subtitleSize + 8
    }


    func prepare(cell: UITableViewCell, for tableView: UITableView, indexPath: IndexPath) {
        tableView.register(StandartImageCell.nib, forCellReuseIdentifier: StandartImageCell.identifire)
        guard
        let cell = cell as? StandartImageCell
        else { return }
        cell.configure(with: self)
    }

    func cell(for tableView: UITableView, indexPath: IndexPath) -> UITableViewCell {
        guard
        let cell = tableView.dequeueReusableCell(withIdentifier: StandartImageCell.identifire, for: indexPath) as? StandartImageCell
        else { return .init() }
        return cell
    }
}
This protocol “YourNameCell” need to be emplimented to make your state strictly typed && predictable – so now it cannot be used in any way except for this protocol. Extension for this protocol just predicted the Cell integration to the tableView. BackgroundColor is the color of the cell’s back, cell(for) – great method, so BaseTableView will see your cell (DO NOT FORGET TO IMPLEMENT “tableView.register”).
The most important part for the best perfomance using BaseTableView is to calculate YourTableViewCell height. You can do it by yourself, if your constraints are fixed – just calculate the height and return the value. But if you have some greaterOrEqual constraint, for a label – you can calculate it by using our extesion “.height(withConstrainedWidth: CGFloat, font: UIFont)”
Prepare func is called when the cell “willDisplay” so it’s configure will be BEFORE it displayed.
class StandartImageCell : UITableViewCell {

    @IBOutlet weak private var title : UILabel!
    @IBOutlet weak private var separator : UIView!
    @IBOutlet weak private var leftImage : UIImageView!

    override func awakeFromNib() {
        super.awakeFromNib()
        isUserInteractionEnabled = true
    }

    override func prepareForReuse() {
        self.title.text = nil
        self.title.textColor = nil
        self.leftImage.image = nil
        self.leftImage.tintColor = nil
    }

    public func configure(with data: _StandartImage) {
        self.title.text = data.title
        self.title.textColor = textColor
        self.leftImage.image = data.leftImage
        self.separator.isHidden = !data.separator
        self.leftImage.tintColor = imageColor
        if boldText {
            self.title.font = .Body17_bold
        }
        if let accesory = data.accesoryType {
            self.accessoryType = accesory
        }
        if let bgColor = data.backgroundColor  {
            self.backgroundColor = bgColor
        }
        self.leftImage.tintColor = data.tintColor
    }
}
So your cell schould implement method to “configure” and “eraseData”.
