RoughSwift
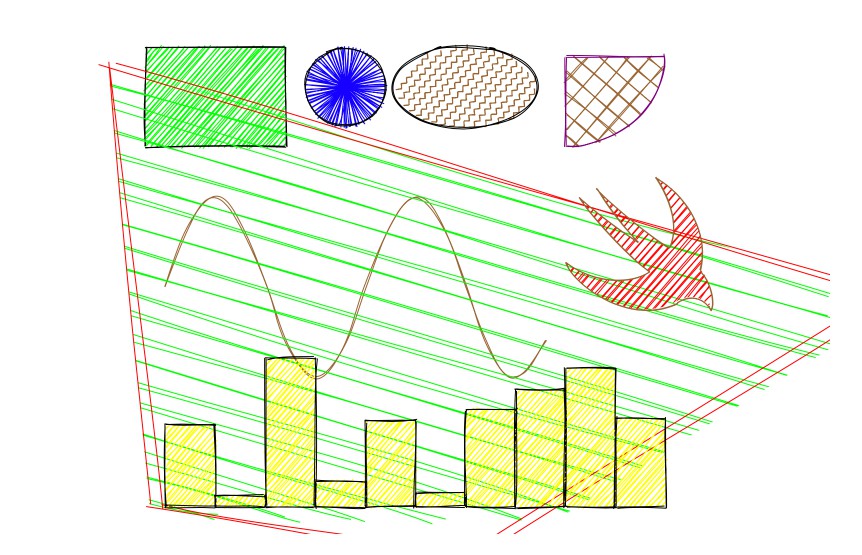
RoughSwift allows us to easily make shapes in hand drawn, sketchy, comic style. Based on the same concept of Snowflake which generates CALayer that are highly composable and changeable, RoughSwift turns drawing commands into beautiful sketchy graphics.
- [x] Support iOS, tvOS
- [ ] Support macOS
- [x] Support all shapes: line, rectangle, circle, ellipse, linear path, arc, curve, polygon, svg path
- [x] Generate
UIBezierPathforCAShapeLayer - [x] Easy cusomizations with Options
- [x] Easy composable APIs
- [x] Convenient draw functions
- [x] Platform independant APIs which can easily support new platforms
- [x] Test coverage
- [x] Immutable and type safe data structure
- [ ] SVG elliptical arc
There are Playground and Example project where you can explore further.
Basic
Use generator in draw function to specify which shape to render. The returned CALayer contains the rendered result in correct size and is updated everytime generator is instructed.
Here's how to draw a green rectangle
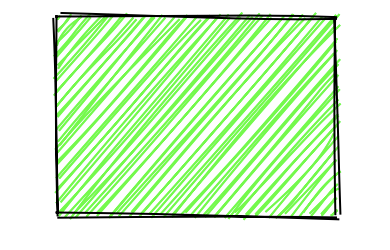
let size = CGSize(width: 300, height: 200)
let layer = draw(size: size, using: { generator in
  var options = Options()
  options.fill = UIColor.green
  generator.rectangle(x: 80, y: 10, width: 140, height: 100, options: options)
}
The beauty of CALayer is that we can further animate, transform (translate, scale, rotate) and compose them into more powerful shapes.
Options
Options is used to custimize shape. It is immutable struct and apply to one shape at a time. The following properties are configurable
- maxRandomnessOffset
- toughness
- bowing
- fill
- stroke
- strokeWidth
- curveTightness
- curveStepCount
- fillStyle
- fillWeight
- hachureAngle
- hachureGap
- dashOffset
- dashGap
- zigzagOffset
Shapes
RoughSwift supports all primitive shapes, including SVG path
- line
- rectangle
- ellipse
- circle
- linearPath
- arc
- curve
- polygon
- path
Fill style
Most of the time, we use fill for solid fill color inside shape, stroke for shape border, and fillStyle for sketchy fill style.
Available fill styles
- crossHatch
- dashed
- dots
- hachure
- solid
- starBurst
- zigzag
- zigzagLine
Here's how to draw circles in different fill styles. The default fill style is hachure

let layer = draw(size: size, using: { generator in
  var options = Options()
  options.stroke = UIColor.blue

  options.fill = UIColor.red
  options.fillStyle = .crossHatch
  generator.circle(x: 100, y: 100, diameter: 100, options: options)

  options.fill = UIColor.green
  options.fillStyle = .dashed
  generator.circle(x: 230, y: 100, diameter: 100, options: options)

  options.fill = UIColor.purple
  options.fillStyle = .dots
  generator.circle(x: 350, y: 100, diameter: 100, options: options)

  options.fill = UIColor.cyan
  options.fillStyle = .hachure
  generator.circle(x: 480, y: 100,  diameter: 100, options: options)

  options.fill = UIColor.orange
  options.fillStyle = .solid
  generator.circle(x: 100, y: 300,  diameter: 100, options: options)

  options.fill = UIColor.gray
  options.fillStyle = .starBurst
  generator.circle(x: 230, y: 300, diameter: 100, options: options)

  options.fill = UIColor.yellow
  options.fillStyle = .zigzag
  generator.circle(x: 350, y: 300,  diameter: 100, options: options)

  options.fill = UIColor.blue
  options.fillStyle = .zigzagLine
  generator.circle(x: 480, y: 300, diameter: 100, options: options)
})
SVG
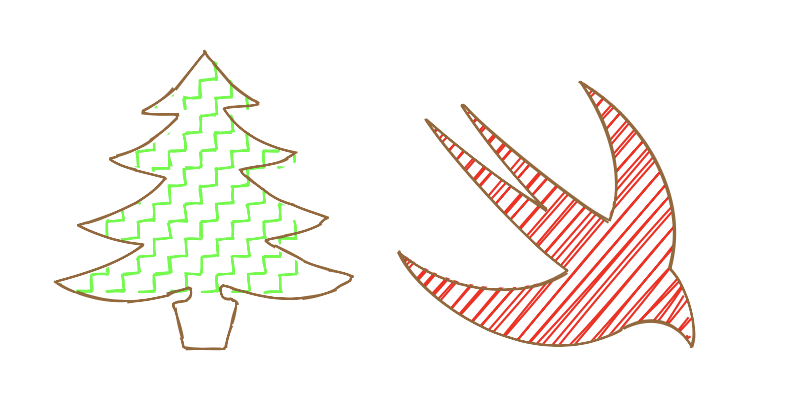
SVG shape can be bigger or smaller than the specifed layer size, so RoughSwift scales them to your requested size. This way we can compose and transform the SVG shape.
let bird = draw(size: CGSize(width: 150, height: 150), using: { generator in
  var options = Options()
  options.stroke = UIColor.brown
  options.fill = UIColor.red
  let apple = "M85 32C115 68 239 170 281 192 311 126 274 43 244 0c97 58 146 167 121 254 28 28 40 89 29 108 -25-45-67-39-93-24C176 409 24 296 0 233c68 56 170 65 226 27C165 217 56 89 36 54c42 38 116 96 161 122C159 137 108 72 85 32z"
  generator.path(d: apple, options: options)
})

bird.frame.origin = CGPoint(x: 100, y: 100)
Creative shapes
With all the primitive shapes, we can create more beautiful things. The only limit is your imagination.
Here's how to create chart

let width: Float = 50
var options = Options()
options.fill = UIColor.yellow
Array(0..<10).forEach { i in
  let height = Float(arc4random_uniform(150))
  generator.rectangle(x: Float(i) * width + 100, y: 470 - height, width: width, height: height, options: options)
}
Advance with Drawable, Generator and Renderer
Behind the screen, draw function composes Generator and Renderer. We don't really need to know this detail but it's good to know in case we want more fine grained control.
We can instantiate Engine or use a shared Engine for memory efficiency, to make Generator. Every time we instruct Generator to draw a shape, the engine works hard to figure out information about the sketchy shape in Drawable.
The name of these concepts follow rough.js for better code reasoning.
For iOS, there is a Renderer that can handle Drawable and transform it into UIBezierPath and CALayer. There will be more Renderer that can render into graphics context, image and for other platforms like macOS and watchOS.
let layer = CALayer()

let generator = Engine.shared.generator(size: size)
let renderer = Renderer(layer: layer)
generator.onDrawable = renderer.handle
Installation
RoughSwift is available through CocoaPods. To install
it, simply add the following line to your Podfile:
pod 'RoughSwift'
RoughSwift is also available through Carthage.
To install just write into your Cartfile:
github "onmyway133/RoughSwift"
RoughSwift can also be installed manually. Just download and drop Sources folders in your project.
