iOS-Static-Library-Example
iOS Static Library를 직접 만들어보고 적용해보는 프로젝트입니다.
Custom Button을 Static Library로 만들어보며 학습합니다.
Repository Structure
iOS-Static-Library-Example
├── Library       // Static Library
├── StaticApp     // App Project
└── StaticLibrary // Static Library Project
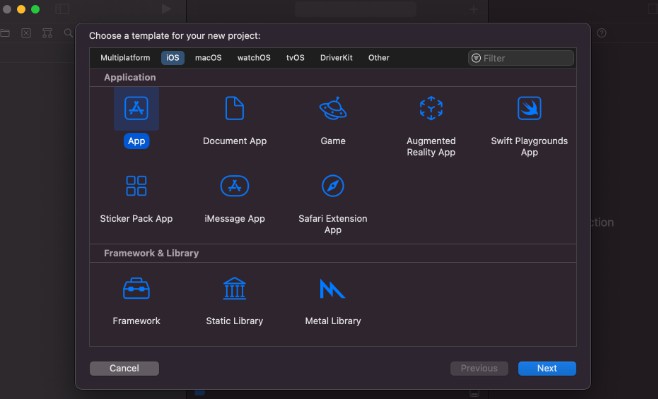
1. Create Project
App Project

- Optional
- Use Core Data
- Include Tests
Library Project

2. App Project Setting
Create Library Folder
xcodeproj 파일이 있는 곳에 lib 폴더를 생성

App -> Targets-App -> Build Settings -> Select All, Combined

Search Paths -> Library Search Paths

$(inherited) $(PROJECT_DIR) $(PROJECT_DIR)/lib추가

Swift Compiler – Search Paths -> Import Paths

$(inherited) $(PROJECT_DIR) $(PROJECT_DIR)/lib추가

3. Coding Custom Button in Library Project
// CustomButton.swift
import SwiftUI

public struct CustomButton<L> : View where L : View {
    let role: ButtonRole?
    let action: () -> Void
    let label: () -> L

    public init(role: ButtonRole? = .none, action: @escaping () -> Void, @ViewBuilder label: @escaping () -> L) {
        self.role = role
        self.action = action
        self.label = label
    }

    public var body: some View {
        Button(role: self.role) {
            self.action()
        } label: {
            self.label()
        }
    }
}
4. Build Simulator & Device
iOS 기기 시뮬레이터 선택 후 빌드(Command + B)

Any iOS Device 또는 실제 Device 선택 후 빌드(Command + B)

5. Find Build File
Product -> Show Build Folder in Finder

Binary File(.a file)과 Swift Module이 생성됐는지 확인한다.

App Scheme에 따라 Build Folder명이 Debug 또는 Release로 시작된다.

6. Copy Library File
테스트할 환경에 맞춰 lib 폴더에 라이브러리 복사

7. Import Library
lib 폴더를 project에 추가
 |
 |
|---|
7. Use Library
import SwiftUI
import StaticLibrary

struct ContentView: View {
    var body: some View {
        VStack{
            Text("Hello, world!")
            CustomButton{
                print("Custom Button in Library")
            } label: {
                Text("Static Library Button")
            }
        }
    }
}
8. App Build
Build or Run으로 확인한다.

9. Error
Library를 M1 CPU에서 만들었기 때문에 x86_64(Intel CPU)에서 빌드될 Simulator에 대한 정보가 없다는 오류
-> 실행가능한 오류

10. Improvement
- Simulator와 Device 동시에 사용가능한 Binary 파일을 만드는 것