SwiftUINavigation
About
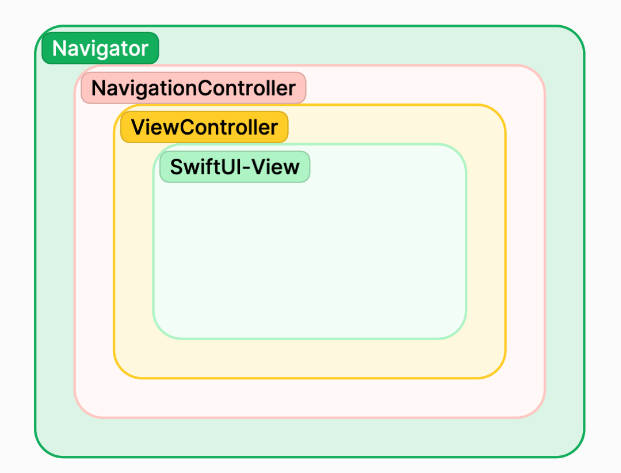
SwiftUINavigation provides UIKit-like navigation in SwiftUI. This can be easily integrated like:
NavigationController {
    MyCustomView()
}
Installation
1. Swift Package Manager:
In Xcode, select File > Add Packages….
Copy and paste the following into the search/input box.
https://github.com/bhimsenp/SwiftUINavigation.git
2. CocoaPods:
SlidingTabLayout is available through CocoaPods. To install
it, simply add the following line to your Podfile:
pod 'SwiftUINavigation'
Usage
Add navigation controller to your view:
import SwiftUI
import SwiftUINavigation

struct MyRootSwiftUIView: View {
    var body: some View {
        NavigationController {
            MyOtherView()
        }
    }
}
Push/Pop views:
You can push pop other views from the view which is wrapped in NavigationController
struct MyFirstView: View {
    @EnvironmentObject var stack: NavigationStack
    var body: some View {
        Button("Show other view") {
            stack.push(MySecondView())
        }
    }
}
.
.
.
struct MySecondView: View {
    @EnvironmentObject var stack: NavigationStack
    var body: some View {
        Button("Show previous view") {
            stack.pop(animated: false)
        }
    }
}
Other features
1. Replace current view (with/without animation):
stack.replace(MyOtherView())
2. Pop to root:
stack.popToRoot()
3. Hide/show navigation bar:
struct MyFirstView: View {
    @EnvironmentObject var stack: NavigationStack
    var body: some View {
        VStack {
            ....
        }
        .onAppear {
            stack.setNavigationBarHidden(true)
        }
    }
}
Author
Bhimsen Padalkar, [email protected]
License
SlidingTabLayout is available under the MIT license. See the LICENSE file for more info.