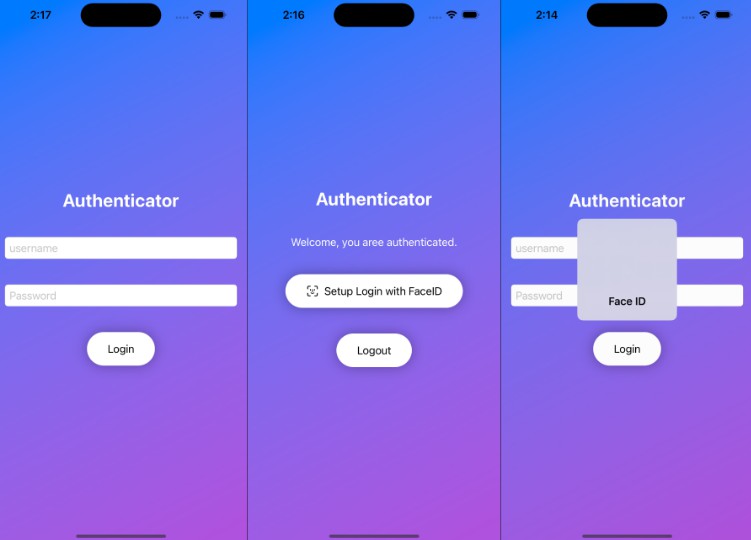
Authentication with FaceID and TouchID
The following demo shows how to use FaceID (or TouchID) to authenticate a user account on iOS 15/16.
There are five steps required to authenticate a user with FaceID:
- Import the
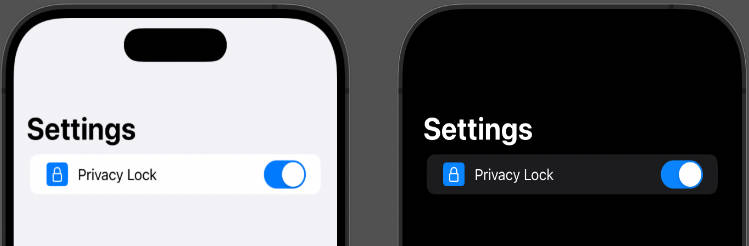
LocalAuthenticationframework into your code:import LocalAuthentication - Set the Privacy – Face ID Usage Description in your app’s Info.plist or the target’s Info settings
- Create a local authentication
contextinstance. This provides the interface between your app and device’s Secure Enclave:
// If you don't create a strong ref to LAContext() and reuse it you get weird runtime errors
private var context = LAContext()
- Use the local authentication context’s
canEvaluatePolicy(_:error:)method to check that you can actually use FaceID or TouchID. For example, the device might not support it, or the user may not have enabled it:
// Is Biometric security supported?
guard context.canEvaluatePolicy(LAPolicy.deviceOwnerAuthenticationWithBiometrics, error: nil) else {
	print("FaceID or TouchID not supported")
	result(.failure(.notSupported))
	return
}
- Call the call the local authentication context’s
evaluatePolicy(_:localizedReason:reply:)method to authenticate the user:
// Use FaceID/TouchID to authenticate the user
context.evaluatePolicy(LAPolicy.deviceOwnerAuthenticationWithBiometrics, localizedReason: "Authentication required") { success, error in
    guard success else {
		print("Error authenticating: \(error?.localizedDescription ?? "unknown error")")
        return
    }

	print("Successfully authenticated")
}
Here we encapsulate everything required in a BioSecurity class:
//
//  BioSecurity.swift
//
//  Created by Russell Archer on 03/08/2022.
//

import LocalAuthentication

enum BioAuthenticationError: Error {
    case notSupported, failed
}

class BioSecurity {
    private var context = LAContext()

    func isSupported() -> Bool {
        switch typeSupported() {
            case .faceID: return true
            case .touchID: return true
            default: return false
        }
    }

    func typeSupported() -> LABiometryType {
        // LAContext().biometryType is always none until you call canEvaluatePolicy(_:error:)
        guard context.canEvaluatePolicy(LAPolicy.deviceOwnerAuthenticationWithBiometrics, error: nil) else {
            return .none
        }

        return context.biometryType
    }

    func typeSupportedDescription() -> String {
        switch typeSupported() {
            case .faceID: return "FaceID"
            case .touchID: return "TouchID"
            default: return "None"
        }
    }

    func authenticate(result: @escaping (Result<String, BioAuthenticationError>) -> Void) {
        // Get a fresh context for each login. If you use the same context on multiple attempts
        // then a previously successful authentication causes the next policy evaluation to succeed
        // without testing biometry again
        context = LAContext()


        // Is Biometric security supported?
        guard context.canEvaluatePolicy(LAPolicy.deviceOwnerAuthenticationWithBiometrics, error: nil) else {
            print("Biometric security not supported")
            result(.failure(.notSupported))
            return
        }

        let bioType = typeSupportedDescription()

        // Use Biometry to authenticate the user
        context.evaluatePolicy(LAPolicy.deviceOwnerAuthenticationWithBiometrics, localizedReason: "Authentication required") { success, error in
	        // Note: Return all results on the main thread

            guard success else {
                Task { @MainActor in
                    print("Error authenticating: \(error?.localizedDescription ?? "unknown error")")
                    result(.failure(BioAuthenticationError.failed))
                }

                return
            }

            Task { @MainActor in
                result(.success(bioType))
            }
        }
    }
}
And a minimal SwiftUI view that uses our BioSecurity class looks as follows:
//
//  ContentView.swift
//
//  Created by Russell Archer on 03/08/2022.
//

import SwiftUI

struct ContentView: View {
    @State var isSupported = false
    @State var authenticated : Bool?
    var bioSec = BioSecurity()

    var body: some View {
        VStack {
            Button(action: {
                bioSec.authenticate() { result in
                    switch result {
                        case .failure(_): authenticated = false
                        case .success(_): authenticated = true
                    }
                }
            }, label: {
                Label("Authenticate", systemImage: "person.badge.key.fill")
            })
            .padding()
            .disabled(!isSupported)

            Text("Biometric authentication \(isSupported ? "" : "not") supported")
                .padding()
                .font(.footnote)

            if let auth = authenticated {
                Text(auth ? "Authenticated ?" : "Authentication failed ☹️")
                    .padding()
                    .font(.largeTitle)
                    .foregroundColor(auth ? .green : .red)
            }

            Spacer()
        }
        .task {
            isSupported = bioSec.isSupported()
        }
    }
}
The UI consists of just a single button that allows the user to authenticate (if it’s supported).