JonContextMenu
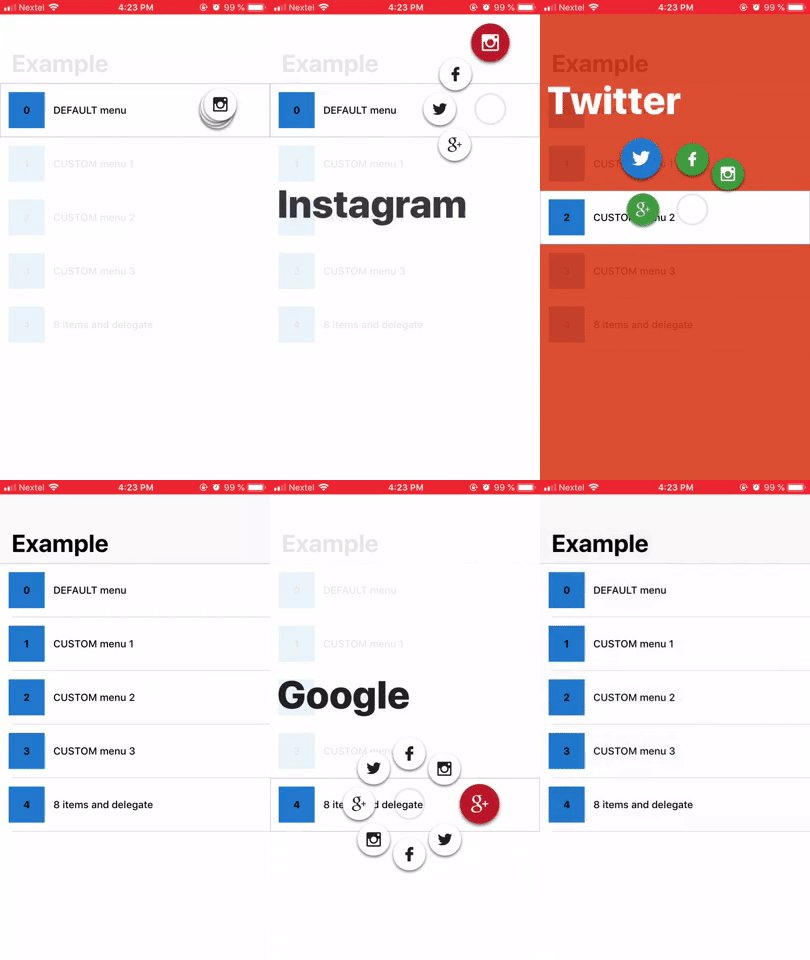
A beautiful and minimalist arc menu like the Pinterest one, written in Swift. Allows you to add up to 8 items and customize it to the way you like!
How to use
// First import the library to your class file.
import JonContextMenu

// Create an array of type "JonItem" for the items you desire to show.
// "JonItem" constructor takes an id to identify the object, a String to be the title of the item and
// an UIImage to be the icon of the item.
let items = [JonItem(id: 1, title: "Google"   , icon: UIImage(named:"google")),
             JonItem(id: 2, title: "Twitter"  , icon: UIImage(named:"twitter")),
             JonItem(id: 3, title: "Facebook" , icon: UIImage(named:"facebook")),
             JonItem(id: 4, title: "Instagram", icon: UIImage(named:"instagram"))]
The JonItem contructor has also a fourth optional parameter called "data". You can use it to add some object that you would like to have access later when selecting this item
JonItem(id: 1, title: "Google", icon: UIImage(named:"google", data: <<SOMEOBJECT>>)
// Then, create an instance of JonContextMenu setting your array to it.
let contextMenu = JonContextMenu().setItems(options).build()

// Finally, add the "contextMenu" to the view you wish.
<<YOURVIEW>>.addGestureRecognizer(contextMenu)
To show the menu, just long press the view you set the JonContextMenu.
Delegates
If you want to be notified when some interaction happens on the context menu, JonContextMenu has with 5 functions that you can implemement:
// Implement the JonContextMenuDelegate to your ViewController
class ViewController:JonContextMenuDelegate{

    func menuOpened(){
      // Called when the JonContextMenu opens
    }
    func menuClosed(){
      // Called when the JonContextMenu closes
    }
    func menuItemWasSelected(item:JonItem){
      // Called when the user selects one of the items
    }
    func menuItemWasActivated(item:JonItem){
      // Called when the user interacts with one of the items
    }
    func menuItemWasDeactivated(item:JonItem){
      // Called when the user stops interacting with one of the items
    }
}

// Then, when creating an instance of JonContextMenu, set the delegate.
let contextMenu = JonContextMenu()
                  .setItems(options)
                  .setDelegate(self)
                  .build()
Custom Configuration
The default visual configuration for JonContextMenu will probably be enough for you, but if you wish to make a few custom modification, the library has some functions that allow you to personalize it as you wish.
JonContextMenu()

// The number of items to be displayed, it can be up to 8 items.
.setItems(options)

// The delegate to notify when an item is selected.
.setDelegate(self)

// The background colour of the view. The default colour is white and the default alpha is 0.9
.setBackgroundColorTo(.white, withAlpha: 0.5)

// The idle colour of the items(when there is no interaction). The default colour is white
.setItemsDefaultColorTo(.black)

// The idle colour of the items' icon(when there is no interaction).  There is no deafault colour.
// If you don't set it, the icon will have no tint colour and will display the original image's colour
.setIconsDefaultColorTo(.white)

// The active colour of the items(when there is interaction). The default colour is darkRed
.setItemsActiveColorTo(.white)

// The active colour of the items' icon(when there is interaction). There is no deafault colour.
// If you don't set it, the icon will have no tint colour and will display the original image's colour
.setIconsActiveColorTo(.black)

// The colour of the title of the items. The default colour is darkGray
.setItemsTitleColorTo(.black)

// The size of the title of the items. The default size is 72
.setItemsTitleSizeTo(50)

// The colour of touch point circle. The default colour is darkGray
.setTouchPointColorTo(.black)
Installation
CocoaPods
To integrate JonContextMenu to your project using CocoaPods, specify it in your Podfile:
target '<Your Target Name>' do
    pod 'JonContextMenu', :git => 'https://github.com/jonSurrey/JonContextMenu.git', :branch => 'master'
end
Then, run the following command:
$ pod install
Manual installation
First download the "JonContextMenu" folder. Then, in Xcode, right-click on the root of your project node in the project navigator. Click "Add Files" to “YOURPROJECTNAME”. In the file chooser, navigate to where "JonContextMenu" folder is and select JonContextMenu.xcodeproj. Click "Add" to add JonContextMenu.xcodeproj as a sub-project.
Select the top level of your project node to open the project editor. Click the YOUR_PROJECT_NAME target, and then go to the General tab.
Scroll down to the Embedded Binaries section. Drag JonContextMenu.framework from the Products folder of JonContextMenu.xcodeproj onto this section.
Clean and rebuild your project, and you should be good to go!
