Bluejay
Bluejay is a simple Swift framework for building reliable Bluetooth LE apps.
Bluejay's primary goals are:
- Simplify talking to a single Bluetooth LE peripheral
- Make it easier to handle Bluetooth operations reliably
- Take advantage of Swift features and conventions
Features
- A callback-based API
- A FIFO operation queue for more synchronous and predictable behaviour
- A background task mode for batch operations that avoids the "callback pyramid of death"
- Simple protocols for data serialization and deserialization
- An easy and safe way to observe connection states
- Listen restoration
- Extended error handling
Requirements
- iOS 9.3 or above
- Xcode 8.2.1 or above
- Swift 3.2 or above
Installation
Install using CocoaPods:
pod 'Bluejay', '~> 0.6'
Or to try the latest master:
pod 'Bluejay', :git => 'https://github.com/steamclock/bluejay.git', :branch => 'master'
Cartfile:
github "steamclock/bluejay" ~> 0.6
Import using:
import Bluejay
Demo
The iOS Simulator does not simulate Bluetooth. You may not have a debuggable Bluetooth LE peripheral handy, so we recommend trying Bluejay using a BLE peripheral simulator such as the LightBlue Explorer App.
Bluejay has a demo app called BluejayDemo that works with LightBlue Explorer. To see it in action:
- Get two iOS devices – one to run a BLE peripheral simulator, and the other to run the Bluejay demo app.
- On one iOS device, go to the App Store and download LightBlue Explorer.
- Launch LightBlue Explorer, and tap on the Create Virtual Peripheral button located at the bottom of the peripheral list.
- To start, choose Heart Rate from the base profile list, and finish by tapping the Save button.
- Finally, build and run BluejayDemo on the other iOS device. Once it launches, choose Heart Rate Sensor in the menu, and you will be able to start interacting with the virtual heart rate peripheral.
Notes:
- You can turn the virtual peripheral on or off in LightBlue Explorer by tapping the blue circle to the left of the peripheral's name.
- If the virtual peripheral is not working as expected, you can try to reset it this way.
- The virtual peripheral may use your iPhone or iPad name, because the virtual peripheral is an extension of the host device.
- Some characteristics in the various virtual peripherals available in LightBlue Explorer might not have read of write permissions enabled by default, but you can change most of those settings.
- After selecting your virtual peripheral, tap on the characteristic you wish to modify, then tap on either the "Read" or "Write" property to customize their permissions.
- Characteristics belonging to the Device Information service, for example, are read only.
Usage
Initialization
Create an instance of Bluejay:
let bluejay = Bluejay()
While you may want to create one Bluejay instance and use it everywhere, you can also create instances in specific portions of your app and tear them down after use. It's worth noting, however, that each instance of Bluejay has its own CBCentralManager, which makes the multi-instance approach somewhat more complex.
Once you've created an instance, you can start the Core Bluetooth session. You can do this during initialization of your app or view controller, as appropriate. For example, in the demo app Bluejay is started inside viewDidLoad of the root view controller.
bluejay.start()
Bluejay needs to be started explicitly in order to support Core Bluetooth's State Restoration. State Restoration restores the Bluetooth stack and state when your app is restored from the background.
If you want to support Background Mode and State Restoration in your app, it will take some extra work, which is necessary for Bluetooth apps that do work in the background.
Bluejay also supports CoreBluetooth Migration for working with other Bluetooth libraries or your own.
Bluetooth Events
The ConnectionObserver protocol allows a class to monitor and to respond to major Bluetooth and connection-related events:
public protocol ConnectionObserver: class {
    func bluetoothAvailable(_ available: Bool)
    func connected(to peripheral: Peripheral)
    func disconnected(from peripheral: Peripheral)
}
You can register a ConnectionObserver when starting Bluejay:
bluejay.start(connectionObserver: self)
Or you can add additional observers later using:
bluejay.register(observer: batteryLabel)
Unregistering an observer is not necessary, because Bluejay only holds weak references to registered observers, and Bluejay will clear nil observers from its list when they are found at the next event. But if you need to do so before that happens, you can use:
bluejay.unregister(observer: rssiLabel)
Services and Characteristics
In Bluetooth parlance, a Service is a group of attributes, and a Characteristic is an attribute belonging to a group. For example, BLE peripherals that can detect heart rates typically have a Service named "Heart Rate" with a UUID of "180D". Inside that Service are Characteristics such as "Body Sensor Location" with a UUID of "2A38", as well as "Heart Rate Measurement" with a UUID of "2A37".
Many of these Services and Characteristics are standards specified by the Bluetooth SIG organization, and most hardware adopt their specifications. For example, most BLE peripherals implement the Service "Device Information" which has a UUID of "180A", which is where Characteristics such as firmware version, serial number, and other hardware details can be found. Of course, there are many BLE uses not covered by the Bluetooth Core Spec, and custom hardware often have their own unique Services and Characteristics.
Here is how you can specify Services and Characteristics for use in Bluejay:
let heartRateService = ServiceIdentifier(uuid: "180D")
let bodySensorLocation = CharacteristicIdentifier(uuid: "2A38", service: heartRateService)
let heartRate = CharacteristicIdentifier(uuid: "2A37", service: heartRateService)
Bluejay uses the ServiceIdentifier and CharacteristicIdentifier structs to avoid problems like accidentally specifying a Service when a Characteristic is expected.
Scanning
Bluejay has a powerful device scanning API that can be be used simply or customized to satisfy many use cases.
Basic Scanning
This simple call will just notify you when there is a new discovery, and when the scan has finished:
bluejay.scan(
    serviceIdentifiers: [heartRateService],
    discovery: { [weak self] (discovery, discoveries) -> ScanAction in
	guard let weakSelf = self else {
	    return .stop
	}

	weakSelf.peripherals = discoveries
	weakSelf.tableView.reloadData()

	return .continue
    },
    stopped: { (discoveries, error) in
	if let error = error {
	    debugPrint("Scan stopped with error: \(error.localizedDescription)")
	}
	else {
	    debugPrint("Scan stopped without error.")
	}
})
A scan result (ScanDiscovery, [ScanDiscovery]) contains the current discovery followed by an array of all the discoveries made so far.
The stopped result contains a final list of discoveries available just before stopping, and an error if there is one.
Scan Action
A ScanAction is returned at the end of a discovery callback to tell Bluejay whether to keep scanning or to stop.
public enum ScanAction {
    case `continue`
    case blacklist
    case stop
    case connect(ScanDiscovery, (ConnectionResult) -> Void)
}
Returning blacklist will ignore any future discovery of the same peripheral within the current scan session. This is only useful when allowDuplicates is set to true.
Returning connect will first stop the current scan, and have Bluejay make your connection request. This is useful if you want to connect right away when you've found the peripheral you're looking for. You can set up the ConnectionResult block outside the scan call to reduce callback nesting.
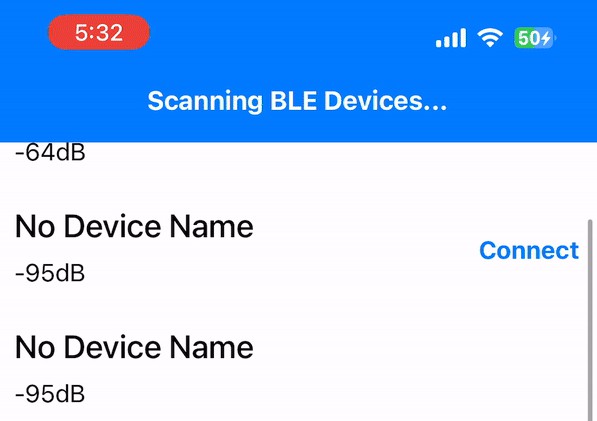
Monitoring
Another useful way to use the scanning API is to monitor the RSSI changes of nearby peripherals to estimate their proximity:
bluejay.scan(
    duration: 5,
    allowDuplicates: true,
    serviceIdentifiers: nil,
    discovery: { [weak self] (discovery, discoveries) -> ScanAction in
	guard let weakSelf = self else {
	    return .stop
	}

	weakSelf.peripherals = discoveries
	weakSelf.tableView.reloadData()

	return .continue
    },
    expired: { [weak self] (lostDiscovery, discoveries) -> ScanAction in
	guard let weakSelf = self else {
	    return .stop
	}

	debugPrint("Lost discovery: \(lostDiscovery)")

	weakSelf.peripherals = discoveries
	weakSelf.tableView.reloadData()

	return .continue
}) { (discoveries, error) in
    if let error = error {
	debugPrint("Scan stopped with error: \(error.localizedDescription)")
    }
    else {
	debugPrint("Scan stopped without error.")
    }
}
Key parameters here are allowDuplicates and expired.
Setting allowDuplicates to true will stop coalescing multiple discoveries of the same peripheral into one single discovery callback. Instead, you'll get a discovery call every time a peripheral's advertising packet is picked up. This will consume more battery, and does not work in the background.
The expired callback is only invoked when allowDuplicates is true. This is called when Bluejay estimates that a previously discovered peripheral is likely out of range or no longer broadcasting. Essentially, when allowDuplicates is set to true, every time a peripheral is discovered a long timer associated with that peripheral starts counting down. If that peripheral is within range, and even if it has a slow broadcasting interval, it is likely that peripheral will be picked up by Core Bluetooth again and cause the timer to refresh. If not, it may be gone. Be aware that this is an estimation.
Warning: Setting serviceIdentifiers to nil will result in picking up all available Bluetooth peripherals in the vicinity, but is not recommended by Apple. It may cause battery and cpu issues on prolonged scanning, and it also doesn't work in the background. It is not a private API call, but an available option for situations where you need a quick solution, such as when experimenting or testing. Specifying at least one specific service identifier is the most common way to scan for Bluetooth devices in iOS. If you need to scan for all Bluetooth devices, we recommend making use of the duration parameter to stop the scan after 5 ~ 10 seconds to avoid scanning indefinitely and overloading the hardware.
Connecting
It is important to keep in mind that Bluejay is designed to work with a single BLE peripheral. Multiple connections at once is not currently supported, and a connection request will fail if Bluejay is already connected or is still connecting. Although this can be a limitation for some sophisticated apps, it is more commonly a safeguard to ensure your app does not issue connections unnecessarily or erroneously.
bluejay.connect(peripheralIdentifier) { [weak self] (result) in
    switch result {
    case .success(let peripheral):
	debugPrint("Connection to \(peripheral.identifier) successful.")

	guard let weakSelf = self else {
	    return
	}

	weakSelf.performSegue(withIdentifier: "showHeartSensor", sender: self)
    case .cancelled:
	debugPrint("Connection to \(peripheral.identifier) cancelled.")
    case .failure(let error):
	debugPrint("Connection to \(peripheral.identifier) failed with error: \(error.localizedDescription)")
    }
}
Disconnect
To disconnect:
bluejay.disconnect()
Rarely, a disconnect request can fail or get cancelled, so it is generally a good idea to make use of the completion block to provide error handling.
bluejay.disconnect { (result) in
    switch result {
    case .success(let peripheral):
	debugPrint("Disconnection from \(peripheral.identifier) successful.")
    case .cancelled:
	debugPrint("Disconnection from \(peripheralIdentifier.uuid.uuidString) cancelled.")
    case .failure(let error):
	debugPrint("Disconnection from \(peripheralIdentifier.uuid.uuidString) failed with error: \(error.localizedDescription)")
    }
}
Timeouts
You can also specify a timeout for a connection request, default is no timeout:
bluejay.connect(peripheralIdentifier, timeout: .seconds(15)) { ... }

public enum Timeout {
    case seconds(TimeInterval)
    case none
}
Connection States
Your Bluejay instance has these properties to help you make connection-related decisions:
isBluetoothAvailableisConnectingisConnectedisDisconnectingshouldAutoReconnectisScanning
Auto Reconnect
By default, shouldAutoReconnect is true and Bluejay will always try to automatically reconnect after an unexpected disconnection.
Bluejay will only set shouldAutoReconnect to false under these circumstances:
- If you manually call
disconnectand the disconnection is successful. - If you manually call
cancelEverythingand set the parameterautoReconnecttofalse.
Bluejay will also always reset shouldAutoReconnect to true on a successful connection to a peripheral, as we usually want to reconnect to the same device as soon as possible if a connection is lost unexpectedly during normal usage.
However, there are some cases where auto reconnect is not desired. Keeping the above default behaviors in mind, you can manually set the shouldAutoReconnect variable to control when and whether Bluejay should automatically attempt to reconnect.
Deserialization and Serialization
Reading, writing, and listening to Characteristics is straightforward in Bluejay. Most of the work involved is building out the deserialization and serialization of data. Let's have a quick look at how Bluejay helps standardize this process in your app via the Receivable and Sendable protocols.
Receivable
The models that represent data you wish to read and receive from your peripheral should all conform to the Receivable protocol.
Here is a partial example for the Heart Rate Measurement Characteristic:
struct HeartRateMeasurement: Receivable {

    private var flags: UInt8 = 0
    private var measurement8bits: UInt8 = 0
    private var measurement16bits: UInt16 = 0
    private var energyExpended: UInt16 = 0
    private var rrInterval: UInt16 = 0

    private var isMeasurementIn8bits = true

    var measurement: Int {
        return isMeasurementIn8bits ? Int(measurement8bits) : Int(measurement16bits)
    }

    init(bluetoothData: Data) throws {
        flags = try bluetoothData.extract(start: 0, length: 1)

        isMeasurementIn8bits = (flags & 0b00000001) == 0b00000000

        if isMeasurementIn8bits {
            measurement8bits = try bluetoothData.extract(start: 1, length: 1)
        }
        else {
            measurement16bits = try bluetoothData.extract(start: 1, length: 2)
        }
    }

}
Note how you can use the extract function that Bluejay adds to Data to easily parse the bytes you need. We have plans to build more protection and error handling for this in the future.
Finally, while it is not essential and it will depend on the context, we suggest only exposing the needed and computed properties of your models.
Sendable
The models representing data you wish to send to your peripheral should all conform to the Sendable protocol.
In a nutshell, this is how you help Bluejay determine how to convert your models into Data:
struct WriteRequest: Sendable {

    var handle: UInt16
    var data: Sendable

    init(handle: UInt16, data: Sendable) {
        self.handle = handle
        self.data = data
    }

    func toBluetoothData() -> Data {
        let startByte = UInt8(0x3A)
        let payloadLength = UInt8(3 + (data.toBluetoothData().count))
        let command = UInt8(0x02)
        let handleInBigEndian = handle.bigEndian

        // The crc16CCITT function is a custom extension not available in either NSData nor Bluejay. It is included here just for demonstration purposes.
        let crc = (Bluejay.combine(sendables: [command, handleInBigEndian, data]) as NSData).crc16CCITT

        let request = Bluejay.combine(sendables: [
            startByte,
            payloadLength,
            command,
            handleInBigEndian,
            data,
            crc.bigEndian
            ])

        return request
    }

}
Note how we have a nested Sendable in this slightly more complicated model, as well as making use of the combine helper function to group and to arrange the data bytes in a particular order.
Sending and Receiving Primitives
In some cases, you may want to send or receive data that is simple enough that creating a custom struct that implements Sendable or Receivable to hold it is unnecessarily complicated. For those cases, Bluejay also retroactively conforms several built-in Swift types to Sendable and Receivable. Int8, Int16, Int32, Int64, UInt8, UInt16, UInt32, UInt64, Data and Stringare all conformed to both protocols and so can be sent or received directly.
Int and UInt are intentionally not conformed. Values are sent and/or received at a specific bit width. The intended bit width for an Int is ambiguous, and trying to use one often indicates a programmer error, in the form of not considering the bit width the Bluetooth device is expecting on a characteristic.
String is sent and/or received UTF8 encoded.
Interactions
Once you have your data modelled using either the Receivable or Sendable protocol, the read, write, and listen APIs in Bluejay should handle the deserialization and serialization seamlessly for you. All you need to do is to specify the type for the generic result wrappers: ReadResult<T> or WriteResult<T>.
Reading
Here is an example showing how to read the sensor body location characteristic, and converting its value to its corresponding label.
let heartRateService = ServiceIdentifier(uuid: "180D")
let sensorLocation = CharacteristicIdentifier(uuid: "2A38", service: heartRateService)

bluejay.read(from: sensorLocation) { [weak self] (result: ReadResult<UInt8>) in
    guard let weakSelf = self else {
	return
    }

    switch result {
    case .success(let location):
	debugPrint("Read from sensor location is successful: \(location)")

	var locationString = "Unknown"

	switch location {
	case 0:
	    locationString = "Other"
	case 1:
	    locationString = "Chest"
	case 2:
	    locationString = "Wrist"
	case 3:
	    locationString = "Finger"
	case 4:
	    locationString = "Hand"
	case 5:
	    locationString = "Ear Lobe"
	case 6:
	    locationString = "Foot"
	default:
	    locationString = "Unknown"
	}

	weakSelf.sensorLocationCell.detailTextLabel?.text = locationString
	weakSelf.sensorLocation = location
    case .cancelled:
	debugPrint("Cancelled read from sensor location.")
    case .failure(let error):
	debugPrint("Failed to read from sensor location with error: \(error.localizedDescription)")
    }
}
Writing
Note that LightBlue Explorer's virtual heart sensor does not have write enabled for its sensor body location characteristic. See Demo to find out how to enable it. However, if write is not allowed, the error object in the failure block will inform you.
bluejay.write(to: sensorLocation, value: UInt8(indexPath.row), completion: { [weak self] (result) in
    guard let weakSelf = self else {
	return
    }

    switch result {
    case .success:
	debugPrint("Write to sensor location is successful.")

	if let selectedCell = weakSelf.selectedCell {
	    selectedCell.accessoryType = .none
	}
	cell.accessoryType = .checkmark

	weakSelf.navigationController?.popViewController(animated: true)
    case .cancelled:
	debugPrint("Cancelled write to sensor location.")
    case .failure(let error):
	debugPrint("Failed to write to sensor location with error: \(error.localizedDescription)")
    }
})