PermissionsSwiftUI
A SwiftUI package to beautifully display and handle permissions.
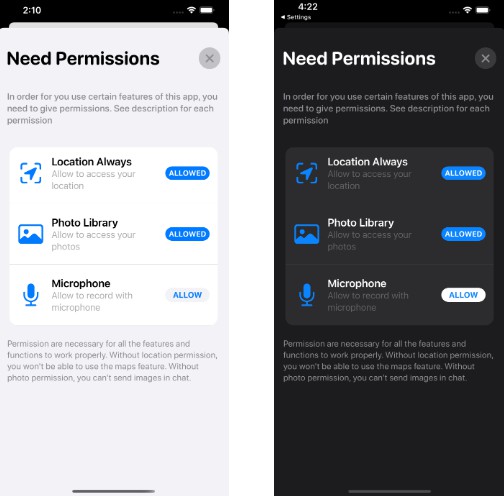
PermissionsSwiftUI displays and handles permissions in SwiftUI. The UI/UX is highly customizable and resembles an Apple style. If you like the project, don't forget to put star ★ and follow me on GitHub.
Installation
Requirements
- iOS 13 or iPadOS 13
- Xcode 12 and Swift 5.3
- No tvOS, MacOS, and WatchOS support for now
Install
You can install PermissionsSwiftUI into your Xcode project via Swift Package Manager. To learn more about Swift Package Manager, click here
- In Xcode, open your project and navigate to File → Swift Packages → Add Package Dependency...
- Paste the repository URL (
https://github.com/jevonmao/PermissionsSwiftUI) and click Next. - For Version, select Up to next major.
- Click Next and click Finish.
- You are all set, have fun using PermissionsSwiftUI!
Quickstart
Before you start, please
star ★this repository. Your star is my biggest motivation to pull all-nighters and maintain this open source project.
To use PermissionsSwiftUI, simply add the JMPermission modifier to any view.
Pass in a Binding<Bool> to show the modal view, and add whatever permissions you want to show.
   struct ContentView: View {
       @State var showModal = false

       var body: some View {
           Button(action: {
               showModal=true
           }, label: {
               Text("Ask user for permissions")
           })
           .JMPermissions(showModal: $showModal, for: [.locationAlways, .photo, .microphone])
       }
   }
Usage
Customize permission texts
? Be aware. Features ahead will wow you - the customization is so advanced, yet so simple. Have fun!
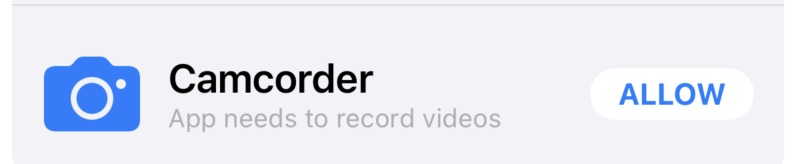
To customize permission texts, use the modifier with syntax customize"permission name"PermissionWith. Ex. customizeCameraPermissionWith is for camera, and customizeLocationPermissionWith is for location.
You can change title and description:
.JMPermissions(showModal: $showModal, for: [.camera])
.customizeCameraPermissionWith(title: "Camcorder", description: "App needs to record videos")
and the result:
Or only change 1 of title and description:
.customizeCameraPermissionWith(title: "Camcorder")
the parameters you don't provide will show the default text
.customizeCameraPermissionWith(description: "App needs to record videos")
You can use custom text for all the supported permissions, with a single line of code.
Customize header texts
To customize the header title, use the modifier changeHeaderTo:
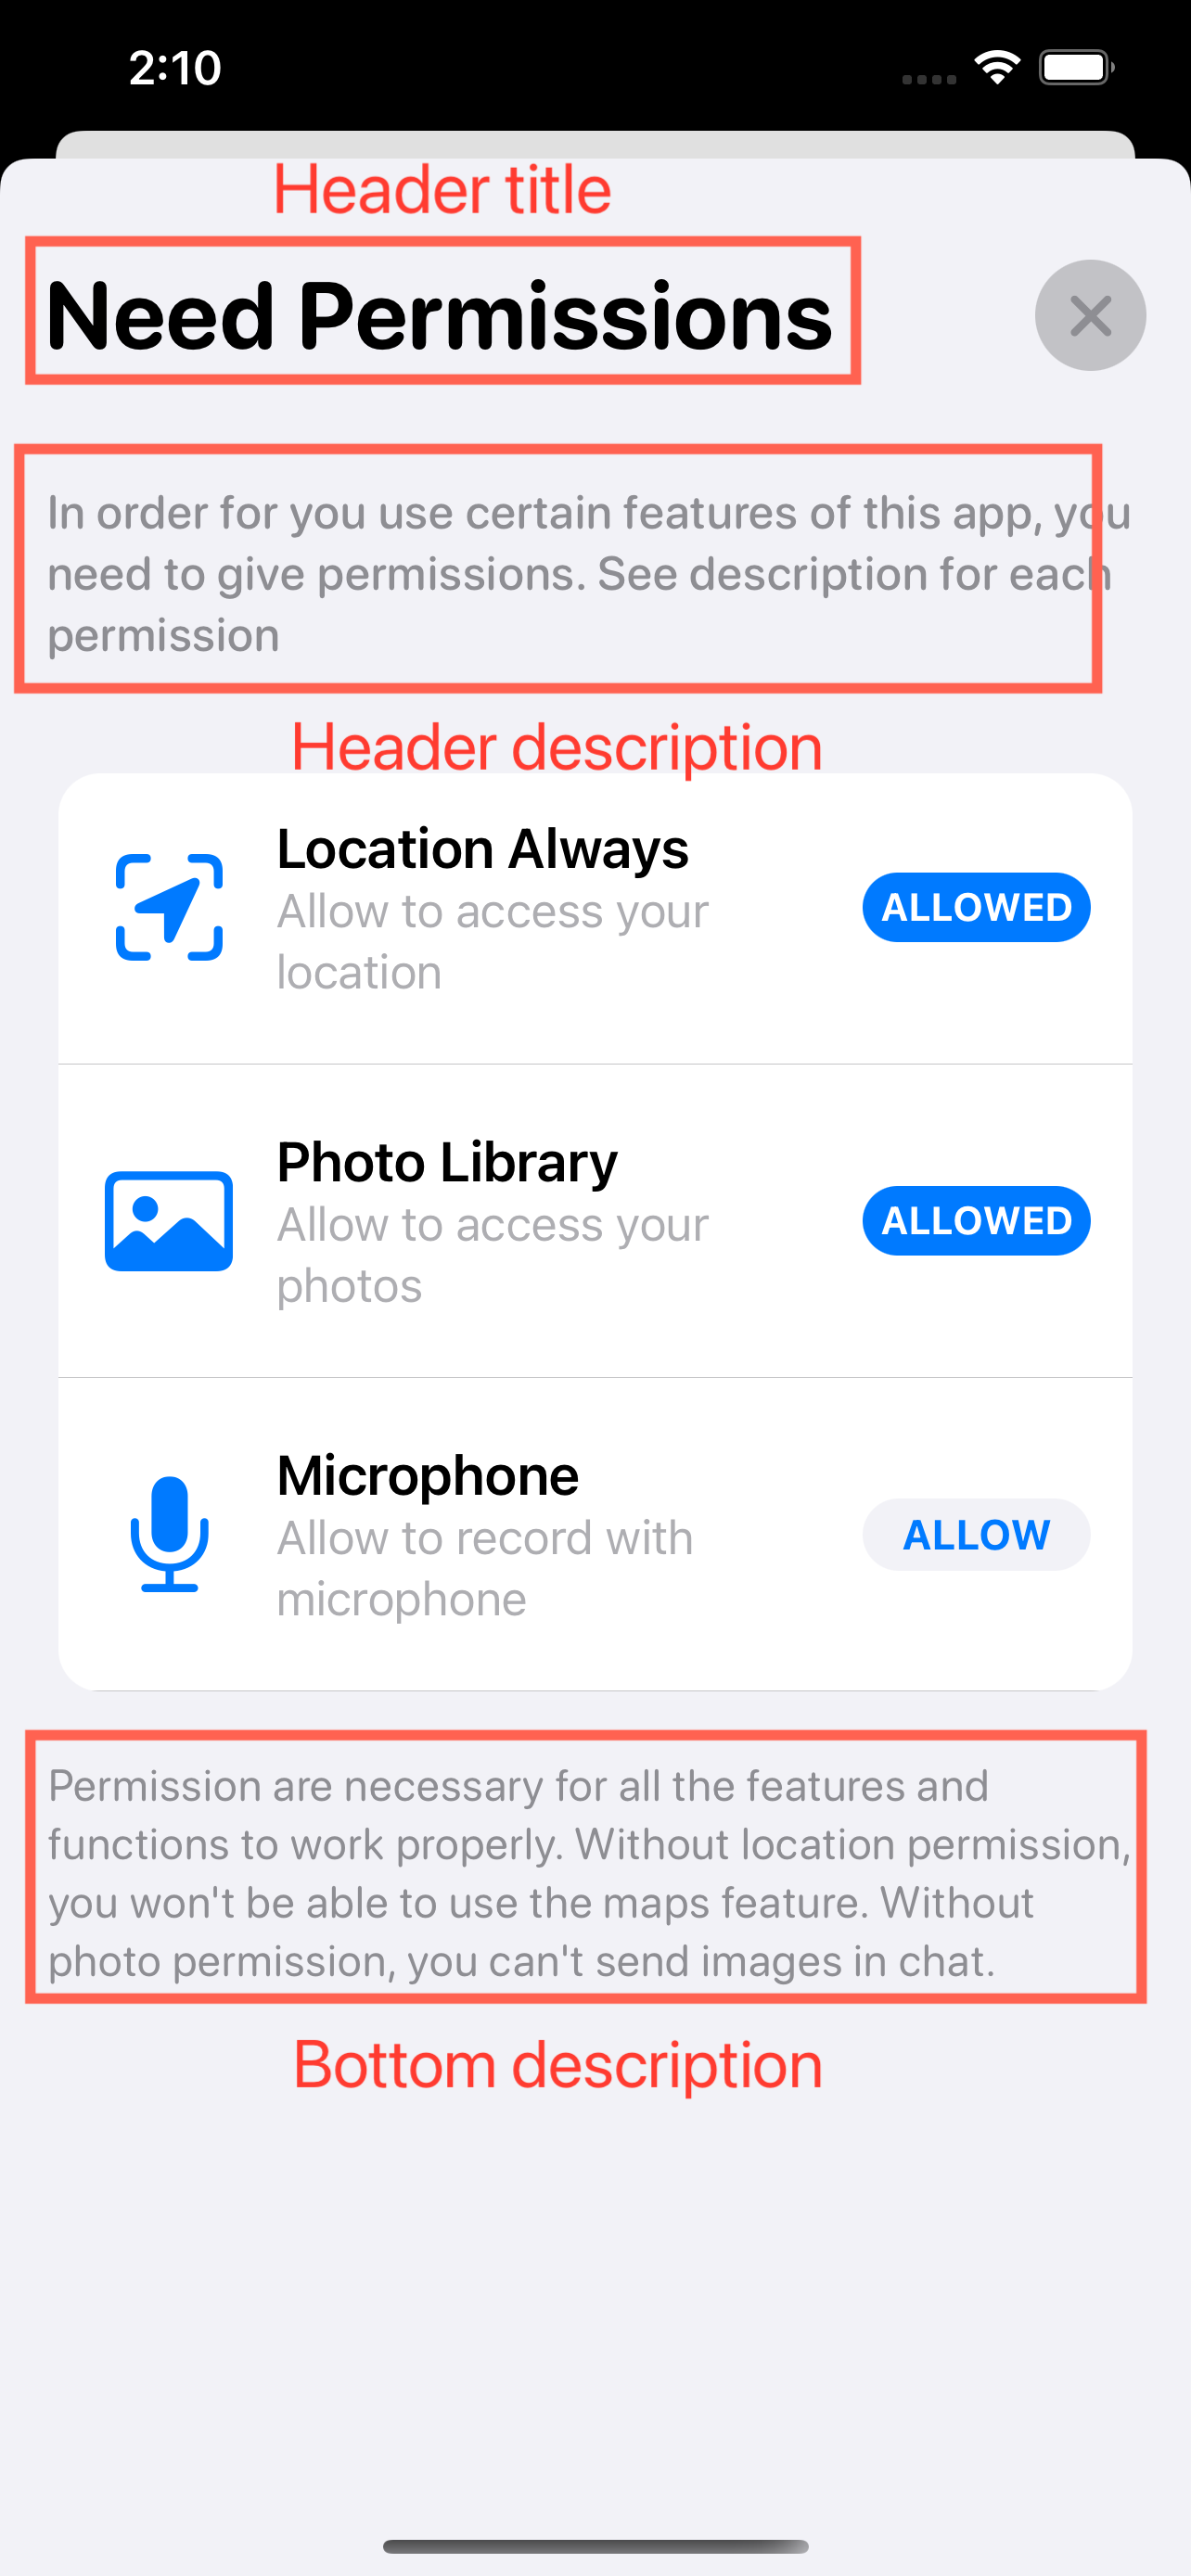
.JMPermissions(showModal: $showModal, for: [.camera, .location, .calendar])
.changeHeaderTo("App Permissions")
To customize the header description, use the modifier changeHeaderDescriptionTo:
.JMPermissions(showModal: $showModal, for: [.camera, .location, .photo])
.changeHeaderDescriptionTo("Instagram need certain permissions in order for all the features to work.")
To customize the bottom description, use the modifier changeBottomDescriptionTo:
.JMPermissions(showModal: $showModal, for: [.camera, .location, .photo])
.changeBottomDescriptionTo("If not allowed, you have to enable permissions in settings")
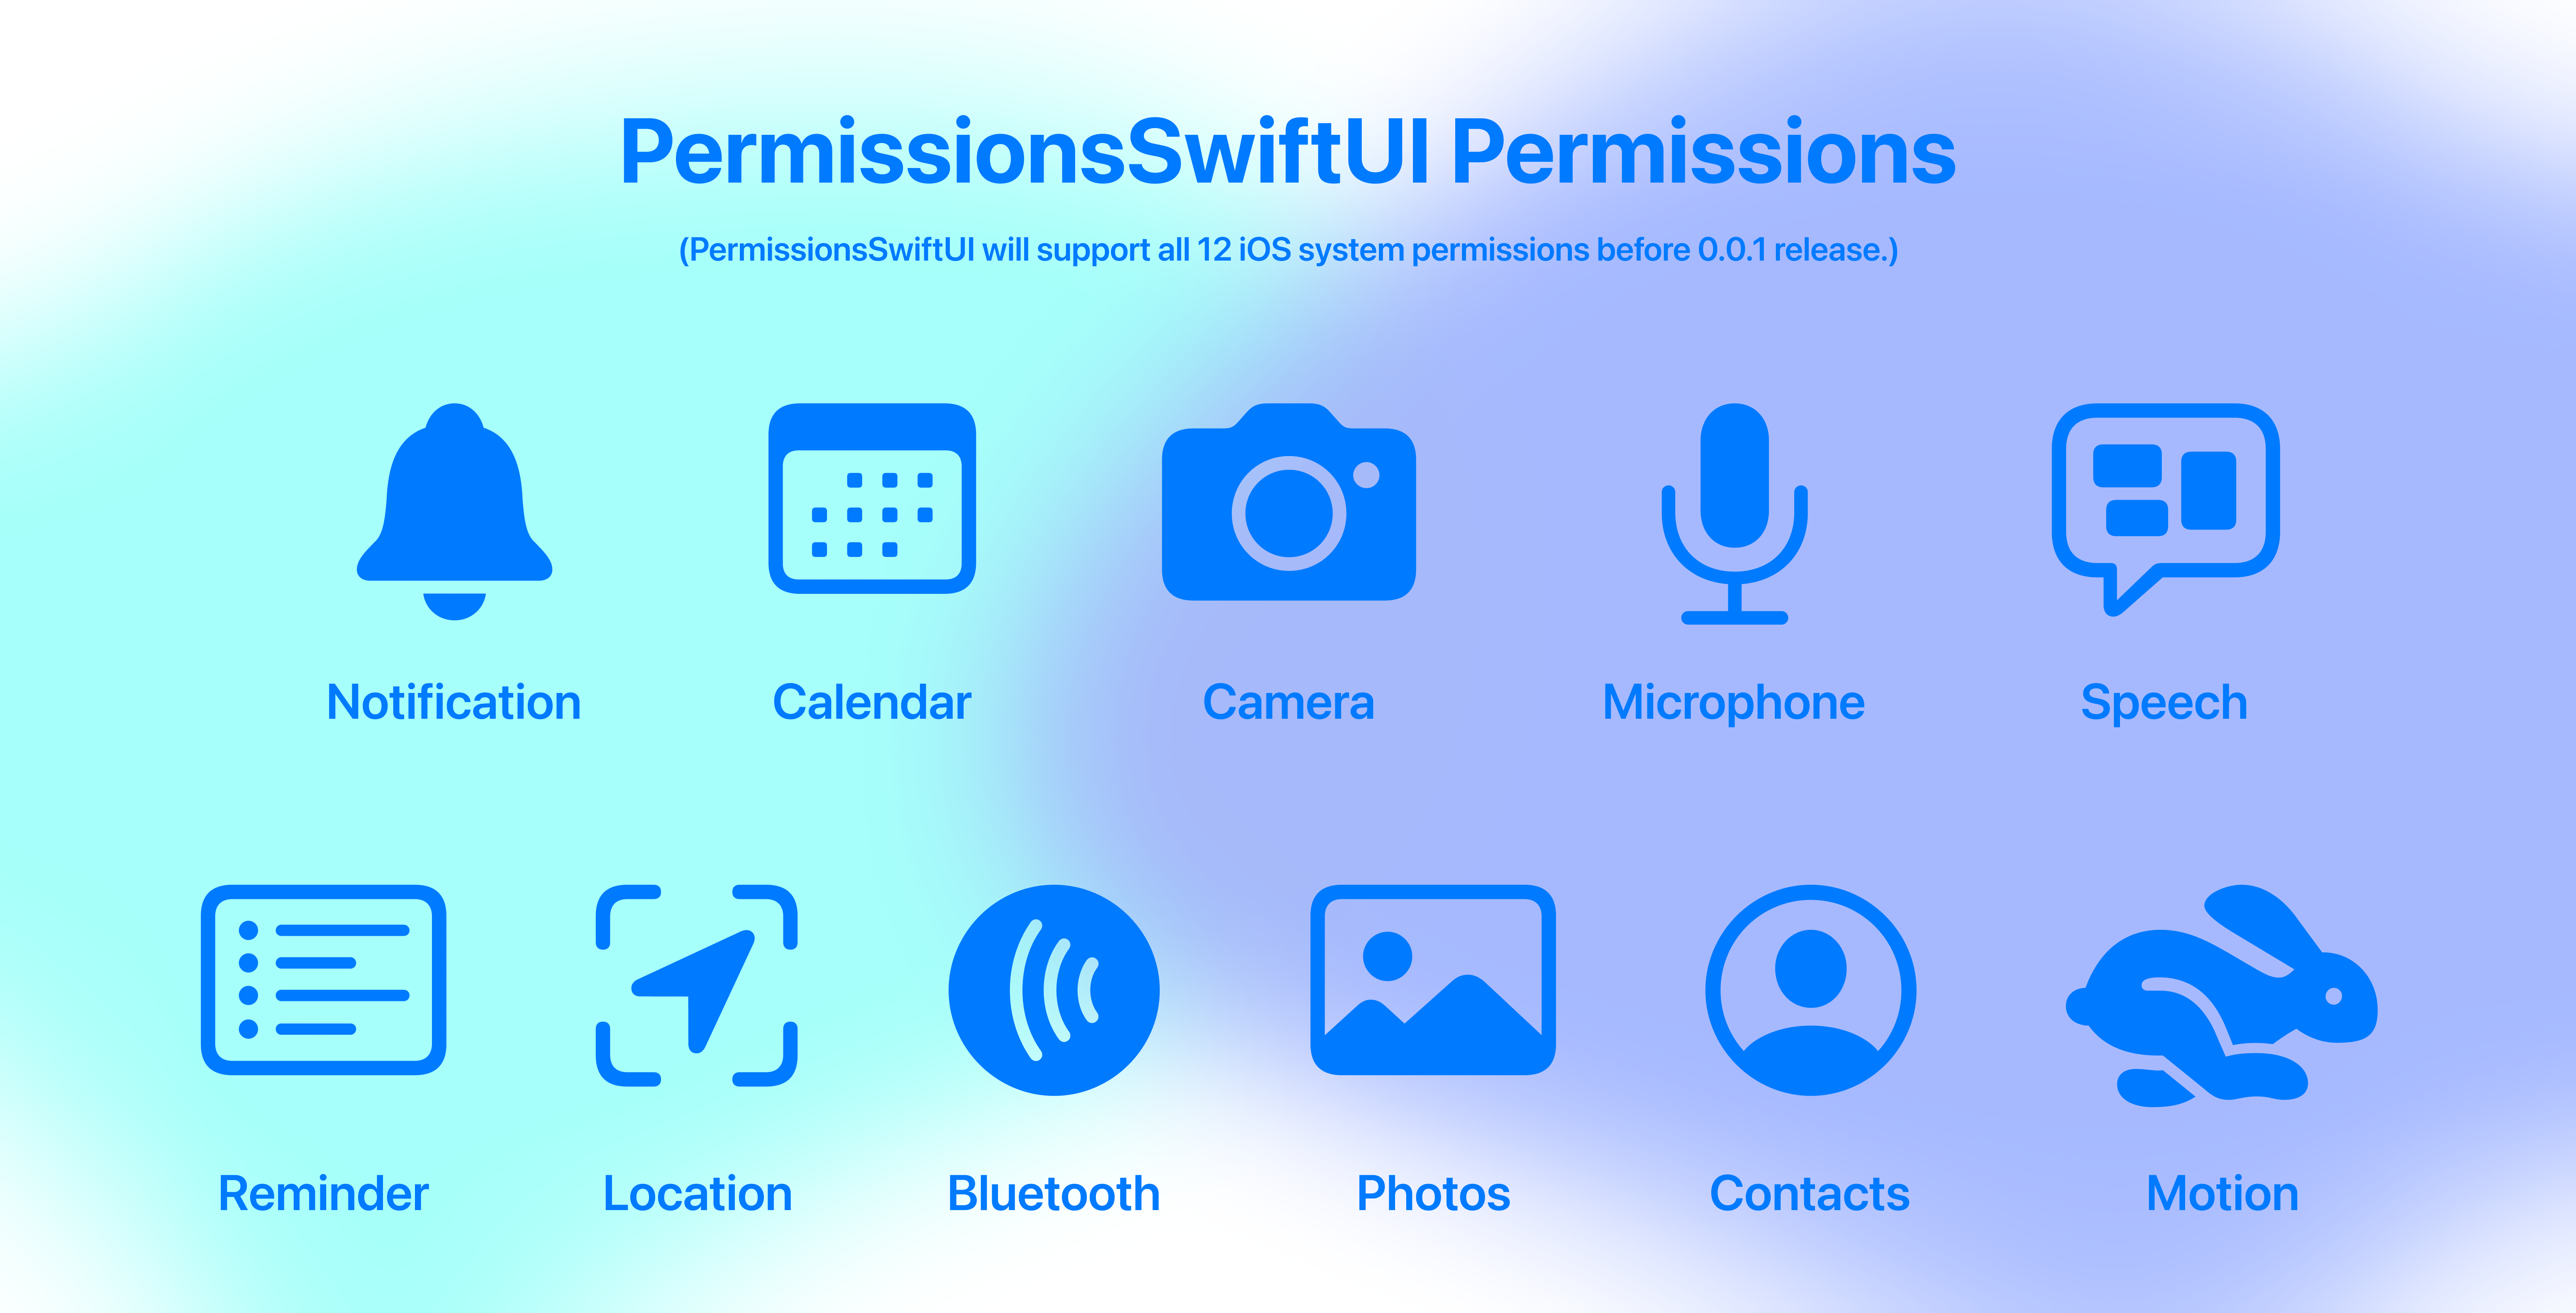
Additional Information
Here is a list of all permissions PermissionsSwiftUI already supports/will support. By the 0.0.1 beta release, PermissionsSwiftUI will have all 12 iOS system permissions built in. Yup, even the newest tracking permission for iOS 14 so you can stay on top of your game. All permissions in PermissionsSwiftUI come with a default name, description, and a stunning Apple native SF Symbols icon. Stay tuned!