Alerts & Pickers
Advanced usage of UIAlertController and pickers based on it: Telegram, Contacts, Location, PhotoLibrary, Country, Phone Code, Currency, Date.
Advanced usage of native UIAlertController with TextField, TextView, DatePicker, PickerView, TableView, CollectionView and MapView.
Features
- [x] Custom pickers based on UITextField, UITextView, UIDatePicker, UIPickerView, UITableView, UICollectionView and MKMapView.
- [x] Example using a Storyboard.
- [x] Easy contentViewController placement.
- [x] Attributed title label and message label.
- [x] Button customization: image and title color.
- [x] Understandable action button placement.
- [x] Easy presentation.
- [x] Pure Swift 4.
Usage
- New Alert
let alert = UIAlertController(style: .alert, title: "Title", message: "Message")
// or
let alert = UIAlertController(style: .alert)
- Set and styling title
alert.set(title: "Title", font: .systemFont(ofSize: 20), color: .black)
// or
alert.setTitle(font: .systemFont(ofSize: 20), color: .black)
- Set and styling message
alert.set(message: "Message", font: .systemFont(ofSize: 16), color: .black)
// or
alert.setMessage(font: .systemFont(ofSize: 16), color: .black)
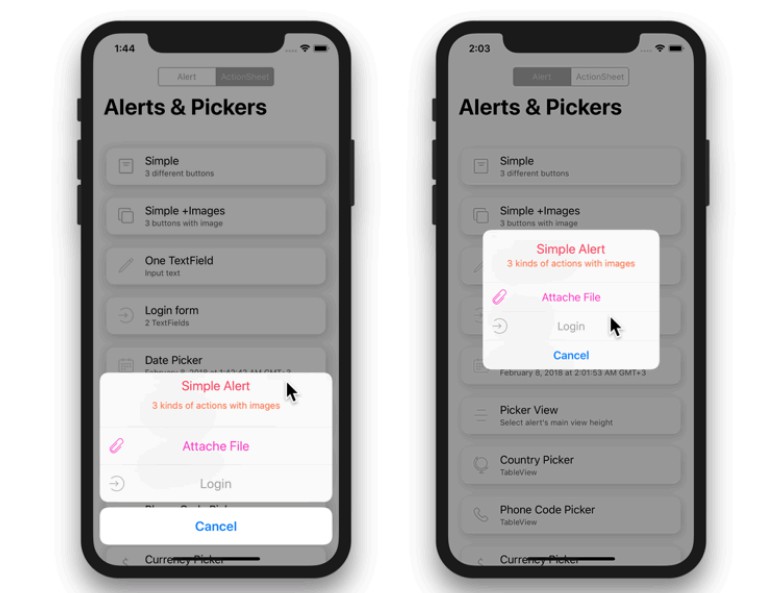
- Add button with image
alert.addAction(image: image, title: "Title", color: .black, style: .default) { action in
    // completion handler
}
- Show Alert
// show alert
alert.show()

// or show alert with options
alert.show(animated: true, vibrate: true) {
    // completion handler
}
Set Content ViewController
When setting your own custom UIViewController into UIAlertController keep in mind to set prefferedContentSize.height of the controller otherwise it will no effect. You can not set prefferedContentSize.width.
let alert = UIAlertController(style: .alert, title: "Title")
let vc = CustomViewController()
vc.preferredContentSize.height = height
alert.setValue(vc, forKey: "contentViewController")
alert.show()

// or
let alert = UIAlertController(style: .alert, title: "Title")
let vc = CustomViewController()
alert.set(vc: vc, height: height)
alert.show()
Pickers
For UX better to use .actionSheet style in UIAlertController when set picker into contentViewController. If you like you can use .alert style as well, buy .actionSheet style is wider and User can see more as well as action button is placing at bottom that also more convenience for User to touch it.
UITextField
In native UIAlertController you can only add UITextField to .alert style with default style and you can not change such properties as .borderColor, .borderWidth, .frame.size and so on. But if you make your own UIViewController with UITextField, it will solve all these problems.
One TextField Picker
You can use both styles .alert and .actionSheet of UIAlertController.
let alert = UIAlertController(style: self.alertStyle, title: "TextField")
let config: TextField.Config = { textField in
    textField.becomeFirstResponder()
    textField.textColor = .black
    textField.placeholder = "Type something"
    textField.left(image: image, color: .black)
    textField.leftViewPadding = 12
    textField.borderWidth = 1
    textField.cornerRadius = 8
    textField.borderColor = UIColor.lightGray.withAlphaComponent(0.5)
    textField.backgroundColor = nil
    textField.keyboardAppearance = .default
    textField.keyboardType = .default
    textField.isSecureTextEntry = true
    textField.returnKeyType = .done
    textField.action { textField in
        // validation and so on
    }
}
alert.addOneTextField(configuration: config)
alert.addAction(title: "OK", style: .cancel)
alert.show()
Two TextFields Picker
You can use both styles .alert and .actionSheet of UIAlertController.
let alert = UIAlertController(style: .alert, title: "Login")

let configOne: TextField.Config = { textField in
    textField.left(image: user), color: .black)
    textField.leftViewPadding = 16
    textField.leftTextPadding = 12
    textField.becomeFirstResponder()
    textField.backgroundColor = nil
    textField.textColor = .black
    textField.placeholder = "Name"
    textField.clearButtonMode = .whileEditing
    textField.keyboardAppearance = .default
    textField.keyboardType = .default
    textField.returnKeyType = .done
    textField.action { textField in
        // action with input
    }
}

let configTwo: TextField.Config = { textField in
    textField.textColor = .black
    textField.placeholder = "Password"
    textField.left(image: lock, color: .black)
    textField.leftViewPadding = 16
    textField.leftTextPadding = 12
    textField.borderWidth = 1
    textField.borderColor = UIColor.lightGray.withAlphaComponent(0.5)
    textField.backgroundColor = nil
    textField.clearsOnBeginEditing = true
    textField.keyboardAppearance = .default
    textField.keyboardType = .default
    textField.isSecureTextEntry = true
    textField.returnKeyType = .done
    textField.action { textField in
        // action with input
    }
}
// vInset - is top and bottom margin of two textFields
alert.addTwoTextFields(vInset: 12, textFieldOne: configOne, textFieldTwo: configTwo)
alert.addAction(title: "OK", style: .cancel)
alert.show()
DatePicker
UIDatePicker does not look very much in .alert style.
let alert = UIAlertController(style: .actionSheet, title: "Select date")
alert.addDatePicker(mode: .dateAndTime, date: date, minimumDate: minDate, maximumDate: maxDate) { date in
    // action with selected date
}
alert.addAction(title: "OK", style: .cancel)
alert.show()
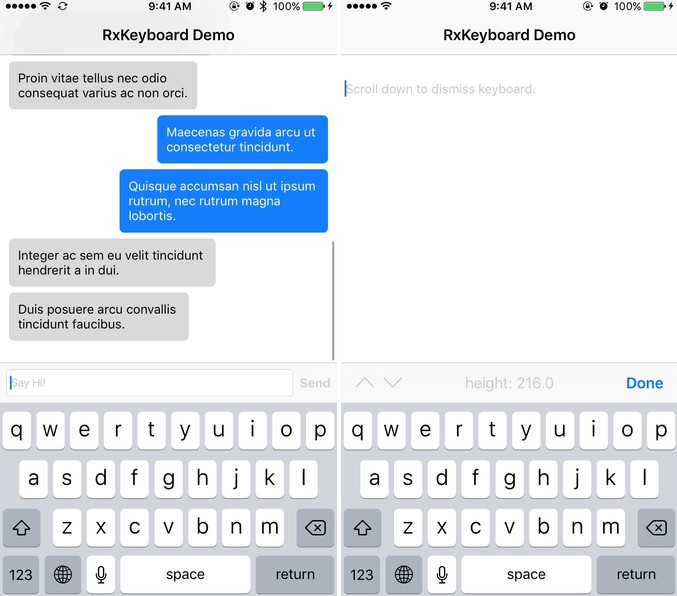
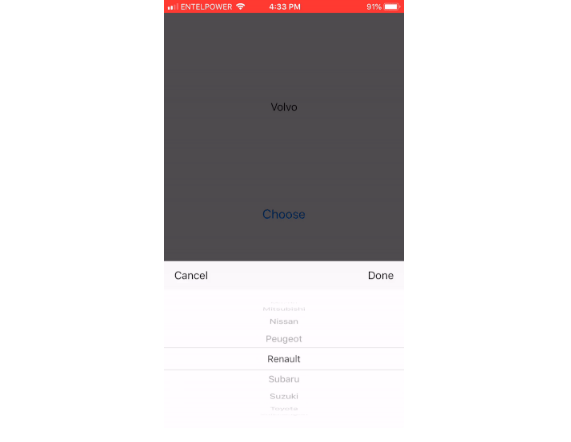
PickerView
Example how to use UIPickerView as contentViewController and change height of the UIAlertController.


let alert = UIAlertController(style: .actionSheet, title: "Picker View", message: "Preferred Content Height")

let frameSizes: [CGFloat] = (150...400).map { CGFloat($0) }
let pickerViewValues: [[String]] = [frameSizes.map { Int($0).description }]
let pickerViewSelectedValue: PickerViewViewController.Index = (column: 0, row: frameSizes.index(of: 216) ?? 0)

alert.addPickerView(values: pickerViewValues, initialSelection: pickerViewSelectedValue) { vc, picker, index, values in
    DispatchQueue.main.async {
        UIView.animate(withDuration: 1) {
            vc.preferredContentSize.height = frameSizes[index.row]
        }
    }
}
alert.addAction(title: "Done", style: .cancel)
alert.show()
Locale Pickers
-
Country Picker
let alert = UIAlertController(style: .actionSheet, message: "Select Country")
alert.addLocalePicker(type: .country) { info in
    // action with selected object
}
alert.addAction(title: "OK", style: .cancel)
alert.show()
-
Phone Code Picker
let alert = UIAlertController(style: .actionSheet, title: "Phone Codes")
alert.addLocalePicker(type: .phoneCode) { info in
    // action with selected object
}
alert.addAction(title: "OK", style: .cancel)
alert.show()
-
Currency Picker
let alert = UIAlertController(style: .actionSheet, title: "Currencies")
alert.addLocalePicker(type: .currency) { info in
    alert.title = info?.currencyCode
    alert.message = "is selected"
    // action with selected object
}
alert.addAction(title: "OK", style: .cancel)
alert.show()
Image Picker
- Horizontal Image Picker with paging and single selection:
let alert = UIAlertController(style: .actionSheet)
let photos: [UIImage] = images
alert.addImagePicker(
    flow: .horizontal,
    paging: true,
    images: photos,
    selection: .single(action: { [unowned self] image in
        // action with selected image
    }))
alert.addAction(title: "OK", style: .cancel)
alert.show()
- Vertical Image Picker w/o paging and with multiple selection:
let alert = UIAlertController(style: .actionSheet)
let photos: [UIImage] = images
alert.addImagePicker(
    flow: .vertical,
    paging: false,
    height: UIScreen.main.bounds.height,
    images: photos,
    selection: .multiple(action: { [unowned self] images in
        // action with selected images
    }))
alert.addAction(title: "OK", style: .cancel)
alert.show()
PhotoLibrary Picker
let alert = UIAlertController(style: .actionSheet)
alert.addPhotoLibraryPicker(
    flow: .horizontal,
    paging: true,
    selection: .single(action: { image in
        // action with selected image
    }))
alert.addAction(title: "Cancel", style: .cancel)
alert.show()
ColorPicker
Example how to use UIViewController instantiated from Storyboard with Autolayout as contentViewController in the UIAlertController.
let alert = UIAlertController(style: .actionSheet)
alert.addColorPicker(color: color) { color in
    // action with selected color
}
alert.addAction(title: "Done", style: .cancel)
alert.show()
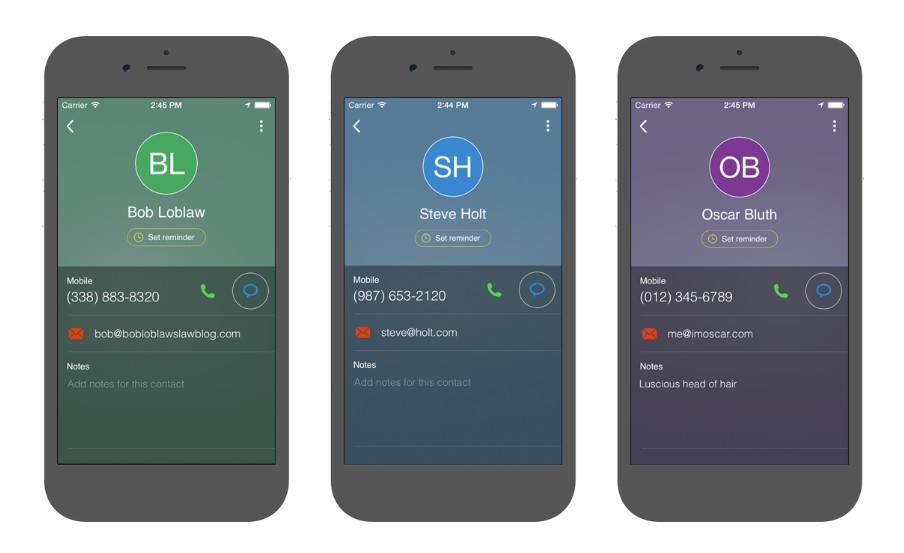
Contacts Picker
let alert = UIAlertController(style: .actionSheet)
alert.addContactsPicker { contact in
    // action with contact
}
alert.addAction(title: "Cancel", style: .cancel)
alert.show()
Location Picker
let alert = UIAlertController(style: .actionSheet)
alert.addLocationPicker { location in
    // action with location
}
alert.addAction(title: "Cancel", style: .cancel)
alert.show()
Telegram Picker
let alert = UIAlertController(style: .actionSheet)
alert.addTelegramPicker { result in
    switch result {
      case .photo(let assets):
        // action with assets
      case .contact(let contact):
        // action with contact
      case .location(let location):
        // action with location
    }
}
alert.addAction(title: "Cancel", style: .cancel)
alert.show()
TextViewer
let alert = UIAlertController(style: .actionSheet)
alert.addTextViewer(text: .attributedText(text))
alert.addAction(title: "OK", style: .cancel)
alert.show()
Alerts vs. Action Sheets
There are some things to keep in mind when using .actionSheet and .alert styles:
- Pickers better to use in
.actionSheetstyle. UITextFieldcan be used in both styles.
Installing
Manually
Download and drop /Source folder in your project.
Requirements
- Swift 4
- iOS 11 or higher