 An easy-to-use UI component to display brief, transient messages to the user.
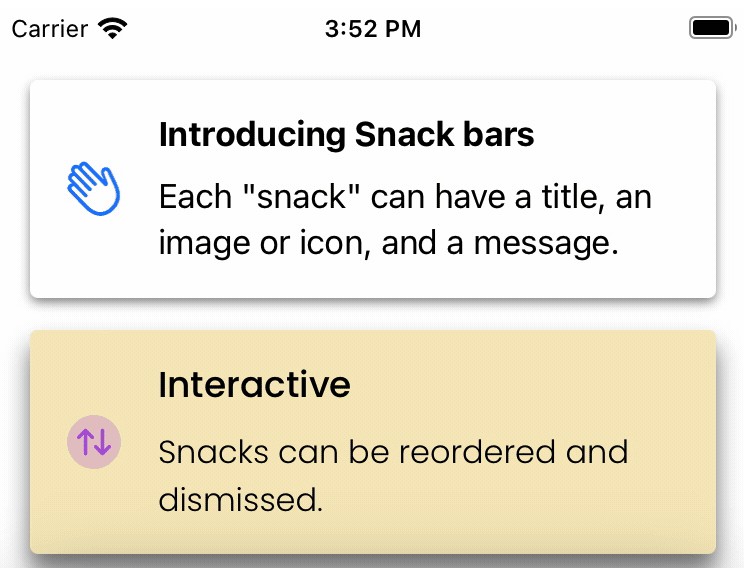
This framework allows you to add transient in-app messaging to your application. Multiple messages will stack using fluid animations. Messages can be fully themed and set to either expire after a specified time interval or to remain on-screen until dismissed.

Licensing
Y—Snackbar is licensed under the Apache 2.0 license.
Documentation
Documentation is automatically generated from source code comments and rendered as a static website hosted via GitHub Pages at: https://yml-org.github.io/ysnackbar-ios/
Usage
Snack
A Snack is a model that represents a floating ephemeral alert or message to be presented to the user. It consists of the following:
alignment: Alignment for the snack view. Default isSnackbarManager.defaultAlignment.title: Title for the snack view. This is an optional string and the default is nil.message: Message to be displayed bySnackView. This is of typeString.reuseIdentifier: A string for identifying a snack. This is of typeString?and the default is nil.icon: A small image to be displayed as part of the snack view. This is of typeUIImage?and the default is nil.duration: The total duration for which the snack will be displayed. The default is 4 seconds.appearance: Sets the appearance of theSnackView. The default isSnackView.Appearance()
Two snacks are said to be equal if either the reuseIdentifier of both snacks are equal or the title and message of both snacks are equal. This is made possible by the snack’s conformance to both Equatable and Hashable.
? If the snack duration is .nan or .zero then the snack lives forever (until you swipe to dismiss it)
SnackView
A SnackView is a view that will be presented to the user through the SnackbarManager. The content of the view is populated using a Snack model object. It has one initializer:
init(snack: Snack)- Initializes a
SnackViewusing thesnackdata model.
- Initializes a
Clients can modify or set the appearance of the SnackView while creating a Snack by setting the appearance. This will allow the client to modify the following properties:
title:- A tuple consisting of
textColorandtypographyfor the title label. - Default is
(.label, .systemLabel.bold).
- A tuple consisting of
message:- A tuple consisting of
textColorandtypographyfor the message label. - Default is
(.label, .systemLabel).
- A tuple consisting of
backgroundColor:SnackView‘s background color. The default issystemBackground.
shadow:SnackView‘s shadow property is of typeShadowand consists of properties such as color, opacity, etc.- The default is
Shadow().
layout:SnackView‘s layout property is of typeLayoutwhich consists of properties such as spacing between views, corner radius, etc.- The default is
Layout().
How to get SnackView from a Snack?
func getSnackAssociatedView() -> SnackUpdatable
SnackUpdatable
- Any object that can be updated with a new
Snackmodel object. SnackViewuses this to update an existing view with new information.
SnackbarManager
All snacks are managed by the SnackbarManager.
State
defaultAlignment- It is a global mutable shared state.
- Describes the default alignment of the snack view.
- Default is
.top
Operations
-
class func add(snack: Snack)-
Creates a snack view using the snack passed as an argument to display a snack.
-
Depending on the alignment, duplicate snacks will be updated and pushed to the bottom or top.
-
-
class func remove(snack: Snack)- Removes a snack view using the snack passed as an argument. The
SnackContainerViewwill be dismissed after the last snack is removed. - There are 3 ways by which you can remove a snack. They are as follows:
- By calling
class func remove(snack: Snack)operation. - When the snack has completed its
duration - Swiping it up or down to dismiss.
- By calling
- Removes a snack view using the snack passed as an argument. The
Clients can control or modify the animation duration, spacing, etc of the SnackbarManager by setting the appearance property which is of type SnackbarManager.Appearance. This will allow the client to modify the following properties:
addAnimationDuration:- Animation duration on adding a snack.
- Default is 0.4
removeAnimationDuration:- Animation duration on removing a snack.
- The default is 0.4
snackSpacing:- Spacing between the snacks
- The default is 16.0
contentInset:- The distance the content is inset from the superview.
- The default is 16.0
maxSnackWidth:- Maximum width of a snack view.
- Helps to keep a fixed width for a snack view on an iPad screen.
- The default is 428.0
Default Features
Every snack added has the following default features:
- corner radius based on appearance
- shadow based on appearance
- swipe enabled to dismiss snack view
Usage
-
Importing the framework
import YSnackbar
-
Create a snack
func makeSnack() -> Snack {
    Snack(
        alignment: .bottom,
        title: "Network Reachable",
        message: "You are currently online.",
        reuseIdentifier: "yml.co",
        icon: UIImage(named: "wifi"),
        duration: 8.0
      )
}
-
Add a snack
// Creates a snack using `SnackbarManager.defaultAlignment = .top`
let snack = Snack(message: "No network")

// Adds to the top of the screen
SnackbarManager.add(snack: snack)
// Creates a snack with bottom alignment
let snack = Snack(alignment: .bottom, message: "Copied to clipboard")

// Adds to the bottom of the screen
SnackbarManager.add(snack: snack)
// Set `SnackbarManager.defaultAlignment` to bottom
SnackbarManager.defaultAlignment = .bottom

// Creates a snack using defaultAlignment.
let snack = Snack(message: "Copied to clipboard")

// Adds to the bottom of the screen
SnackbarManager.add(snack: snack)
-
Remove a snack
let snack = Snack()
SnackbarManager.remove(snack)
-
Create a custom Snack
final class ImageSnack: Snack {
    convenience init(named: String) {
        self.init(message: named, reuseIdentifier: "co.yml.page")
    }

    override func getSnackAssociatedView() -> SnackUpdatable {
        SnackImageView(snack: self)
    }
}

final class SnackImageView: UIImageView {
    private(set) var snack: Snack

    required init(snack: Snack) {
        self.snack = snack
        super.init(image: UIImage(named: snack.message))
        setUp()
    }

    required init?(coder: NSCoder) { nil }

    private func setUp() {
        self.contentMode = .scaleAspectFit
    }
}

extension SnackImageView: SnackUpdatable {
    func update(_ snack: Snack) {
        self.image = UIImage(named: snack.message)
        self.snack = snack
    }
}
Installation
You can add Y—Snackbar to an Xcode project by adding it as a package dependency.
- From the File menu, select Add Packages…
- Enter “https://github.com/yml-org/ysnackbar-ios” into the package repository URL text field
- Click Add Package
Contributing to Y—Snackbar
Requirements
SwiftLint (linter)
brew install swiftlint
Jazzy (documentation)
sudo gem install jazzy
Setup
Clone the repo and open Package.swift in Xcode.
Versioning strategy
We utilize semantic versioning.
{major}.{minor}.{patch}
e.g.
1.0.5
Branching strategy
We utilize a simplified branching strategy for our frameworks.
- main (and development) branch is
main - both feature (and bugfix) branches branch off of
main - feature (and bugfix) branches are merged back into
mainas they are completed and approved. maingets tagged with an updated version # for each release
Branch naming conventions:
feature/{ticket-number}-{short-description}
bugfix/{ticket-number}-{short-description}
e.g.
feature/CM-44-button
bugfix/CM-236-textview-color
Pull Requests
Prior to submitting a pull request you should:
- Compile and ensure there are no warnings and no errors.
- Run all unit tests and confirm that everything passes.
- Check unit test coverage and confirm that all new / modified code is fully covered.
- Run
swiftlintfrom the command line and confirm that there are no violations. - Run
jazzyfrom the command line and confirm that you have 100% documentation coverage. - Consider using
git rebase -i HEAD~{commit-count}to squash your last {commit-count} commits together into functional chunks. - If HEAD of the parent branch (typically
main) has been updated since you created your branch, usegit rebase mainto rebase your branch.- Never merge the parent branch into your branch.
- Always rebase your branch off of the parent branch.
When submitting a pull request:
- Use the provided pull request template and populate the Introduction, Purpose, and Scope fields at a minimum.
- If you’re submitting before and after screenshots, movies, or GIF’s, enter them in a two-column table so that they can be viewed side-by-side.
When merging a pull request:
- Make sure the branch is rebased (not merged) off of the latest HEAD from the parent branch. This keeps our git history easy to read and understand.
- Make sure the branch is deleted upon merge (should be automatic).
Releasing new versions
- Tag the corresponding commit with the new version (e.g.
1.0.5) - Push the local tag to remote
Generating Documentation (via Jazzy)
You can generate your own local set of documentation directly from the source code using the following command from Terminal:
jazzy
This generates a set of documentation under /docs. The default configuration is set in the default config file .jazzy.yaml file.
To view additional documentation options type:
jazzy --help
A GitHub Action automatically runs each time a commit is pushed to main that runs Jazzy to generate the documentation for our GitHub page at: https://yml-org.github.io/ysnackbar-ios/