SideMenu
SideMenu is an easy-to-use container view controller written in Swift.

Besides all the features a Side Menu should have, it supports:
- Four types of status bar behaviors which adopts by most Apps
- Three different menu position
- Both storyboard and programmatically
- Caching the content view controller and lazy initialization
- Rubber band effect while panning
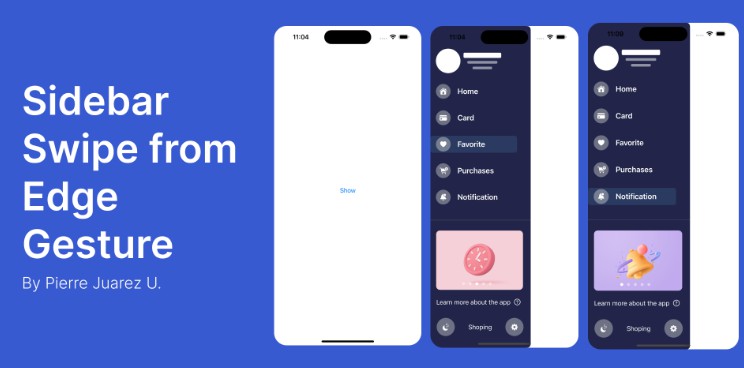
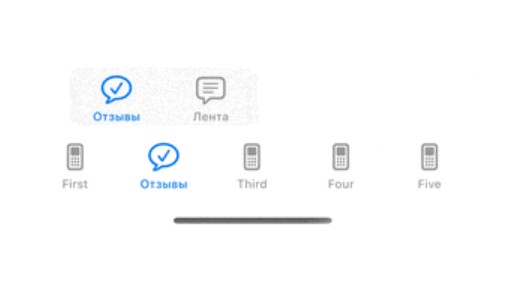
Preview
Menu Position / Status Bar Behavior
| Above + None | Below + Slide |
|---|---|
 |
 |
| SideBySide + Fade | SideBySide + HideOnMenu |
|---|---|
 |
 |
We call the left/right view controller as the menu view controller, the central view controller as content view controller.
Installation
CocoaPods
To install SideMenu with CocoaPods, add the below line in your Podfile:
pod 'SideMenuSwift'
# Note its not 'SideMenu'
Carthage
To install SideMenu with Carthage, add the below line in your Cartfile:
github "kukushi/SideMenu" "master"
Usages
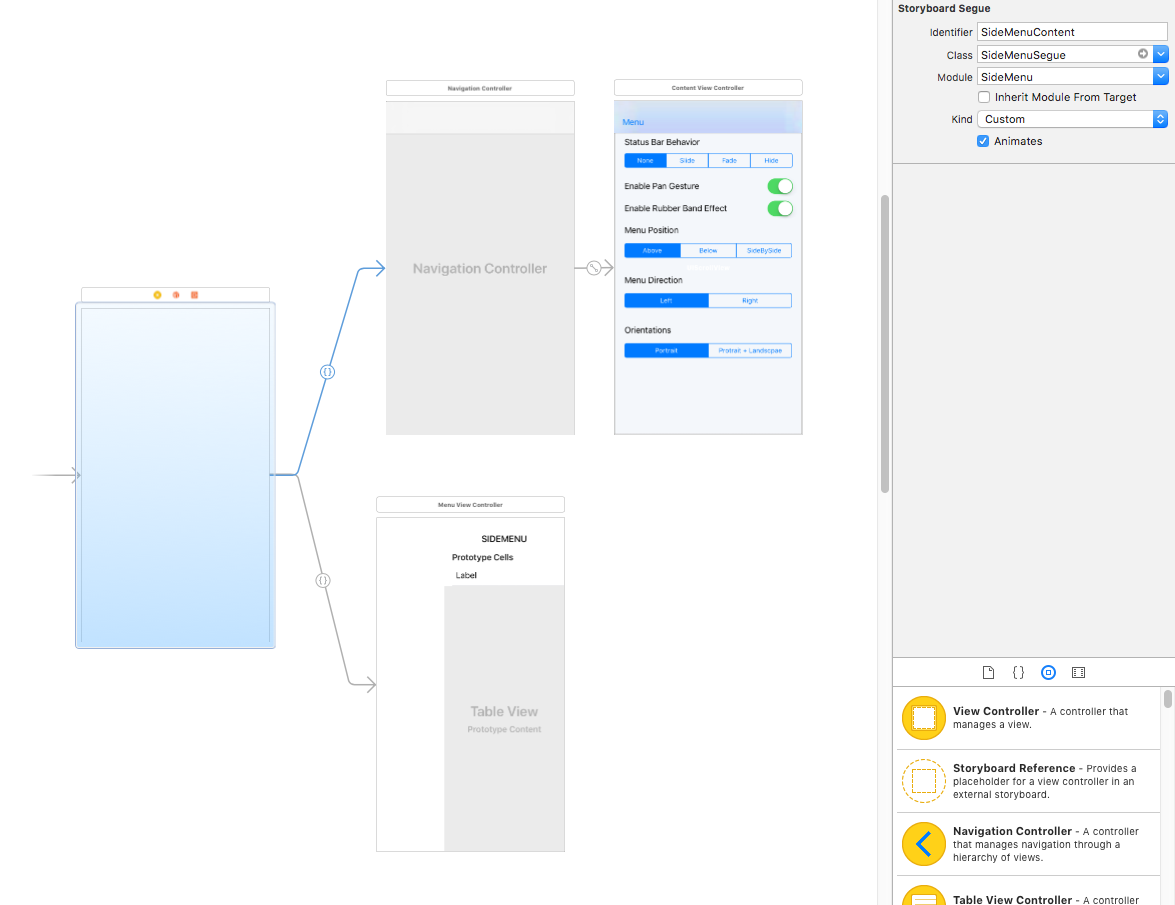
Storyboard
To set up SideMenu in storyboard:
- Open the view controller's Identity inspector. Change the Class to
SideMenuControllerand Module toSideMenuSwift. - Set up the menu view controller and the initial content view controller in your Storyboard. Add a Custom segue from the
SideMenuControllerto each of them.- Change the menu segue's identifier to
SideMenu.Menu, Class toSideMenuSegueand Module toSideMenuSwift. - Change the content segue's identifier to
SideMenu.Content, Class toSideMenuSegueand Module toSideMenuSwift.
- Change the menu segue's identifier to
- (Optional) If you want to use custom segue identifier:
- Open the
SideMenuController's Attribute inspector. - In the Side Menu Controller section, modify the Content SegueID/Menu SegueID to the desired value and change the corresponding segue's identifier.
- Open the
- It's done. Check this screenshot a for clear view.
Programmatically
To start the app with SideMenu:
import UIKit
import SideMenuSwift

@UIApplicationMain
class AppDelegate: UIResponder, UIApplicationDelegate {

    var window: UIWindow?


    func application(_ application: UIApplication, didFinishLaunchingWithOptions launchOptions: [UIApplicationLaunchOptionsKey: Any]?) -> Bool {
        let contentViewController = ...
        let menuViewController = ...
        window = UIWindow(frame: UIScreen.main.bounds)
        window?.rootViewController = SideMenuController(contentViewController: contentViewController, menuViewController: menuViewController)
        window?.makeKeyAndVisible()
        return true
    }
}
Use the sm_sideMenuController method provided in UIViewController's extension to get the parent SideMenuController:
viewController.sm_sideMenuController.revealMenu()
Preferences
All the preferences of SideMenu can be found in SideMenuController.preferences. Its recommend to check out the Example to see how those options will take effect.
SideMenuController.preferences.basic.menuWidth = 240
SideMenuController.preferences.basic.statusBarBehavior = .hideOnMenu
SideMenuController.preferences.basic.position = .below
SideMenuController.preferences.basic.direction = .left
SideMenuController.preferences.basic.enablePanGesture = true
SideMenuController.preferences.basic.enablePanGesture = true
// Many other options.
Caching The Content
One of the biggest features of SideMenu is caching.
// Cache the view controllers somewhere in your code
sideMenuController.cache(viewControllerGenerator: secondViewController, with: "1")
sideMenuController.cache(viewControllerGenerator: thirdViewController, with: "2")

// Switch to it when needed
sm_sideMenuController.setContentViewController(with: "1")
What about the content view controller initialized from the Storyboard? We can use the preferences to apply a default key for it!
SideMenuController.preferences.basic.defaultCacheKey = "0"
What if we can't want to load all the content view controllers so early? We can use lazy caching:
sm_sideMenuController.cache(viewControllerGenerator: { self.storyboard?.instantiateViewController(withIdentifier: "SecondViewController") }, with: "1")
sm_sideMenuController.cache(viewControllerGenerator: { self.storyboard?.instantiateViewController(withIdentifier: "ThirdViewController") }, with: "2")
Requirements
- Xcode 9
- iOS 9.0 or later


