Final Project: Ekko AR Camera
ekko-app-demo.mp4
- Name: Ruoda Yuan
- UChicago Email: [email protected] or [email protected]
- Slack Username: ryuan0653 (display name is just Ruoda Yuan)
Instructions
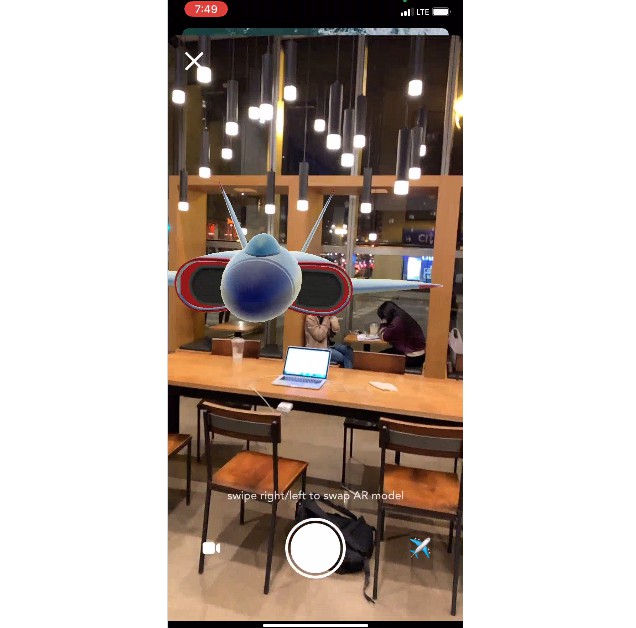
Just launch the app, direct the phone towards a direction where you want to project the AR scene, and then click the main camera button.
While using the app, provide the app your permission to access the camera, microphone, and photo library whenever asked – this is a camera app, after all.
Once the recording view slides up, you can toggle between recording a 10-second video or live photo by clicking the bottom-left icon button. This option button switches between live photo and video icons to indicate the current recording mode.
You can swipe left or right on the entire screen to switch between the 3 AR objects – fighter jet, walking fox, and seeing-eye drone. To verify which swipe was registered, you can check on terminal to see what’s printed. The icon on the bottom-right of the screen reflects which AR model is presented. Note that you may have to physically turn around to “find” the model in space.
Once ready, click on the main record button to start shooting. A progress ring appears with a highlighter to indicate how much recording time is left. The option button is disabled while recording. Once it’s done, a UIAlert will pop up only if the recording session was a success and the file was saved to your photo library.