Capturing Depth Using the LiDAR Camera
Access the LiDAR camera on supporting devices to capture precise depth data.
Overview
AVFoundation introduced depth data capture for photos and video in iOS 11. The data it provides is suitable for many apps, but may not meet the needs of those that require greater precision depth. Starting in iOS 15.4, you can access the LiDAR camera on supporting hardware, which offers high-precision depth data suitable for use cases like room scanning and measurement.
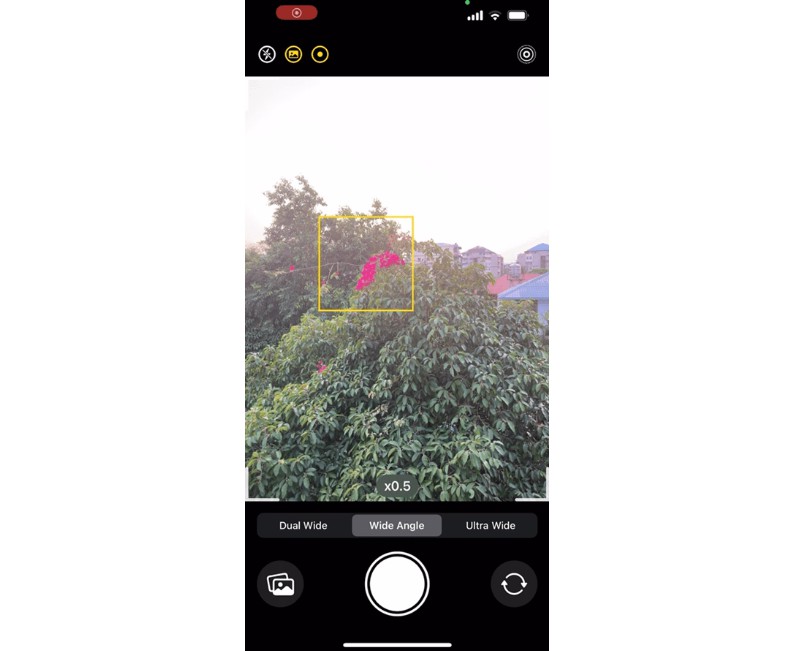
The sample app shows how to capture and render depth data from the LiDAR camera. It starts in streaming mode, which demonstrates how to capture synchronized video and depth data. Tapping the camera button in the upper-left corner of the screen toggles the app into photo mode, which illustrates how to capture photos with depth data. In both modes, the app provides several Metal-based visualizations of the depth and image data.
Configure the Sample Code Project
You must run this sample code on a device that provides a LiDAR camera such as:
- iPhone 12 Pro or later.
- iPad Pro 11-inch (2nd generation) or later.
- iPad Pro 12.9-inch (4th generation) or later.
Configure the LiDAR Camera
The sample app’s CameraController class provides the code that configures and manages the capture session, and handles the delivery of new video and depth data. It begins its configuration by retrieving the LiDAR camera. It calls the capture device’s default(_:for:position:) class method as shown below, passing it the new .builtInLiDARDepthCamera device type available in iOS 15.4 and later.
// Look up the LiDAR camera.
guard let device = AVCaptureDevice.default(.builtInLiDARDepthCamera, for: .video, position: .back) else {
    throw ConfigurationError.lidarDeviceUnavailable
}
After retrieving the device, the app configures it with a specific video and depth format. It asks the device for its supported formats and finds the best nonbinned, full-range YUV color format that matches the sample app’s preferred width and supports depth capture. Finally, it sets the active formats on the device as shown below.
// Find a match that outputs video data in the format the app's custom Metal views require.
guard let format = (device.formats.last { format in
    format.formatDescription.dimensions.width == preferredWidthResolution &&
    format.formatDescription.mediaSubType.rawValue == kCVPixelFormatType_420YpCbCr8BiPlanarFullRange &&
    !format.isVideoBinned &&
    !format.supportedDepthDataFormats.isEmpty
}) else {
    throw ConfigurationError.requiredFormatUnavailable
}

// Find a match that outputs depth data in the format the app's custom Metal views require.
guard let depthFormat = (format.supportedDepthDataFormats.last { depthFormat in
    depthFormat.formatDescription.mediaSubType.rawValue == kCVPixelFormatType_DepthFloat16
}) else {
    throw ConfigurationError.requiredFormatUnavailable
}

// Begin the device configuration.
try device.lockForConfiguration()

// Configure the device and depth formats.
device.activeFormat = format
device.activeDepthDataFormat = depthFormat

// Finish the device configuration.
device.unlockForConfiguration()
Configure the Capture Outputs
The app operates in streaming or photo mode. To enable streaming output, it creates an instance of AVCaptureVideoDataOutput and AVCaptureDepthDataOutput to capture video sample buffers and depth data, respectively. It configures them as shown in the following example.
// Create an object to output video sample buffers.
videoDataOutput = AVCaptureVideoDataOutput()
captureSession.addOutput(videoDataOutput)

// Create an object to output depth data.
depthDataOutput = AVCaptureDepthDataOutput()
depthDataOutput.isFilteringEnabled = isFilteringEnabled
captureSession.addOutput(depthDataOutput)

// Create an object to synchronize the delivery of depth and video data.
outputVideoSync = AVCaptureDataOutputSynchronizer(dataOutputs: [depthDataOutput, videoDataOutput])
outputVideoSync.setDelegate(self, queue: videoQueue)
Because the video and depth data stream from separate output objects, the sample uses an AVCaptureDataOutputSynchronizer to synchronize the delivery from both outputs to a single callback. The CameraController class adopts the synchronizer’s AVCaptureDataOutputSynchronizerDelegate protocol and responds to the delivery of new video and depth data.
To handle photo capture, the app also creates an instance of AVCapturePhotoOutput. It optimizes the output for high-quality capture and adds the output to the capture session as shown below.
// Create an object to output photos.
photoOutput = AVCapturePhotoOutput()
photoOutput.maxPhotoQualityPrioritization = .quality
captureSession.addOutput(photoOutput)

// Enable delivery of depth data after adding the output to the capture session.
photoOutput.isDepthDataDeliveryEnabled = true
After it adds the output to the session, it enables the delivery of depth data, which configures the capture pipeline appropriately. It can only enable depth delivery after adding the output to the capture session because the output needs to know whether the pipeline is configured to deliver it.
Capture Synchronized Video and Depth
With the capture session’s inputs and outputs configured as required, the app is ready to start capturing data. The app starts in streaming mode, which uses the video data and depth data outputs and an AVCaptureDataOutputSynchronizer to synchronize the delivery of their data. The app adopts the synchronizer’s delegate protocol and implements its dataOutputSynchronizer(_:didOutput:) method to handle the delivery as shown below.
func dataOutputSynchronizer(_ synchronizer: AVCaptureDataOutputSynchronizer,
                            didOutput synchronizedDataCollection: AVCaptureSynchronizedDataCollection) {
    // Retrieve the synchronized depth and sample buffer container objects.
    guard let syncedDepthData = synchronizedDataCollection.synchronizedData(for: depthDataOutput) as? AVCaptureSynchronizedDepthData,
          let syncedVideoData = synchronizedDataCollection.synchronizedData(for: videoDataOutput) as? AVCaptureSynchronizedSampleBufferData else { return }

    guard let pixelBuffer = syncedVideoData.sampleBuffer.imageBuffer,
          let cameraCalibrationData = syncedDepthData.depthData.cameraCalibrationData else { return }

    // Package the captured data.
    let data = CameraCapturedData(depth: syncedDepthData.depthData.depthDataMap.texture(withFormat: .r16Float, planeIndex: 0, addToCache: textureCache),
                                  colorY: pixelBuffer.texture(withFormat: .r8Unorm, planeIndex: 0, addToCache: textureCache),
                                  colorCbCr: pixelBuffer.texture(withFormat: .rg8Unorm, planeIndex: 1, addToCache: textureCache),
                                  cameraIntrinsics: cameraCalibrationData.intrinsicMatrix,
                                  cameraReferenceDimensions: cameraCalibrationData.intrinsicMatrixReferenceDimensions)

    delegate?.onNewData(capturedData: data)
}
The app retrieves the container objects that store the synchronized data from the AVCaptureSynchronizedDataCollection. It then unwraps the underlying video pixel buffer and depth data, and packages them for the app’s Metal views to display.
Capture Photos and Depth
Tapping the app’s camera button in the upper-left corner of the user interface toggles the app to photo capture mode. When this occurs, the app calls its capturePhoto() method, which creates a photo settings object, requests depth delivery on it, and initiates a photo capture as shown below.
func capturePhoto() {
    var photoSettings: AVCapturePhotoSettings
    if  photoOutput.availablePhotoPixelFormatTypes.contains(kCVPixelFormatType_420YpCbCr8BiPlanarFullRange) {
        photoSettings = AVCapturePhotoSettings(format: [
            kCVPixelBufferPixelFormatTypeKey as String: kCVPixelFormatType_420YpCbCr8BiPlanarFullRange
        ])
    } else {
        photoSettings = AVCapturePhotoSettings()
    }

    // Capture depth data with this photo capture.
    photoSettings.isDepthDataDeliveryEnabled = true
    photoOutput.capturePhoto(with: photoSettings, delegate: self)
}
When the framework finishes the photo capture, it calls the photo output’s delegate method and passes it the AVCapturePhoto object that contains the image and depth data. The sample retrieves the data from the photo, stops the stream until the user returns to streaming mode, and, similarly to the video case, packages the captured data for delivery to the app’s user interface layer.
func photoOutput(_ output: AVCapturePhotoOutput, didFinishProcessingPhoto photo: AVCapturePhoto, error: Error?) {

    // Retrieve the image and depth data.
    guard let pixelBuffer = photo.pixelBuffer,
          let depthData = photo.depthData,
          let cameraCalibrationData = depthData.cameraCalibrationData else { return }

    // Stop the stream until the user returns to streaming mode.
    stopStream()

    // Convert the depth data to the expected format.
    let convertedDepth = depthData.converting(toDepthDataType: kCVPixelFormatType_DepthFloat16)

    // Package the captured data.
    let data = CameraCapturedData(depth: convertedDepth.depthDataMap.texture(withFormat: .r16Float, planeIndex: 0, addToCache: textureCache),
                                  colorY: pixelBuffer.texture(withFormat: .r8Unorm, planeIndex: 0, addToCache: textureCache),
                                  colorCbCr: pixelBuffer.texture(withFormat: .rg8Unorm, planeIndex: 1, addToCache: textureCache),
                                  cameraIntrinsics: cameraCalibrationData.intrinsicMatrix,
                                  cameraReferenceDimensions: cameraCalibrationData.intrinsicMatrixReferenceDimensions)

    delegate?.onNewPhotoData(capturedData: data)
}


