SwiftyCrop – SwiftUI


? Overview
SwiftyCrop allows users to seamlessly crop images within their SwiftUI applications. It provides a user-friendly interface that makes cropping an image as simple as selecting the desired area.
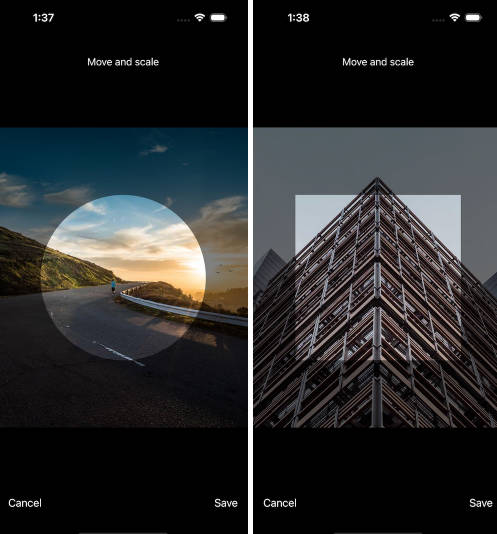
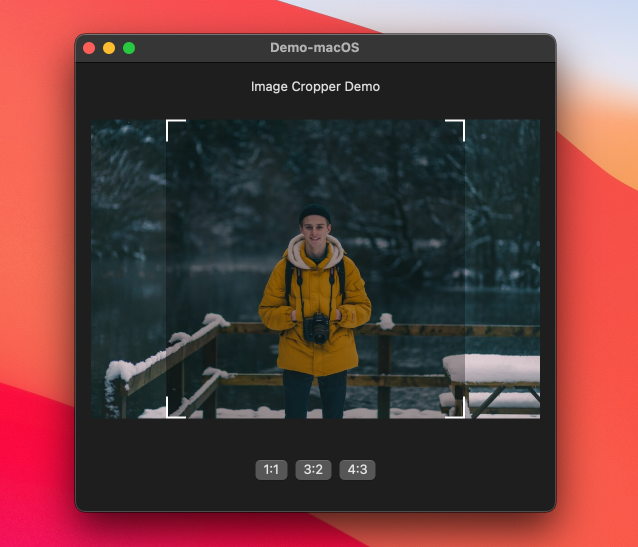
With SwiftyCrop, you can easily adjust the cropping area, maintain aspect ratio, zoom in and out for precise cropping. You can also specify the cropping mask to be a square or circle.
The following languages are supported & localized:
- ?? English
- ?? German
- ?? French
- ?? Italian
- ?? Russian
- ?? Spanish
- ?? Turkish
- ?? Ukrainian
The localization file can be found in Sources/SwiftyCrop/Resources.
? Contents
? Requirements
- iOS 16.0 or later
- Xcode 15.0 or later
- Swift 5.9 or later
? Installation
There are two ways to use SwiftyCrop in your project:
- using Swift Package Manager
- manual install (embed Xcode Project)
Swift Package Manager
The Swift Package Manager is a tool for managing the distribution of Swift code. It’s integrated with the Swift build system to automate the process of downloading, compiling, and linking dependencies.
To integrate SwiftyCrop into your Xcode project using Xcode 14.3 or later, specify it in File > Swift Packages > Add Package Dependency...:
https://github.com/benedom/SwiftyCrop, :branch="master"
Manually
If you prefer not to use any of dependency managers, you can integrate SwiftyCrop into your project manually. Put Sources/SwiftyCrop folder in your Xcode project. Make sure to enable Copy items if needed and Create groups.
?️ Usage
Quick Start
This example shows how to display SwiftyCropView in a full screen cover after an image has been set.
import SwiftUI
import SwiftyCrop

struct ExampleView: View {
    @State private var showImageCropper: Bool = false
    @State private var selectedImage: UIImage?

    var body: some View {
        VStack {
            /*
            Update `selectedImage` with the image you want to crop,
            e.g. after picking it from the library or downloading it.

            As soon as you have done this, toggle `showImageCropper`.

            Below is a sample implementation:
             */

             Button("Crop downloaded image") {
                Task {
                    selectedImage = await downloadExampleImage()
                    showImageCropper.toggle()
                }
             }

        }
        .fullScreenCover(isPresented: $showImageCropper) {
            if let selectedImage = selectedImage {
                SwiftyCropView(
                    imageToCrop: selectedImage,
                    maskShape: .square
                ) { croppedImage in
                    // Do something with the returned, cropped image
                }
            }
        }
    }

    // Example function for downloading an image
    private func downloadExampleImage() async -> UIImage? {
        let urlString = "https://picsum.photos/1000/1200"
        guard let url = URL(string: urlString),
              let (data, _) = try? await URLSession.shared.data(from: url),
              let image = UIImage(data: data)
        else { return nil }

        return image
    }
}
SwiftyCrop supports two different mask shapes for cropping:
circlesquare
This is only the shape of the mask the user will see when cropping the image. The resulting, cropped image will always be a square.
You can also configure SwiftyCropView by passing a SwiftyCropConfiguration. A configuration has the following properties:
| Property | Description |
|---|---|
maxMagnificationScale |
CGFloat: The maximum scale factor that the image can be magnified while cropping. Defaults to 4.0. |
maskRadius |
CGFloat: The radius of the mask used for cropping. Defaults to 130. A good way is to make it dependend on the screens size. |
Create a configuration like this:
let configuration = SwiftyCropConfiguration(
    maxMagnificationScale = 4.0,
    maskRadius: 130
)
and use it like this:
.fullScreenCover(isPresented: $showImageCropper) {
            if let selectedImage = selectedImage {
                SwiftyCropView(
                    imageToCrop: selectedImage,
                    maskShape: .square,
                    // Use the configuration
                    configuration: configuration
                ) { croppedImage in
                    // Do something with the returned, cropped image
                }
            }
        }
?? Contributors
All issue reports, feature requests, pull requests and GitHub stars are welcomed and much appreciated.
✍️ Author
Benedikt Betz & CHECK24
? License
SwiftyCrop is available under the MIT license. See the LICENSE file for more info.
