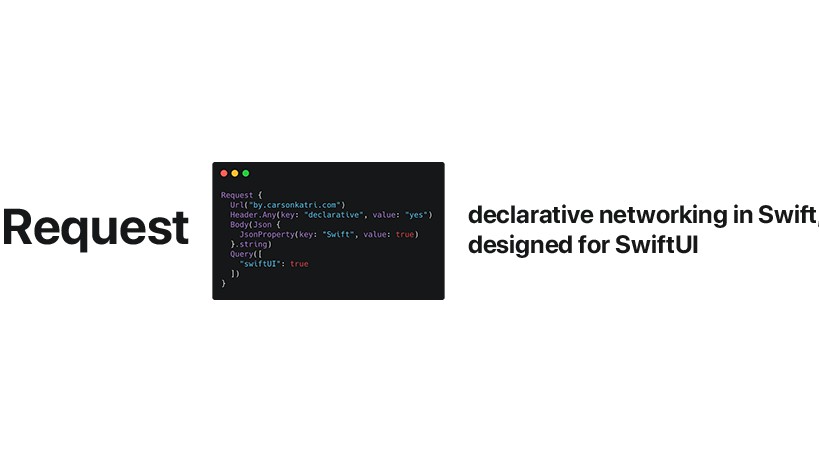
swift-request
Declarative HTTP networking, designed for SwiftUI.
Installation
swift-request can be installed via the Swift Package Manager.
In Xcode 11, go to File > Swift Packages > Add Package Dependency..., then paste in https://github.com/carson-katri/swift-request
Now just import Request, and you're ready to Get Started
Getting Started
The old way:
var request = URLRequest(url: URL(string: "https://jsonplaceholder.typicode.com/todos")!)
request.addValue("application/json", forHTTPHeaderField: "Accept")
let task = URLSession.shared.dataTask(with: url!) { (data, res, err) in
    if let data = data {
        ...
    } else if let error = error {
        ...
    }
}
task.resume()
The declarative way:
Request {
    Url("https://jsonplaceholder.typicode.com/todo")
    Header.Accept(.json)
}
.onData { data in
    ...
}
.onError { error in
    ...
}
.call()
The benefit of declaring requests becomes abundantly clear when your data becomes more complex:
Request {
    Url("https://jsonplaceholder.typicode.com/posts")
    Method(.post)
    Header.ContentType(.json)
    Body(Json {
        JsonProperty(key: "title", value: "foo")
        JsonProperty(key: "body", value: "bar")
        JsonProperty(key: "usedId", value: 1)
    }.string)
}
Once you've built your Request, you can specify the response handlers you want to use.
.onData, .onString, .onJson, and .onError are available.
You can chain them together to handle multiple response types, as they return a modified version of the Request.
You can also use .response, which is an ObservableObject for use with Combine and/or SwiftUI.
To perform the Request, just use .call(). This will run the Request, and give you the response when complete.
Building a Request
There are many different tools available to build a Request:
Url
Exactly one must be present in each Request
Url("https://example.com")
Url(protocol: .secure, url: "example.com")
Method
Sets the MethodType of the Request (.get by default)
Method(.get) // Available: .get, .head, .post, .put, .delete, .connect, .options, .trace, and .patch
Header
Sets an HTTP header field
Header.Any(key: "Custom-Header", value: "value123")
Header.Accept(.json)
Header.Authorization(.basic(username: "carsonkatri", password: "password123"))
Header.CacheControl(.noCache)
Header.ContentLength(16)
Header.ContentType(.xml)
Header.Host("en.example.com", port: "8000")
Header.Origin("www.example.com")
Header.Referer("redirectfrom.example.com")
Header.UserAgent(.firefoxMac)
Query
Creates the query string
Query(["key": "value"]) // ?key=value
Body
Sets the request body
Body(["key": "value"])
Body("myBodyContent")
Body(Json {
    JsonProperty(key: "firstName", value: "Carson")
}.string)
RequestParam
Add a param directly
Important: You must create the logic to handle a custom
RequestParam. You may also consider adding a case toRequestParamType. If you think your custom parameter may be useful for others, see Contributing
Codable
Let's look at an example. Here we define our data:
struct Todo: Codable {
    let title: String
    let completed: Bool
    let id: Int
    let userId: Int
}
Now we can use AnyRequest to pull an array of Todos from the server:
AnyRequest<[Todo]> {
    Url("https://jsonplaceholder.typicode.com/todos")
}
.onObject { todos in ... }
In this case, onObject gives us [Todo]? in response. It's that easy to get data and decode it.
Request is built on AnyRequest, so they support all of the same parameters.
If you use
onObjecton a standardRequest, you will receiveDatain response.
How it Works
The body of the Request is built using the RequestBuilder @_functionBuilder.
It merges each RequestParam in the body into one CombinedParam object. This contains all the other params as children.
When you run .call(), the children are filtered to find the Url, and any other optional parameters that may have been included.
For more information, see RequestBuilder.swift and Request.swift
Request Groups
RequestGroup can be used to run multiple Requests simulataneously. You get a response when each Request completes (or fails)
RequestGroup {
    Request {
        Url("https://jsonplaceholder.typicode.com/todos")
    }
    Request {
        Url("https://jsonplaceholder.typicode.com/posts")
    }
    Request {
        Url("https://jsonplaceholder.typicode.com/todos/1")
    }
}
.onData { (index, data) in
    ...
}
.call()
Request Chains
RequestChain is used to run multiple Requests one at a time. When one completes, it passes its data on to the next Request, so you can use it to build the Request.
RequestChain.call can optionally accept a callback that gives you all the data of every Request when completed.
Note: You must use
Request.chainedto build yourRequest. This gives you access to the data and errors of previousRequests.
RequestChain {
    Request.chained { (data, errors) in
        Url("https://jsonplaceholder.typicode.com/todos")
    }
    Request.chained { (data, errors) in
        let json = Json.Parse(data[0]!)
        return Url("https://jsonplaceholder.typicode.com/todos/\(json?[0]["id"].int ?? 0)")
    }
}
.call { (data, errors) in
    ...
}
Json
swift-request includes support for Json.
Json is used as the response type in the onJson callback on a Request object.
You can create Json by parsing a String or Data:
Json.Parse("{\"firstName\":\"Carson\"}")
Json.Parse("{\"firstName\":\"Carson\"}".data(using: .utf8))
Or you can build Json by hand:
Json {
    JsonProperty(key: "firstName", value: "Carson")
}
You can subscript Json as you would expect:
myJson["firstName"].string // "Carson"
myComplexJson[0]["nestedJson"]["id"].int
You can use .string, .int, .double, .bool, .json and .property to retrieve JsonProperty values in a desired type.
Note: These return non-optional values. If you want to check for
nil, you must cast the.valueyourself.