SwiftUI Segues
Easy-to-use segues in SwiftUI, allowing for presenting views using common UIKIt Segue types – push, modal and popover.
Navigating between views/screens in SwiftUI is more difficult and convoluted than it is in UIKit, with different segues dispersed over multiple views (e.g, NavigationLink) and modifiers (popover, fullScreenCover). Moreover, part of this functionality isn’t available on iOS 13.
This package contains two View Modifiers that allow for seamless integration of segues into your SwiftUI code, and it’s fully compatible with iOS 13 and above. The segues are triggered by setting binding values, and can be dismissed by setting the value to nil. Yep, it’s as easy as this:
.segue(.push, tag: .pushTest, selection: $route) {
    Text("Welcome to Push")
}
Installation
This component is distributed as a Swift package. Just add this repo’s URL to XCode:
https://github.com/globulus/swiftui-segues
How to use
- A good SwiftUI navigation practice is to define all routes, i.e transitions from the current view to subsequent ones, in an enum. Then, add a
@Statevar to your view (or@Publishedvar in your VM) whose value is an optional enum route. This is consistent with the tag/selection and item variants ofNavigationLink/Popover/FullScreenCover. - Assign a value to the route binding to trigger a segue, and assign it to
nilto dismiss it.
Mixed segues
To add a single segue of a certain type that’s triggered when its route binding (selection)’s value is set to a certain tag, use the segue modifier. Specify its destination view in the view builder block:
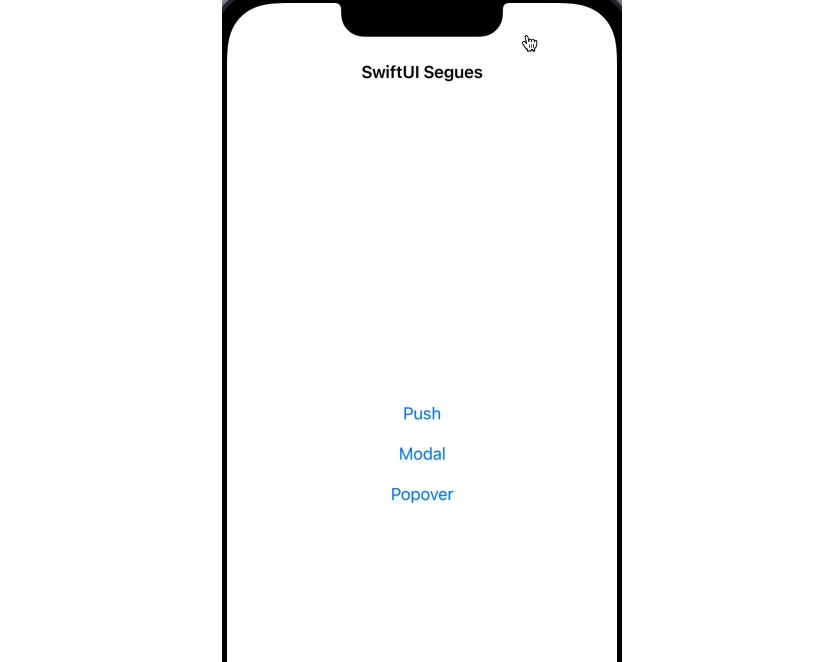
struct MixedSegueTest: View {
    // All the routes that lead from this view to the next ones
    enum Route: Hashable {
        case pushTest, modalTest, popoverTest
    }

    // Triggers segues when its values are changes
    @State private var route: Route? = nil

    var body: some View {
        NavigationView {
            VStack(spacing: 20) {
                Button("Push") {
                    // Navigate by setting route values
                    route = .pushTest
                }
                Button("Modal") {
                    route = .modalTest
                }
                Button("Popover") {
                    route = .popoverTest
                }
            }
            .navigationBarTitle("SwiftUI Segues", displayMode: .inline)

            // Here are individual, mixed segues, with their destinations
            .segue(.push, tag: .pushTest, selection: $route) {
                Text("Welcome to Push")
            }
            .segue(.modal, tag: .modalTest, selection: $route) {
                Button("Welcome to modal") {
                    route = nil
                }
            }
            .segue(.popover(.rect(.bounds), .top), tag: .popoverTest, selection: $route) {
                Text("Welcome to Popover")
            }
        }
    }
}
Multiple segues of the same type
If all the segues bound to the same selection are of the same type (push, modal or popover), use the segues modifier:
struct PushSegueTest: View {
    @State private var route: Route? = nil

    var body: some View {
        NavigationView {
            VStack {
                Button("Go to A") {
                    route = .a
                }
                Button("Go to B") {
                    route = .b
                }
                Button("Go to C") {
                    route = .c
                }
            }
            .segues(.push, selection: $route) { route in
                switch route {
                case .a:
                    Text("A")
                case .b:
                    Text("B")
                case .c:
                    Text("C")
                }
            }
        }
    }

    enum Route: Identifiable, CaseIterable, Hashable {
        case a, b, c

        var id: String {
            "\(self)"
        }
    }
}

struct ModalSegueTest: View {
    @State private var route: Route? = nil

    var body: some View {
        VStack {
            Button("Go to A") {
                route = .a
            }
            Button("Go to B") {
                route = .b
            }
            Button("Go to C") {
                route = .c
            }
        }
        .segues(.modal, selection: $route) { route in
            switch route {
            case .a:
                Button("A") {
                    self.route = nil // dismissed the segue
                }
            case .b:
                Button("B") {
                    self.route = nil
                }
            case .c:
                Button("C") {
                    self.route = nil
                }
            }
        }
    }

    enum Route: Identifiable, CaseIterable, Hashable {
        case a, b, c

        var id: String {
            "\(self)"
        }
    }
}
Recipe
Check out this recipe for in-depth description of the component and its code. Check out SwiftUIRecipes.com for more SwiftUI recipes!
Changelog
- 1.0.0 – Initial release.


