Push notification and silent push
In this article, I will touch on the topic of a push notification, let’s start with the basic concepts of notifications and how they are delivered, create a fast local notification using a simulator, create a remote notification to the real device using firebase and postman, and focus on silent push in which we will pass the URL and load the image in the background to our application.
In this article we will use collections of third-party and native solutions and articles, all authors will be listed at the end.

Push notification and silent push
Sending and Receiving Push Notifications
Enabling the Push Notification Service
Sending a Simulated Push Notification
Sending to a Real Device with Firebase and Postman
Setting up the Firebase Project
Using Silent Push Notifications
So why do we need the silent push?
Let’s start
iOS apps cannot stay in the background for a long time. To conserve battery life, applications running in the background are allowed to perform a limited set of actions.
But what if something interesting is happening and you want to let users know about it, even if they don’t have your app running?
For example, we need to inform the user about the change and make changes to the application itself, for this we have two methods: regular delivery of notifications and silent delivery
Fortunately, Apple has provided a solution to this problem. Instead of constantly checking for events or doing something in the background, you can create a server-side application that will perform these actions.
And when an event of interest occurs, the server-side can send a push notification to the application! Any push notification can perform the following three actions:
- Show a short text message.
- Play a short beep.
- Set the number on the badge of the application icon.
Scheme of operation of the push notification mechanism:

After installing the application, a pop-up message will appear confirming the acceptance of push notifications.
- iOS asks the Apple Push Notification Service (APNS) server for a device token.
- The application receives a device token. We can assume that the token is the address for sending push notifications.
- The application sends the device token to your server.
- When an event occurs for your application, the server will send a push notification to APNS.
- APNS will send a push notification to the user’s device.
When the user receives a push notification, a message will appear, and/or a beep will be played, and/or the badge on the application icon will be updated. The user can open the application from a notification. The application will receive push notification content and be able to process it.
What we need to send
In this article, we will use two methods:
- Send an apns file to the simulator (to test the push and process it in the foreground)
- Sending push through a bundle of Firebase + Postman (to test the push through the server and process it in the background)
For the first option, we only need to set up push notification and create an apns file, for the second method, we will have to make more effort, all the steps will be described below.
Sending and Receiving Push Notifications
Configuring the App
Security is very important for push notifications. You don’t want anyone else to send push notifications to your users through your app. You’ll need to perform several tasks to configure your app to securely receive push notifications.
Enabling the Push Notification Service
First, you have to change the bundle identifier. In Xcode, highlight project in the Project navigator then selects the project target. Select General, then change Bundle Identifier to something unique so Apple’s push notification server can direct pushes to this app.

Next, you need to create an App ID in your developer account and enable the push notification entitlement. Xcode has a simple way to do this: With the project still selected, click the Signing & Capabilities tab and then click the + Capability button. Type “push” in the filter field and press Enter.

Behind the scenes, this creates the App ID and then adds the push notifications entitlement to it. You can log into the Apple Developer Center to verify this:

There are two steps you take to register for push notifications. First, you must get the user’s permission to show notifications. Then, you can register the device to receive remote (push) notifications.
Ask for user permissions first.
Open AppDelegate.swift and add the following to the top of the file:
import UserNotification
Then, add the following method to the end of AppDelegate:
|
func registerForPushNotifications() { UNUserNotificationCenter.current() .requestAuthorization(options: [.alert, .sound, .badge]) { granted, _ in print(“Permission granted: \(granted)“) }} |
What this code does:
- UNUserNotificationCenter handles all notification-related activities in the app, including push notifications.
- You invoke requestAuthorization(options:completionHandler:) to (you guessed it) request authorization to show notifications. The passed options indicate the types of notifications you want your app to use — here you’re requesting alert, sound, and badge.
- The completion handler receives a Bool that indicates whether authorization was successful. In this case, you simply print the result.
Add the following near the end of application(_:didFinishLaunchingWithOptions:), just before the return:
registerForPushNotifications()
Calling registerForPushNotifications() here ensures the app will attempt to register for push notifications any time it’s launched.
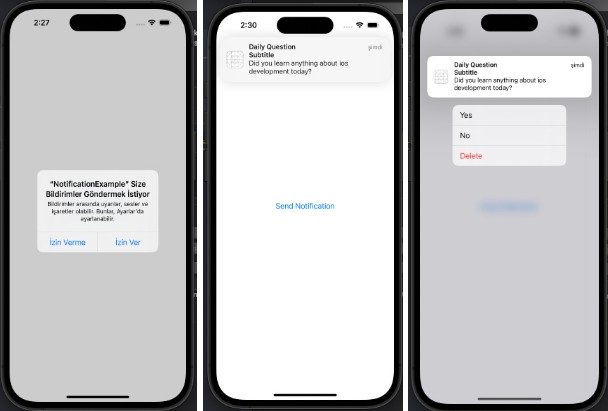
Build and run. When the app launches, you should receive a prompt that asks for permission to send you notifications.
Registering With APNs
Now that you have permissions, you’ll register for remote notifications!
In getNotificationSettings(), add the following beneath the print inside the closure:
|
guard settings.authorizationStatus == .authorized else { return }DispatchQueue.main.async { UIApplication.shared.registerForRemoteNotifications()} |
Here, you verify the authorizationStatus is .authorized: The user has granted notification permissions. If so, you call UIApplication.shared.registerForRemoteNotifications() to kick off registration with the Apple Push Notification service. You need to call this on the main thread, or you’ll receive a runtime warning.
Add the following to the end of AppDelegate:
|
func application( _ application: UIApplication, didRegisterForRemoteNotificationsWithDeviceToken deviceToken: Data) { let tokenParts = deviceToken.map { data in String(format: “%02.2hhx”, data) } let token = tokenParts.joined() print(“Device Token: \(token)“)} |
This method is called by iOS whenever a call registerForRemoteNotifications()succeeds. The code may look cryptic, but it takes a received and converts it to a string. The device token is the fruit of this process. It’s provided by APNs and uniquely identifies this app on this particular device.
When sending a push notification, the server uses tokens as “addresses” to deliver to the correct devices. In your app, you would now send this token to your server to save and use later on for sending notifications.
Now add the following:
|
func application( _ application: UIApplication, didFailToRegisterForRemoteNotificationsWithError error: Error) { print(“Failed to register: \(error)“)} |
This method is called by iOS if registerForRemoteNotifications() fails. You’re just printing the error for now.
That’s it! Build and run. Because you are on a simulator, you’ll see a Failed to register error. You can ignore that for now. Later, when you run on a real device, you should receive a token in the console output. Here’s an example:

Note: There are several reasons why registration might fail. Most often, it’s because the App ID was not properly configured. The error message generally provides a good hint for what’s wrong.
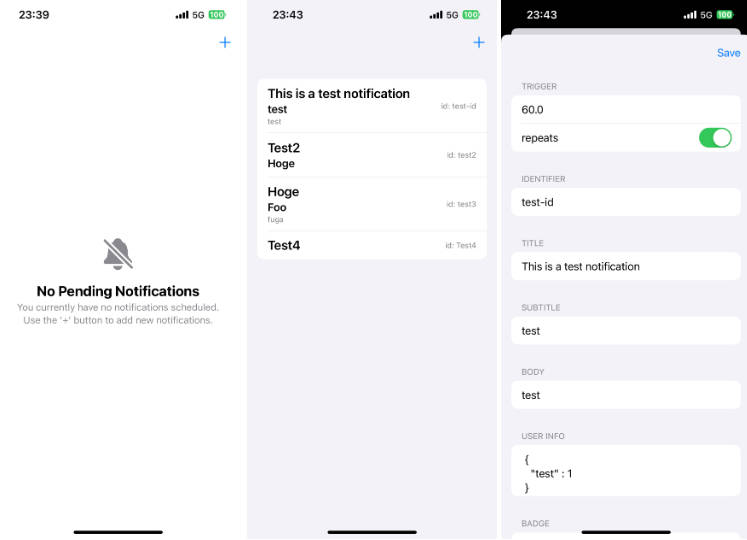
Sending a Simulated Push Notification
Use an xCode to create a file called test. apns:


Paste in the following JSON text and save the file.
|
{ “Simulator Target Bundle”: “DmitrySokoltsov.PushNotification”, “aps”: { “alert”: { “body”: “New Image”, “title”: “Push Notification”, “link_url”: “https://www.freepnglogos.com/uploads/spotify-logo-png/spotify-icon-marilyn-scott-0.png“ }, },} |
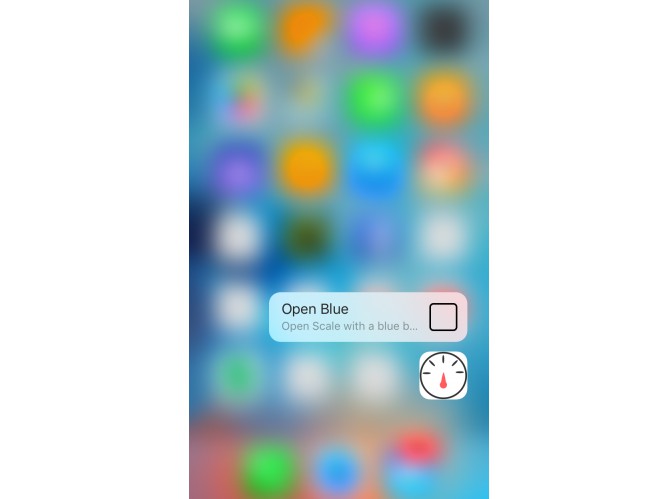
Right-click on the show in folder test and just drag and drop this file into the simulator

Sending to a Real Device with Firebase and Postman
To receive a push notification, your device needs to be registered with the Apple Push Notification service (APNs) by receiving a unique device token. Once the device is registered, you can send push notifications to the device by sending a request to APNs using the device token. All this communication needs to happen from some sort of web server.
You can implement your web service to communicate with APNs, but there are easier options. One of those is Firebase Cloud Messaging (FCM). With Firebase Cloud Messaging (FCM), you have an easy-to-use system at your fingertips! FCM handles the cloud aspect of push notifications, letting you send and receive pushes without having to write your web service.
Note: While you can test local push notifications on a simulator, you need to be running on a physical device to receive push notifications from FCM.
Configuring Firebase
Next, you’ll learn how to configure Firebase.
Creating the p8 Certificate
Firebase requires you to upload a p8 certificate to your app. This is a special file containing a private key that allows Firebase to send notifications. To get a p8 certificate, sign in to Apple Developer.
Select Certificates, Identifiers & Profiles and go to Keys. Select the circle + button to create a new key.

Give it a name and enable the Apple Push Notifications service (APNs) service. Select Continue and, on the next screen, select Register.

It’s important to note down the following three items from this screen:
- Select Download to save the p8 file locally. You’ll need to upload this to Firebase. You cannot download this after leaving this screen.
- Copy and save the Key ID to a file.
- Copy and save your Apple membership ID. This is next to your name in the upper-right corner of the Membership Center or under Membership Details.
Setting up the Firebase Project
Next, go to your Firebase account and select Go to console in the upper-right corner of the page. Select Add project and do the following to create your project:
- Use the name Good News.
- Enable Google Analytics.
- Choose a name and the country for Google Analytics.
- Use the default analytics settings.
Then, you’ll need to configure Firebase with your Apple p8 and membership information. Within your Firebase project, select the gear next to Project Overview and choose Project settings:

Next, set up an iOS app under the General section of your project settings:

From there, go to the app configuration page:
- Add the Bundle Identifier for your project.
- You can leave App nickname and App Store ID blank if you want.
After registering your app, download GoogleServices-Info.plist. You’ll need this to configure Firebase in your app later. You can select Next for the remaining steps. You won’t be using CocoaPods, and you can ignore the steps for adding an initialization code to your app for now.
Next, upload your p8 certificate by going to Cloud Messaging in your Firebase project settings. Under APNs Authentication Key, select Upload.

You’ll see a pop-up asking you to:
- Upload the .p8 file you downloaded from Apple.
- Enter the Key ID you saved when creating the p8.
- Enter your Apple membership ID.
Select Upload to finish setting up your Firebase project.
Adding the Package
Now, you’ll use Swift Package Manager to add the Firebase dependency to your project. In Xcode, select File ▸ Swift Packages ▸ Add Package Dependency…. In the Choose Package Repository pop-up, enter https://github.com/firebase/firebase-ios-sdk.git.
Select Next, keeping the default options, until you get to a screen with a list of packages. This might take some time while Xcode downloads the necessary data. Select the following packages from the list:
- FirebaseAnalytics
- FirebaseMessaging
If you don’t want to collect information about how your users are using push notifications, feel free to leave FirebaseAnalytics unchecked. After adding these packages, it may take a few minutes to add and build the dependencies.
Next, add GoogleService-Info.plist to your project in the Assets group of your Xcode project.
Configuring Your App
Start by opening Info. plist and add the following entry:
- Key: FirebaseAppDelegateProxyEnabled
- Type: Boolean
- Value: NO (Xcode will show this as 0)

By default, FirebaseMessaging uses the method swizzling to handle push notifications. You’ll handle all the code yourself, so turn this off using the plist entry you just added.
Next, Set up the client application Firebase Cloud Messaging instructions
You’re close — only one more step to get your app ready. In Xcode, open your app’s project settings and go to Signing & Capabilities. Select the + Capability button. Search for Push Notifications in the field and press Enter.
Sending remote notifications
Your app is now ready to receive notifications! Build and run on a real device. It should look the same as before, but with an alert asking for permission to send you notifications. Be sure to select Allow.
In the next step, we need a postman. How to set up a request via server key from Firebase

Postman Headers
Server key we can find at Project settings – Cloud Messaging

Firebase project settings
Postman Body
FCM token you can find in the console when you run the device

FCM Token
Press send, if we did everything right you will receive a push notification on the device.
Using Silent Push Notifications
Silent push notifications can wake your app up silently to perform some tasks in the background.
With a proper server component, this can be very efficient. Your app won’t need to constantly poll for data. You can send it a silent push notification whenever new data is available.
To get started, select the project target again. Now click the Signing & Capabilities tab and add the Background Modes capability. Then check the Remote notifications option:

Now, your app will wake up in the background when it receives one of these push notifications.
In AppDelegate.swift, find application(_:didReceiveRemoteNotification:fetchCompletionHandler:).
|
func application(_ application: UIApplication, didReceiveRemoteNotification userInfo: [AnyHashable : Any], fetchCompletionHandler completionHandler: @escaping (UIBackgroundFetchResult) -> Void) { guard let aps = userInfo[AnyHashable(“aps”)] as? NSDictionary, let alert = aps[“alert”] as? NSDictionary, let strURL = alert[“link_url”] as? String else { return } CoreDataService.shared.saveData(strURL) completionHandler(.newData) print(“Wake up and save to data”)
} |
Going over the code:
- You check to see if content-available is set to 1. If so, this is a silent notification.
- You refresh the podcast list, which is an asynchronous network call.
- When the refresh is complete, call the completion handler to let the system know whether the app loaded any new data.
- If it isn’t a silent notification, then it is a news item, so make a news item.
Be sure to call the completion handler with the honest result. The system measures the battery consumption and time that your app uses in the background and may throttle your app if needed.
That’s all there is to it. To test it, build and run, foreground the app and push the following payload via the postman utility:
|
{ “aps”: { “alert”: { “content-available”: 1, “apns-priority” : 5, “link_url”: “https://www.freepnglogos.com/uploads/spotify-logo-png/spotify-icon-marilyn-scott-0.png“ }, },} |
If all goes well, nothing should happen, transfer the image to core data. To confirm the code ran as expected, set a breakpoint in application(_:didReceiveRemoteNotification:fetchCompletionHandler:) and step through it after the notification is sent.
Conclusion
After the work is done, we send our silent push in which we place the URL on the image on our device in the application(_:didReceiveRemoteNotification:fetchCompletionHandler:) method, we wake up our application and process our push pass the URL to the core data.

In debug area
When the application screen opens, we process the URL from core data and render the image.

So why do we need the silent push?
If your app’s server-based content changes infrequently or at irregular intervals, you can use background notifications to notify your app when new content becomes available. A background notification is a remote notification that doesn’t display an alert, play a sound, or badge your app’s icon. It wakes your app in the background and gives it time to initiate downloads from your server and update content.
Important
The system treats background notifications as a low priority: you can use them to refresh your app’s content, but the system doesn’t guarantee their delivery. In addition, the system may throttle the delivery of background notifications if the total number becomes excessive. The number of background notifications allowed by the system depends on current conditions, but don’t try to send more than two or three per hour.
