GuillotineMenu.swift
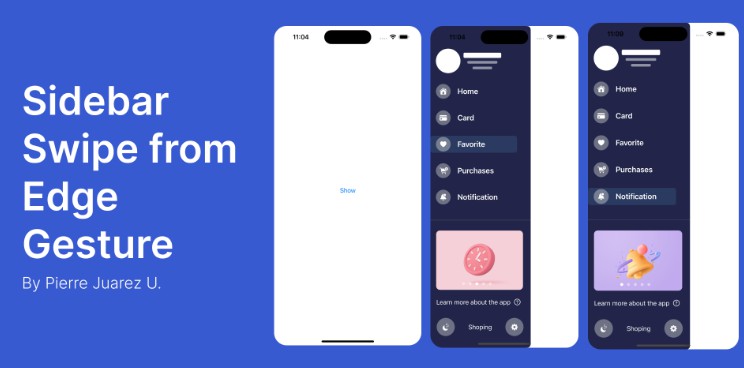
Our Guillotine Menu Transitioning Animation implemented in Swift reminds a bit of a notorious killing machine.
Requirements
- iOS 8.0+
- Xcode 8
- Swift 3
Installation
CocoaPods
pod 'GuillotineMenu', '~> 3.0'
Manual Installation
You are welcome to see the sample of the project for fully operating sample in the Example folder.
- You must add "GuillotineMenuTransitionAnimation.swift" to your project, that's all.
Usage
- Now, it's for you to decide, should or not your menu drop from top left corner of the screen or from your navigation bar, because if you want animation like in example, you must make your menu view controller confirm to "GuillotineMenu" protocol. When you confirm to this protocol, you must make a menu button and title, you don't need to make frame for them, because animator will make it itself.
- In view controller, that will present your menu, you must make a property for "GuillotineMenuTransitionAnimator". It's necessary for proper animation when you show or dismiss menu.
- When you present menu, you must ensure, that model presentation style set to Custom and menu's transition delegate set to view controller, that presents menu:
let menuViewController = storyboard!.instantiateViewController(withIdentifier: "MenuViewController")
menuViewController.modalPresentationStyle = .custom
menuViewController.transitioningDelegate = self
- Implement UIViewControllerTransitionDelegate methods in your presenting view controller:
extension ViewController: UIViewControllerTransitioningDelegate {

func animationControllerForPresentedController(presented: UIViewController, presentingController presenting: UIViewController, sourceController source: UIViewController) -> UIViewControllerAnimatedTransitioning? {
	presentationAnimator.mode = .presentation
	return presentationAnimator
}

func animationControllerForDismissedController(dismissed: UIViewController) -> UIViewControllerAnimatedTransitioning? {
	presentationAnimator.mode = .dismissal
	return presentationAnimator
}
- At last, you can assign offset view, from where your menu will be dropped and button for it, and present your menu:
presentationAnimator.supportView = navigationController!.navigationBar
presentationAnimator.presentButton = sender
present(menuViewController, animated: true, completion: nil)
Customisation
Of course, you can assign different "supportView" or "presentButton" for menu, but we think that's the best case would be behaviour like in Example project.
To specify the length of an animation effect, change the value of the "duration" property.
Also, you have wonderful delegate methods of animator:
public protocol GuillotineAnimationDelegate: class {

    func animatorDidFinishPresentation(_ animator: GuillotineTransitionAnimation)
    func animatorDidFinishDismissal(_ animator: GuillotineTransitionAnimation)
    func animatorWillStartPresentation(_ animator: GuillotineTransitionAnimation)
    func animatorWillStartDismissal(_ animator: GuillotineTransitionAnimation)
}
You can do whatever you want alongside menu is animating.