FanMenu
Menu with a circular layout based on Macaw. This project is maintained by exyte.
img src="http://i.imgur.com/o6tBKW6.gif" height="500"> 

Usage
- Create
UIViewin your storyboard or programatically. - Set
FanMenuasUIViewclass. - Set button
fanMenu.button = FanMenuButton(
  id: "main",
  image: "plus",
  color: Color(val: 0x7C93FE)
)
- Set menu items
fanMenu.items = [
  FanMenuButton(
    id: "exchange_id",
    image: "exchange",
    color: Color(val: 0x9F85FF)
  ),
  ...
  FanMenuButton(
    id: "visa_id",
    image: "visa",
    color: Color(val: 0xF55B58)
  )
]
- Add event handler
// call before animation
fanMenu.onItemDidClick = { button in
  print("ItemDidClick: \(button.id)")
}
// call after animation
fanMenu.onItemWillClick = { button in
  print("ItemWillClick: \(button.id)")
}
- Configure optional parameters
// distance between button and items
fanMenu.menuRadius = 90.0

// animation duration
fanMenu.duration = 0.35

// menu opening delay
fanMenu.delay = 0.05

// interval for buttons in radians
fanMenu.interval = (0, 2.0 * M_PI)

// menu background color
fanMenu.menuBackground = Color.red
- Useful methods
fanMenu.isOpen
fanMenu.open()
fanMenu.close()
Customization
FanMenu bases on Macaw, vector graphics Swift library. Because of that fan-menu could be easily modified and improved for your purposes.
All source code is in one single file called FanMenu.swift. To modify menu simply copy this file and apply necessary changes. With fan-menu and Macaw you could make awesome menus!

Examples
To try fan-menu examples:
- Clone the repo
[email protected]:exyte/fan-menu.git - Open terminal and run
cd <FanMenuRepo>/Example/ - Run
pod installto install all dependencies - Run open
FanMenu.xcworkspace/to open project in the Xcode - Try it!
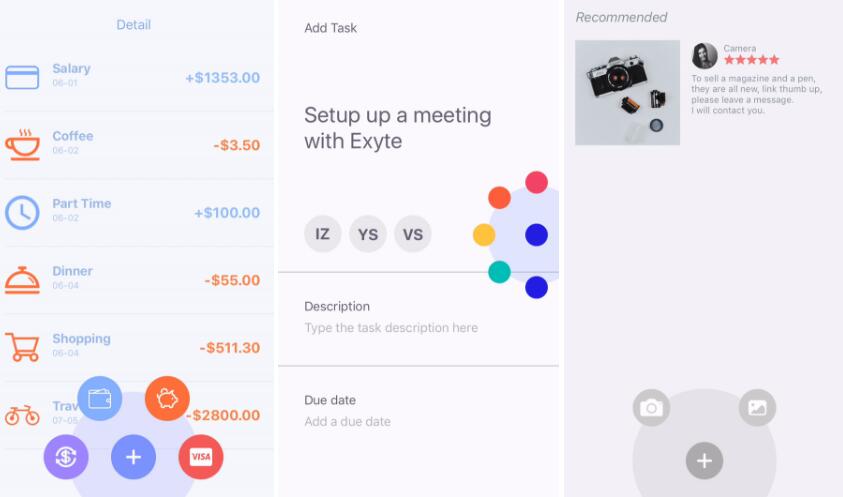
We have next examples:
- FinanceViewController.swift
Accounting & Financial Management. Inspired by Yingfang Xie. - TaskViewController.swift
Color Coding Microinteraction. Insipred by Filippos Protogeridis. - ShopViewController.swift
Inspired by Tice. - CustomViewController.swift Inspired by awesome Ramotion control circle-menu
Installation
CocoaPods
pod "FanMenu"
Carthage
Carthage
github "Exyte/fan-menu"
Manually
Drop FanMenu.swift in your project.
Requirements
- iOS 8.0+ / Mac OS X 10.9+
- Xcode 8.0+

