Handling user input
In the Landmarks app, a user can flag their favorite places, and filter the list to show just their favorites. To create this feature, you’ll start by adding a switch to the list so users can focus on just their favorites, and then you’ll add a star-shaped button that a user taps to flag a landmark as a favorite.
Mark the User’s Favorite Landmarks
Add a property to the Landmark structure to read the initial state of a landmark as a favorite, and then add a star to each LandmarkRow that shows a favorite landmark.
Add an isFavorite property to the Landmark structure.
The landmarkData.json file has a key with this name for each landmark. Because Landmark conforms to Codable, you can read the value associated with the key by creating a new property with the same name as the key.
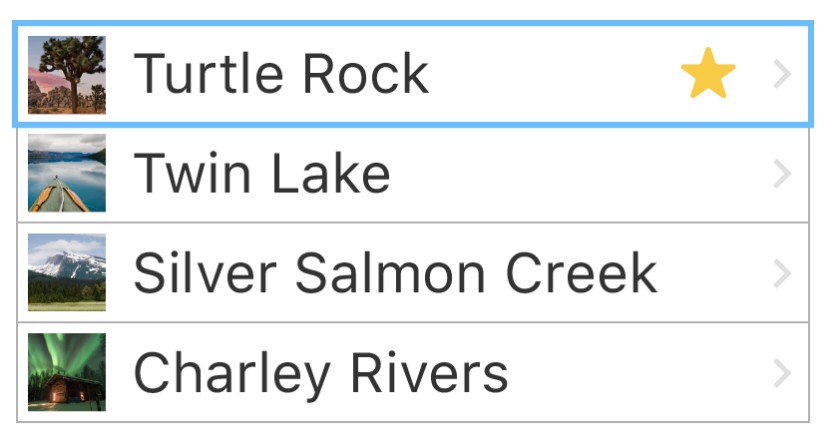
In LandmarkRow.swift , after the spacer, add a star image inside an ifstatement to test whether the current landmark is a favorite.
In SwiftUI blocks, you use if statements to conditionally include views.
Because system images are vector based, you can change their color with the foregroundColor(_:) modifier.
The star is present whenever a landmark’s isFavorite property is true. You’ll see how to modify that property later in this tutorial.
if landmark.isFavorite {
        Image(systemName: "star.fill")
            .foregroundColor(.yellow)
}
"star.fill" is an Apple SF Symbol. You can find more here: https://developer.apple.com/design/human-interface-guidelines/sf-symbols/overview/
or by downloading the SF Symbols app: https://developer.apple.com/design/downloads/SF-Symbols.dmg
Filter the list view
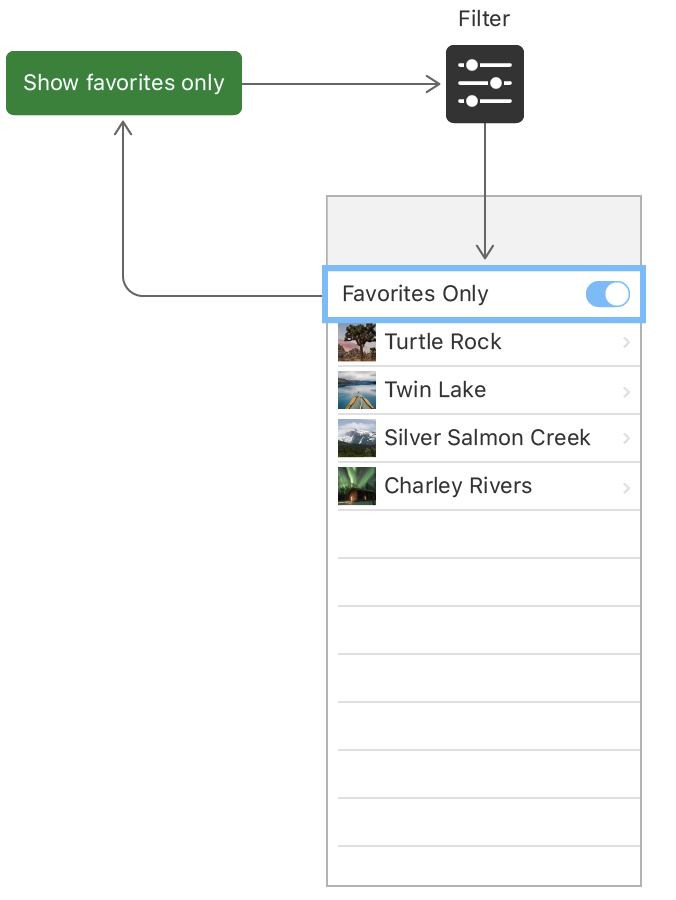
You can customize the list view so that it shows all of the landmarks, or just the user’s favorites. To do this, you’ll need to add a bit of state to the LandmarkList type.
State is a value, or a set of values, that can change over time, and that affects a view’s behavior, content, or layout. You use a property with the @State attribute to add state to a view.
Similar to mutableStateOf in Android Jetpack Compose.
In LandmarksList.swift, add a @State property called showFavoritesOnly with its initial value set to false.
Because you use state properties to hold information that is specific to a view and its subviews, you always create state as private. Then refresh the canvas.
@State private var showFavoritesOnly = false
When you make changes to your view’s structure, like adding or modifying a property, you need to manually refresh the canvas.
Then add a variable to filters the list. This variable is going to be used for showing the UI list.
var filteredLandmarks: [Landmark] {
        landmarks.filter { landmark in
                (!showFavoritesOnly || landmark.isFavorite)
        }
}
Add a Control to Toggle the State
To give the user control over the list’s filter, you need to add a control that can alter the value of showFavoritesOnly. You do this by passing a binding to a toggle control.
A binding acts as a reference to a mutable state. When a user taps the toggle from off to on, and off again, the control uses the binding to update the view’s state accordingly.
Create a nested ForEach group to transform the landmarks into rows.
To combine static and dynamic views in a list, or to combine two or more different groups of dynamic views, use the ForEach type instead of passing your collection of data to List.
var body: some View {
        NavigationView {
            List {
                ForEach(filteredLandmarks) { landmark in
                    NavigationLink(destination: LandmarkDetail(landmark: landmark)) {
                        LandmarkRow(landmark: landmark)
                    }
                }
            }
            .navigationTitle("Landmarks")
        }
    }
ForEach is a structure that computes views on demand from an underlying collection of identified data.
A List has a special appearance, depending on the platform. For example, on iOS a list will appear as a table view and insert separator lines between its vertically stacked views.
You can use ForEach views inside List views to have both dynamic and static content – a very powerful feature of SwiftUI.
Add a Toggle view as the first child of the List view, passing a binding to showFavoritesOnly.
You use the $ prefix to access a binding to a state variable, or one of its properties.
List {

        Toggle(isOn: $showFavoritesOnly) {
                Text("Favorites only")
        }

        ForEach(filteredLandmarks) { landmark in
                NavigationLink(destination: LandmarkDetail(landmark: landmark)) {
                        LandmarkRow(landmark: landmark)
                }
        }

}
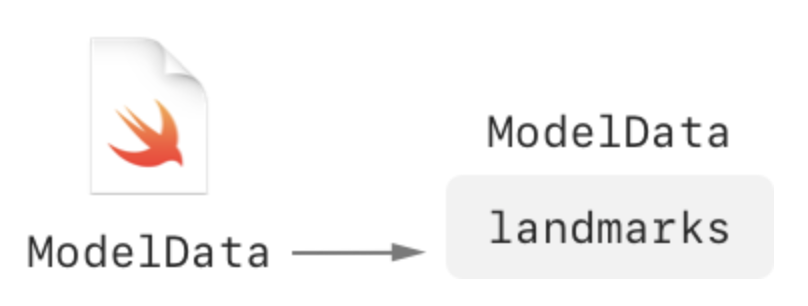
Use an Observable Object for Storage
To prepare for the user to control which particular landmarks are favorites, you’ll first store the landmark data in an observable object.
An observable object is a custom object for your data that can be bound to a view from storage in SwiftUI’s environment. SwiftUI watches for any changes to observable objects that could affect a view, and displays the correct version of the view after a change.
Declare a new model type that conforms to the ObservableObject protocol from the Combine framework.
SwiftUI subscribes to your observable object, and updates any views that need refreshing when the data changes.
An observable object needs to publish any changes to its data, so that its subscribers can pick up the change.
import Combine

final class ModelData: ObservableObject {
        @Published var landmarks: [Landmark] = load("landmarkData.json")
}
Adopt the Model Object in Your Views
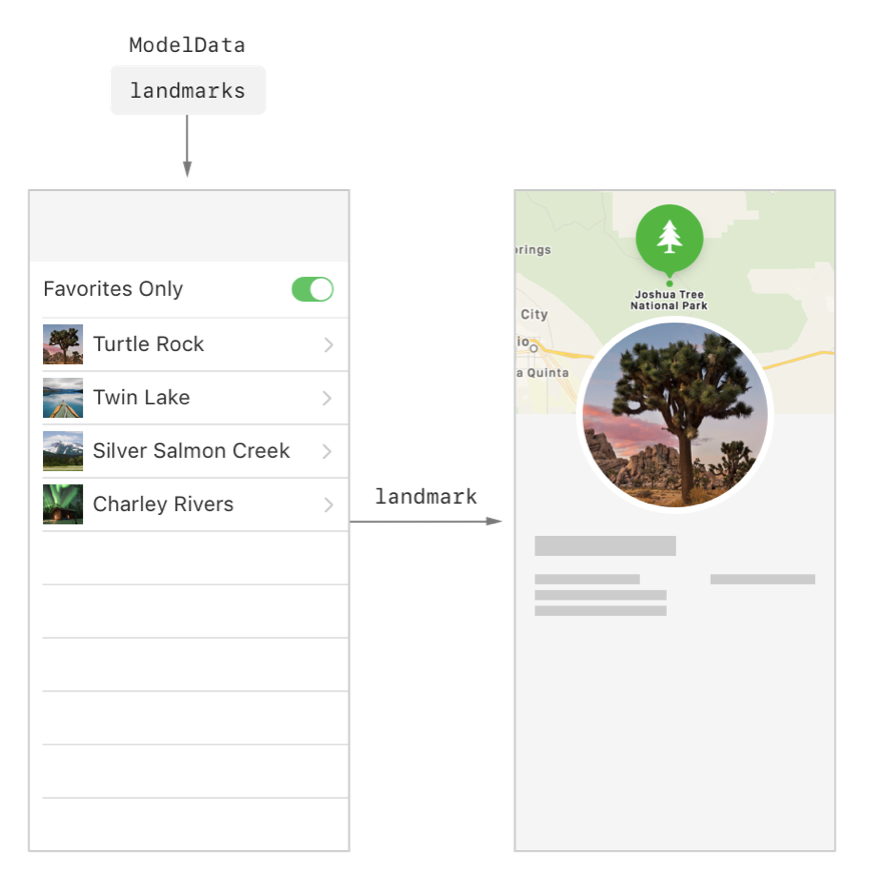
In LandmarkList.swift, add an @EnvironmentObject property declaration to the view, and an environmentObject(_:) modifier to the preview.
The modelData property gets its value automatically, as long as the environmentObject(_:) modifier has been applied to a parent.
struct LandmarkList: View {

        @EnvironmentObject var modelData: ModelData

        ...
}

struct LandmarkList_Previews: PreviewProvider {
    static var previews: some View {
        LandmarkList()
            .environmentObject(ModelData())
    }
}
EnvironmentObjec is a property wrapper type for an observable object supplied by a parent or ancestor view.
An environment object invalidates the current view whenever the observable object changes. If you declare a property as an environment object, be sure to set a corresponding model object on an ancestor view by calling its View.environmentObject(_:) modifier.
View.environmentObject(_:) supplies an ObservableObject to a view subhierachy.
Update all the views to use ModelData object to provide the data of the landmarks.
Update the ContentView preview to add the model object to the environment, which makes the object available to any subview.
A preview fails if any subview requires a model object in the environment, but the view you are previewing doesn’t have the environmentObject(_:) modifier.
struct ContentView_Previews: PreviewProvider {
    static var previews: some View {
        ContentView()
            // ContentView, which has LandmarksList view, requires a Model
            // data as a EnvironmentObject
            .environmentObject(ModelData())
    }
}
Next, you’ll update the app instance to put the model object in the environment when you run the app in the simulator or on a device.
Same in Application class.
Update the LandmarksApp to create a model instance and supply it to ContentView using the environmentObject(_:) modifier.
Use the @StatObject attribute to initialize a model object for a given property only once during the life time of the app. This is true when you use the attribute in an app instance, as shown here, as well as when you use it in a view.
@main
struct LandmarksApp: App {

    @StateObject private var modelData = ModelData()

    var body: some Scene {
        WindowGroup {
            ContentView()
                .environmentObject(modelData)
        }
    }

}
@StatObject is a property wrapper type that instantiates an observable object.
Create a Favorite Button for Each Landmark
The Landmarks app can now switch between a filtered and unfiltered view of the landmarks, but the list of favorite landmarks is still hard coded. To allow the user to add and remove favorites, you need to add a favorite button to the landmark detail view.
Create a FavoriteButton.swift SwiftUI file.
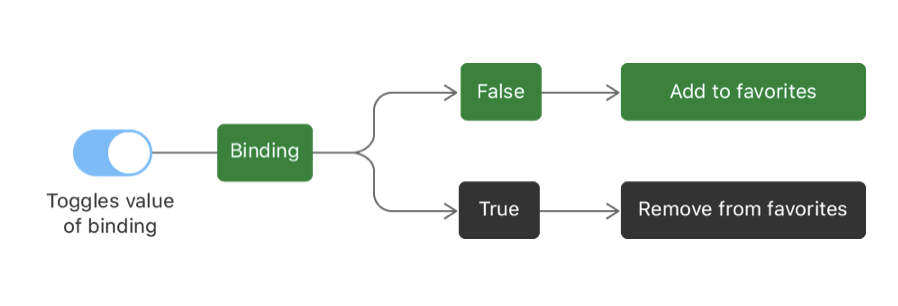
Add an isSet binding that indicates the button’s current state, and provide a constant value for the preview.
Because you use a binding, changes made inside this view propagate back to the data source.
import SwiftUI

struct FavoriteButton: View {
    @Binding var isSet: Bool

    var body: some View {
        Text("Hello, World!")
    }
}

struct FavoriteButton_Previews: PreviewProvider {
    static var previews: some View {
        FavoriteButton(isSet: .constant(true))
    }
}
@Binding A property wrapper type that can read and write a value owned by a source of truth.
Use a binding to create a two-way connection between a property that stores data, and a view that displays and changes the data. A binding connects a property to a source of truth stored elsewhere, instead of storing data directly.
For example, a button that toggles between play and pause can create a binding to a property of its parent view using the Binding property wrapper.
That means, that a parent view instantiate a single view and pass a @State value, and this child view can update this value by binding to a local variable marked with @Binding.
Next, you’ll add the FavoriteButton to the detail view, binding the button’s isSet property to the isFavorite property of a given landmark.
Switch to LandmarkDetail.swift, and compute the index of the input landmark by comparing it with the model data.
To support this, you also need access to the environment’s model data.
struct LandmarkDetail: View {

        @EnvironmentObject var modelData: ModelData
    var landmark: Landmark

    var landmarkIndex: Int {
        modelData.landmarks.firstIndex(where: { $0.id == landmark.id })!
    }

        ...

}
Embed the landmark’s name in an HStackwith a new FavoriteButton; provide a binding to the isFavorite property with the dollar sign ($).
Use landmarkIndex with the modelDataobject to ensure that the button updates the isFavorite property of the landmark stored in your model object.
This will allow to update the state of the object (isFavorite value in this case) in the whole application since the source of truth is the EnvironmentObject modelData.
HStack {

        Text(currentLandmark.name)
                .font(.title)
                .foregroundColor(.primary)

        FavoriteButton(isSet: $modelData.landmarks[landmarkIndex].isFavorite)

}