HeadShot
?
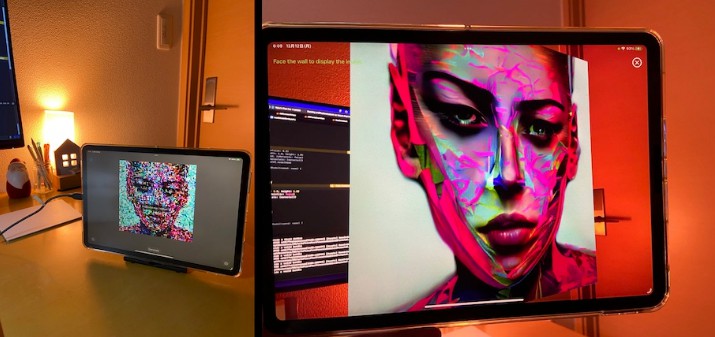
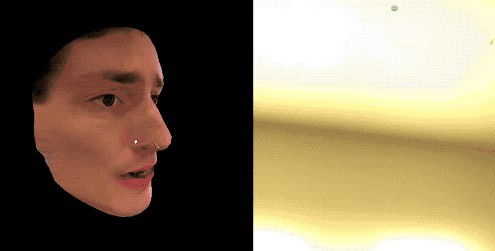
Sample iOS AR app that demonstrates how to capture the texture of a user’s face in realtime. This texture can be used to create a simple textured 3D face model.

Implementation
This demo app uses ARKit to generate a texture map for ARSCNFaceGeometry using images captured from the front facing camera. The texture map can then be applied back to a ARSCNFaceGeometry instance, creating a 3D, textured version of the user’s face.
Basic app structure
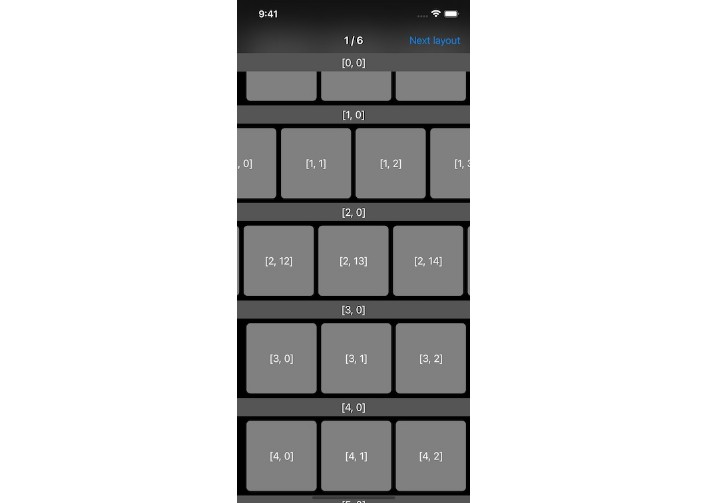
The app creates two SceneKit views: a primary AR scene that captures the user’s face and a secondary SCNView that displays the textured face model.
In this demo app, the primary scene is only used to collect face tracking data and to generate the face texture. It does not render anything directly.
The secondary scene is drawn in the top left corner of the screen. It shows a 3D model of the user’s face based on the current ARSCNFaceGeometry and the generated face texture. Tap and drag to rotate the model.
Note that this two scene setup is only for demonstration purposes. For most applications, you will likely want to use the captured face model within the same AR scene it was captured from.
Face texture generation
The key insight to generating the face texture is that we can render the face model in texture space. Then for each point on the face texture, we use its actual 3D position to compute where to sample from on the screen.
The main face texture generating logic is in two files:
-
FaceTextureGenerator.swift— The main class for generating face textures. This sets up a Metal render pipeline to generate the texture. -
faceTexture.metal— The vertex and fragment shaders used to generate the face texture. These operate in texture space.
This demo app simply takes the generated face texture and applies it back to the original face geometry.
Notes
This app is for demonstration purposes only and is not production quality. Here are a few quick notes about this sample’s limitations and some ideas for next steps:
Does this demo capture an accurate 3D model of the user’s face?
No. This demo uses a generic face model that only approximates the user’s face geometry.
Most of the “3D head scan” apps you in the App Store see instead use depth data to reconstruct a mesh of the user’s face. This can be more accurate, however it is considerably more difficult to implement. For many applications and prototypes, a simple textured model is all you need.
Why are there sometimes gaps in the face texture?
If you turn the left side of your face towards the device, the right side of your face is no longer visible so we can not generate a texture for it. When this happens, this demo app simply omits that part of the texture. This most commonly occurs with the sides of the face and the sides of the nose.
You can add post-processing to fill in these gaps. The simplest approach here is to cache the last known good texture values for each point on the face and fallback to the cache if that part of the face is no longer visible to the camera.
To increase the quality of generated texture, you’d likely also want to discard parts of the face that appear at a high angle relative to the camera. This low quality sampling is easily visible when viewing the sides of the face model while keeping your head looking straight ahead at the device.
Why is there distortion when I turn my head to the side?
This is due to a mismatch between the generic face model we use here and your face’s actual geometry. I find it most commonly happens around the nose as you turn your head left or right.
For a production app, you’d likely want to use the captured depth information to either adjust the sampling positions or to reconstruct a more accurate face mesh.
Can this technique be applied to things besides faces?
Yes! You can apply this same technique to any 3D object.
The most simple use case here is to create 3D models that perfectly align with real world objects, and then apply the technique from this sample app to generate textures them. However you can also achieve some neat effects by creating arbitrary 3D models and then capturing the world using them.
What if I just want a 2D image of the user’s face?
Although out of scope for this demo, here’s a basic sketch of how you might implement this:
-
Render the transformed
ARSCNFaceGeometryto a 1-bit buffer to create an image mask. Basically you just want places where the face model appears to be white, while everything else should be black. -
Apply the mask to the captured frame image.
There are probably fancier ways to do this with ML or something, but the above should get the job done.
Can I capture the user’s face while using world tracking?
As of iOS 14, Apple does not let you access image data from the front facing camera in world tracking AR configurations.
This would definitely be a helpful feature, so be sure to file a feature request with Apple.
Find this demo useful?
If this demo helped you create something cool, let me know!
You can also check out my AR apps in the App Store. Be sure to let others know about them too!