PassportScanner
Works with 2 and 3 line identity documents.


![]()
![]()
![]()
![]()
![]()
What is this
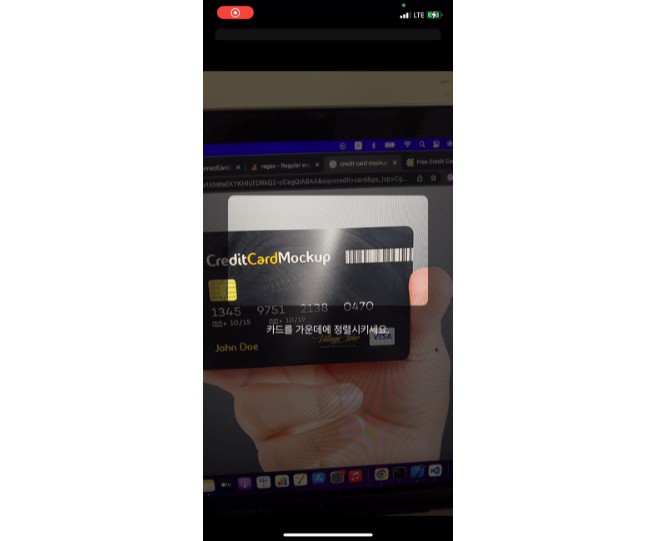
With PassportScanner you can use your camera to scan the MRZ code of a passport. It will extract all data like firstname, lastname, passport number, nationality, date of birth, expiration date and personal numer. Theres is Support for the TD1 and TD3 format (2 or 3 lines)
IMPORTANT NOTICE: SCANNING IDENTITY DOCUMENTS IS IN MOST CASES RESTRICTED BY LAW. OBSERVE THE APPLICABLE LAWS USING THIS TOOL. THE COPYRIGHT HOLDER IS NOT IN ANY WAY LIABLE FOR UNLAWFUL USAGE OF THIS TOOL.
PassportScanner is trying to optimize OCR results by first performing some graphic filters. The exposure filter is dynamic. This means that if the image is dark it tries to light it up and visa versa. As you can see in the demo animation below you will be able to scan a passport about once every 3 seconds.
wait a moment until the .gif below is downloaded...
Building the PassportScanner demo
The current version is tested with Xcode 11.3, Swift 5
-
Clone the repo to a working directory
-
CocoaPods is used to manage dependencies. Pods are setup easily and are distributed via a ruby gem. Follow the simple instructions on the website to setup. After setup, run the following command from the toplevel directory of PassportScanner to download the dependencies:
pod install
-
Open the
PassportScanner.xcworkspacein Xcode. -
Build and Run the app.
External components for the demo
PassportScanner is using the following components which can be installed using CocoaPods.
- TesseractOCRiOS Tesseract OCR iOS is a Framework for iOS7+.
- GPUImage An open source iOS framework for GPU-based image and video processing
- UIImage-Resize Category to add some resizing methods to the UIImage class, to resize it to a given CGSize — or fit in a CGSize keeping aspect ratio
Using PassportScanner in your own App
'PassportScanner' is now available through the dependency manager CocoaPods.
At this moment this can be installed by executing:
[sudo] gem install cocoapods
If you have installed cocoapods you can just add PassportScanner to your workspace by making sure the following lines are in your Podfile:
source 'https://github.com/CocoaPods/Specs.git'
platform :ios, '8.0'
use_frameworks!
pod "PassportScanner"
Add an import at the top of your swift file like this:
import PassportScanner
If you want support for older versions than iOS 8.0, then you can also just copy the Pod folder containing the 2 classes MRZ and PassportScannerController to your app. Also add the above mentioned external components to your podfile.
When PassportScanner is added to your project, then copy the PassportScanner view from the Main.storyboard of the demo app to your own storyboard. After that you can customize that view. Also copy the MyScanViewController.sift to your own project. See the ViewConroller.swift to see how you can initiate the view and get the MRZ data
also copy over the tessdata folder to our app. That folder contains the trained data for tesseract (The OCR engine)
Here is sample code for a PassportScannerController:
protocol ProcessMRZ {
    func processMRZ(mrz:MRZ)
}

class MyScanViewController: PassportScannerController {

    var delegate: ProcessMRZ?

    // the .StartScan and .EndScan are IBOutlets and can be linked to your own buttons

    // For now just start scanning the moment this view is loaded
    override func viewDidLoad() {
        super.viewDidLoad();
        self.debug = true // So that we can see what's going on (scan text and quality indicator)
        self.accuracy = 1  // 1 = all checksums should pass (is the default so we could skip this line)
        self.mrzType = .auto // Performs a little better when set to td1 or td3
        self.showPostProcessingFilters = true // Set this to true to to give you a good indication of the scan quality
        self.StartScan(self)
    }

    override func succesfullScan(mrz: MRZ) {
        print("mrz: {\(mrz.description)\n}")
        delegate?.processMRZ(mrz)
        self.dismissViewControllerAnimated(true, completion: nil)
    }

    override func abbortScan() {
        self.dismissViewControllerAnimated(true, completion: nil)
    }
}
Then in your own code you can access this PassportScannerController and process the MRZ data with something like this:
class ViewController: UIViewController, ProcessMRZ {

    @IBOutlet weak var mrzLabel: UILabel!

    override func supportedInterfaceOrientations() -> UIInterfaceOrientationMask {
        return UIInterfaceOrientationMask.Portrait
    }

    override func prefersStatusBarHidden() -> Bool {
        return true
    }

    @IBAction func StartScan(sender: AnyObject) {
        let storyboard: UIStoryboard = UIStoryboard(name: "Main", bundle: nil)
        let scanVC: MyScanViewController = storyboard.instantiateViewControllerWithIdentifier("PassportScanner") as! MyScanViewController
        scanVC.delegate = self
        self.presentViewController(scanVC, animated: true, completion: nil)
    }

    func processMRZ(mrz:MRZ) {
        self.mrzLabel.text = mrz.description
        mrzLabel.sizeToFit()
    }
}
License
PassportScanner is available under the MIT 3 license. See the LICENSE file for more info.
My other libraries:
Also see my other open source iOS libraries:
- EVReflection - Reflection based (Dictionary, CKRecord, JSON and XML) object mapping with extensions for Alamofire and Moya with RxSwift or ReactiveSwift
- EVCloudKitDao - Simplified access to Apple's CloudKit
- EVFaceTracker - Calculate the distance and angle of your device with regards to your face in order to simulate a 3D effect
- EVURLCache - a NSURLCache subclass for handling all web requests that use NSURLReques
- AlamofireOauth2 - A swift implementation of OAuth2 using Alamofire
- EVWordPressAPI - Swift Implementation of the WordPress (Jetpack) API using AlamofireOauth2, AlomofireJsonToObjects and EVReflection (work in progress)
- PassportScanner - Scan the MRZ code of a passport and extract the firstname, lastname, passport number, nationality, date of birth, expiration date and personal numer.
- AttributedTextView - Easiest way to create an attributed UITextView with support for multiple links (url, hashtags, mentions).