CalendarView
This is an implementation of a calendar component for iOS written in Swift 4.0. It features both vertical and horizontal layout (and scrolling) and the display of native calendar events.

Requirements
- iOS 8.0+
- XCode 9.0+
- Swift 4.2
Installation
CocoaPods
pod 'KDCalendar', '~> 1.6.5'
Carthage
Add this to your Cartfile, and then run carthage update:
github "mmick66/CalendarView" "master"
Manual
The files needed to be included are in the CalendarView subfolder of this project.
Setup
The calendar is a UIView and can be added either programmatically or via a XIB/Storyboard. If doing the latter, make sure that the Module is selected to be KDCalendar.

It needs a delegate and data source that comply with:
protocol CalendarViewDataSource {
    func startDate() -> NSDate // UTC Date
    func endDate() -> NSDate   // UTC Date
}
protocol CalendarViewDelegate {
    func calendar(_ calendar : CalendarView, canSelectDate date : Date) -> Bool /* optional */
    func calendar(_ calendar : CalendarView, didScrollToMonth date : Date) -> Void
    func calendar(_ calendar : CalendarView, didSelectDate date : Date, withEvents events: [CalendarEvent]) -> Void
    func calendar(_ calendar : CalendarView, didDeselectDate date : Date) -> Void /* optional */
    func calendar(_ calendar : CalendarView, didLongPressDate date : Date) -> Void /* optional */
}
The data source will provide the start date and the end date of the calendar. The methods have a default implementation that will return Date() resulting in a single-page calendar displaying the current month.
The delegate responds to events such as scrolling and the selection of specific dates.
Note: The dates should be in UTC (same as GMT)
How to Use
You would want to implement the delegate functions inside your view controller as they appear in the example project.
Say you want to be able to scroll 3 months into the past, then:
func startDate() -> Date {
    var dateComponents = DateComponents()
    dateComponents.month = -3
    let today = Date()
    let threeMonthsAgo = self.calendarView.calendar.date(byAdding: dateComponents, to: today)
    return threeMonthsAgo
}
You probably still want the calendar to open in today's date, so in this case do:
override func viewDidAppear(_ animated: Bool) {
    super.viewDidAppear(animated)
    let today = Date()
    self.calendarView.setDisplayDate(today, animated: false)
}
Say you want tomorrow to be selected for some reason:
// can be in the viewDidAppear
let today = Date()
if let tomorrow = self.calendarView.calendar.date(byAdding: tomorrowComponents, to: today) {
  self.calendarView.selectDate(tomorrow)
}
Selecting and Deselecting Dates
The calendar supports the selection of multiple dates. You can select a date either by clicking on a cell or by selecting it programmatically as:
self.calendarView.selectDate(date)
Similarly you can deselect:
self.calendarView.deselectDate(date)
You can get all the dates that were selected, either manually or programatically using:
self.calendarView.selectedDates
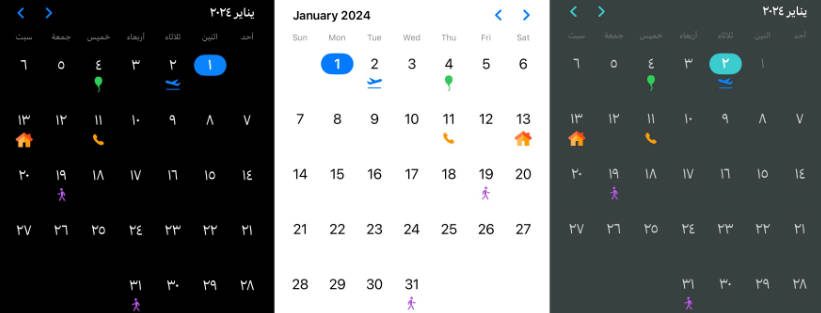
Layout
The calendar supports two basic layouts. Set the direction property to .horizontal or .vertical:
calendarView.direction = .horizontal
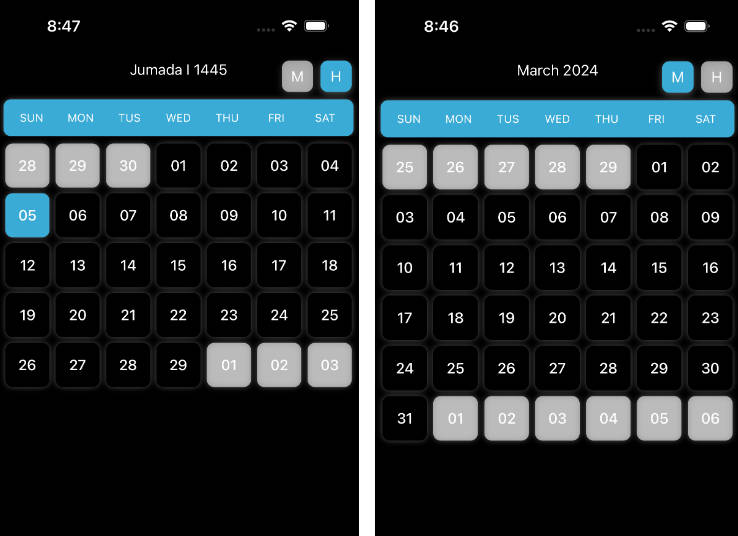
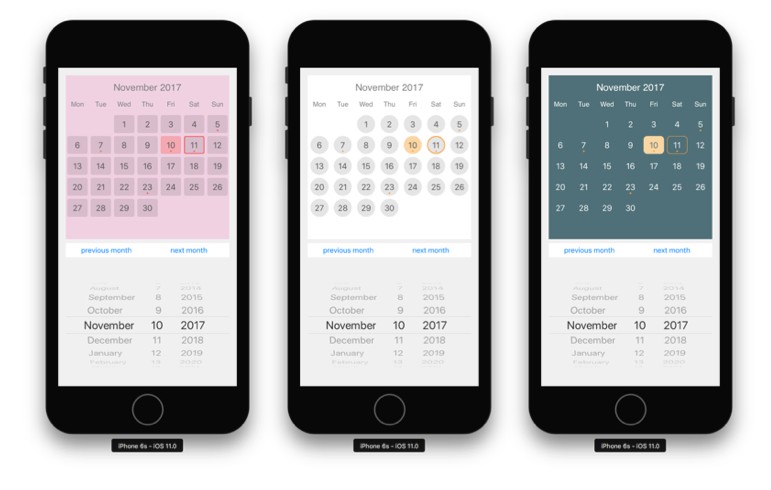
Styling
The look of this calendar component is based on a small set of static variables defined in the CalendarView+Style.swift file and in the CalanderView.Style structure. Set values for these variables anywhere in your code, before the CalendarView gets rendered on screen, for example on the viewDidLoad() of the controller that owns it. One of the styles seen above is defined like so:
override func viewDidLoad() {

    super.viewDidLoad()

    CalendarView.Style.cellShape                = .bevel(8.0)
    CalendarView.Style.cellColorDefault         = UIColor.clear
    CalendarView.Style.cellColorToday           = UIColor(red:1.00, green:0.84, blue:0.64, alpha:1.00)
    CalendarView.Style.cellSelectedBorderColor  = UIColor(red:1.00, green:0.63, blue:0.24, alpha:1.00)
    CalendarView.Style.cellEventColor           = UIColor(red:1.00, green:0.63, blue:0.24, alpha:1.00)
    CalendarView.Style.headerTextColor          = UIColor.white
    CalendarView.Style.cellTextColorDefault     = UIColor.white
    CalendarView.Style.cellTextColorToday       = UIColor(red:0.31, green:0.44, blue:0.47, alpha:1.00)

    // complete init
}
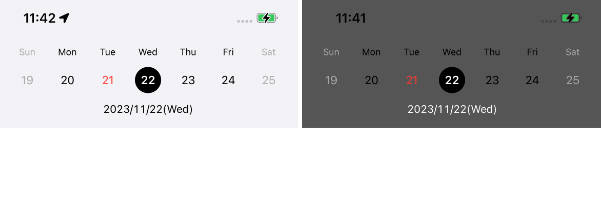
Marking Weekends
Some calendars will want to display weekends as special and mark them with a different text color. To do that, first set the marksWeekends variable on the calendarView itself and (optionally) define the color to use.
CalendarView.Style.cellTextColorWeekend = UIColor.red
calendarView.marksWeekends = true

The CellShape will define whether the dates are displayed in a circle or square with bevel or not.
First Day of the Week
Depending on the culture weeks are considered to start either on a Monday or on a Sunday. To change the way the days are displayed use:
CalendarView.Style.firstWeekday = .sunday

The calendar defaults to Monday which is standard in Europe.
Events
This component has the ability to sync events from the system's EKEventStore which is common with the native calendar provided in iOS.
Loading Events
To load events from the system's calendar call the followint method:
self.calendarView.loadEvents()
Optionally, a complete handler can be added in case an error is returned
self.calendarView.loadEvents() { error in
    if error != nil {
        // handle error
    }
}
The code will pop up an alert view to ask the user if he will allow this app to access the calendar. If access is granted we can pass the events to the CalendarView, otherwise we get a nil and notify the app about the denial.
Creating (Adding) New Events
There is a function that allows you to add a new event in the calendar. It is currently restrictred to a single day (like the rest of the calendar)
func addEvent(_ title: String, date: Date, duration hours: NSInteger = 1) -> Bool
To detect when the user wants to add a new date, the delegate can implement the didLongPressDate method will notify the controller for a long press and the addEvent function is usually used in conjuction with this delegate method.
Currently, the example implementation of this repo will open an alert view that will prompt the user for a title to the event and set it for the duration of an hour. Custom controls could be added to further refine the selection.
As with the loading of the events we need to give persmissions to the app.