SwiftUI Notification Banner (v0.1)
Features
Finally a native SwiftUI notification banner package! With SwiftUI Notification Banner it is super-easy to display in-app notifications.
- Attach a notificationBanner-modifier to the top view in your view hierarchy to make sure it will always appear on top
- The notificationView closure is agnostic to what kind of View you pass in – you can use the default DYNotificationView or simply create your own banner view!
- Check out the code example below and the example project included in this package for more details.
Installation
Simply copy the github link of this project into the Swift Package Manager and install it. Don’t forget to add the library to your target. To use the notificationBanner-modifier and DYNotificationHandler, import SwiftUI_NotificationBanner.
Code Example
Basics
As shown below in the code example DYNotificationView can be modified easily by applying multiple modifiers. Here is a complete list including the given default values:
- text(titleFont: Font = .headline, messageFont: Font = .body, color: Color = .primary)
- image(maxHeight: CGFloat? = 40, maxWidth: CGFloat? = 40, contentMode: ContentMode = .fit, renderingMode: Image.TemplateRenderingMode = .template, color: Color? = .primary)
- backgroundGradientForNotificationType(info: LinearGradient = LinearGradient(colors: [.blue], startPoint: .top, endPoint: .bottom), success: LinearGradient = LinearGradient(colors: [.green], startPoint: .top, endPoint: .bottom), warning: LinearGradient = LinearGradient(colors: [.yellow], startPoint: .top, endPoint: .bottom), error: LinearGradient = LinearGradient(colors: [.red], startPoint: .top, endPoint: .bottom))
- cornerRadius(_ radius: CGFloat = 0)
- dropShadow(color: Color = .clear, radius: CGFloat = 5, x: CGFloat = 0, y: CGFloat = 5)
import SwiftUI
import SwiftUI_NotificationBanner

struct RootView: View {
    @EnvironmentObject var notificationHandler: DYNotificationHandler
    @Environment(\.colorScheme) var colorScheme

    var body: some View {
        // your root view content
          .notificationBanner(handler: notificationHandler, notificationView: {notification in

              DYNotificationView(notification: notification, frameWidth: min(450, UIScreen.main.bounds.size.width))
                  .text(color: notification.type == .info || notification.type == .error ? .white : .primary)
                  .image(color: notification.type == .info || notification.type == .error ? .white : .primary)
//                  .backgroundGradientForNotificationType(success: LinearGradient(colors: [.green.opacity(0.4), .green], startPoint: .leading, endPoint: .trailing), error: LinearGradient(colors: [.red, .red.opacity(0.3)], startPoint: .top, endPoint: .bottom))
                  .dropShadow(color: self.colorScheme == .light ? .gray.opacity(0.4) : .clear, radius: 5, x: 0, y: notification.displayEdge == .top ? 5 : -5)
                  .cornerRadius(self.cornerRadius)

          })

    }


    var cornerRadius: CGFloat {
        guard UIDevice.current.userInterfaceIdiom == .phone else {
            return 10
        }
        return UIScreen.main.bounds.width <  UIScreen.main.bounds.height ? 0 : 10
    }
}
How to launch a notification banner? Pass the notification handler (DYNotificationHandler) as EnvironmentObject to your sub-views. Wherever a notification should be displayed, call the notification handler’s show function:
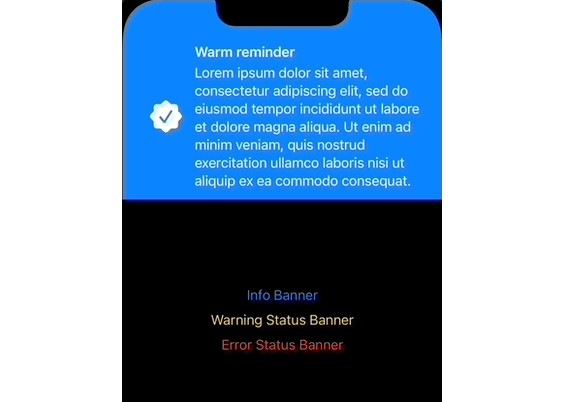
notificationHandler.show(notification: DYNotification(title: "Warm reminder",
message: "Lorem ipsum dolor sit amet, consectetur adipiscing elit, sed do eiusmod tempor incididunt ut labore et dolore magna aliqua. Ut enim ad minim veniam, quis nostrud exercitation ullamco laboris nisi ut aliquip ex ea commodo consequat.",
image: Image(systemName: "checkmark.seal.fill"),
 type: .info, displayDuration: 3,
 dismissOnTap: true,
 hapticFeedbackType: .success,
 tapHandler: {
      print("info banner tapped")
}))
The title and image parameters are optionals – which means that you can create a simple status bar notification banner without a title or image.
Check out the included example project for details.
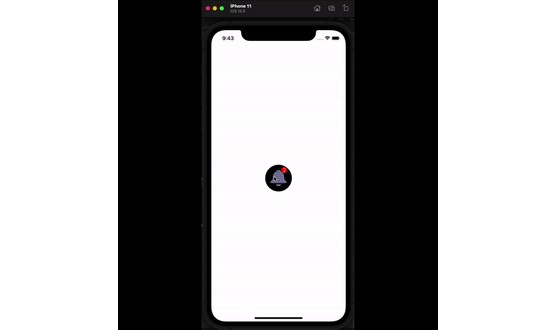
Advanced Implementation: the Sheet-Problem
But wait a minute, you might object: The gif above shows that the notification banner is displayed above a sheet, however, that is impossible because SwiftUI sheets as well fullScreenCovers are always presented as topmost views! So is this some kind of black magic?
The sad truth is that with just one app window, a sheet and full screen cover will indeed always be shown on top, so unfortunately, any notification banner will be covered without mercy…
However, there is a clever solution – we just create another app window above the main app window and attach the notificationBanner to the root view of that second window. You can find the details of that solution here. Thanks to Federico Zanetello for this great article!
In the example project that is included in this package, I have adapted this solution to displaying notification banners – simply open the example project and copy the necessary code lines into your project.
Change log
Version 0.1.1
Updated dropShadow modifier function and added documentation.
Version 0.1
Initial public release.
Author
License
SwiftUI NotificationBanner is available under the MIT license. See the LICENSE file for more info.