SwiftMessages
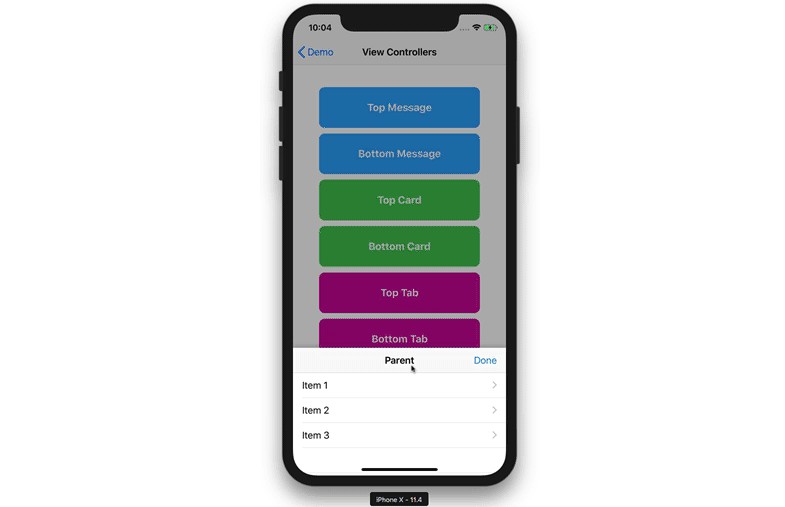
SwiftMessages can now present view controllers using the SwiftMessagesSegue custom modal segue!
SwiftMessagesSegue is a subclass of UIStoryboardSegue that integrates directly into Interface Builder as a custom modal segue, enabling view controllers to take advantage of SwiftMessages layouts, animations and more. SwiftMessagesSegue works with any UIKIt project — storyboards are not required. Refer to the View Controllers readme below for more information.

And check out our blog post Elegant Custom UIViewController Transitioning to learn a great technique you can use to build your own custom segues that utilize UIViewControllerTransitioningDelegate and UIViewControllerAnimatedTransitioning.
Overview
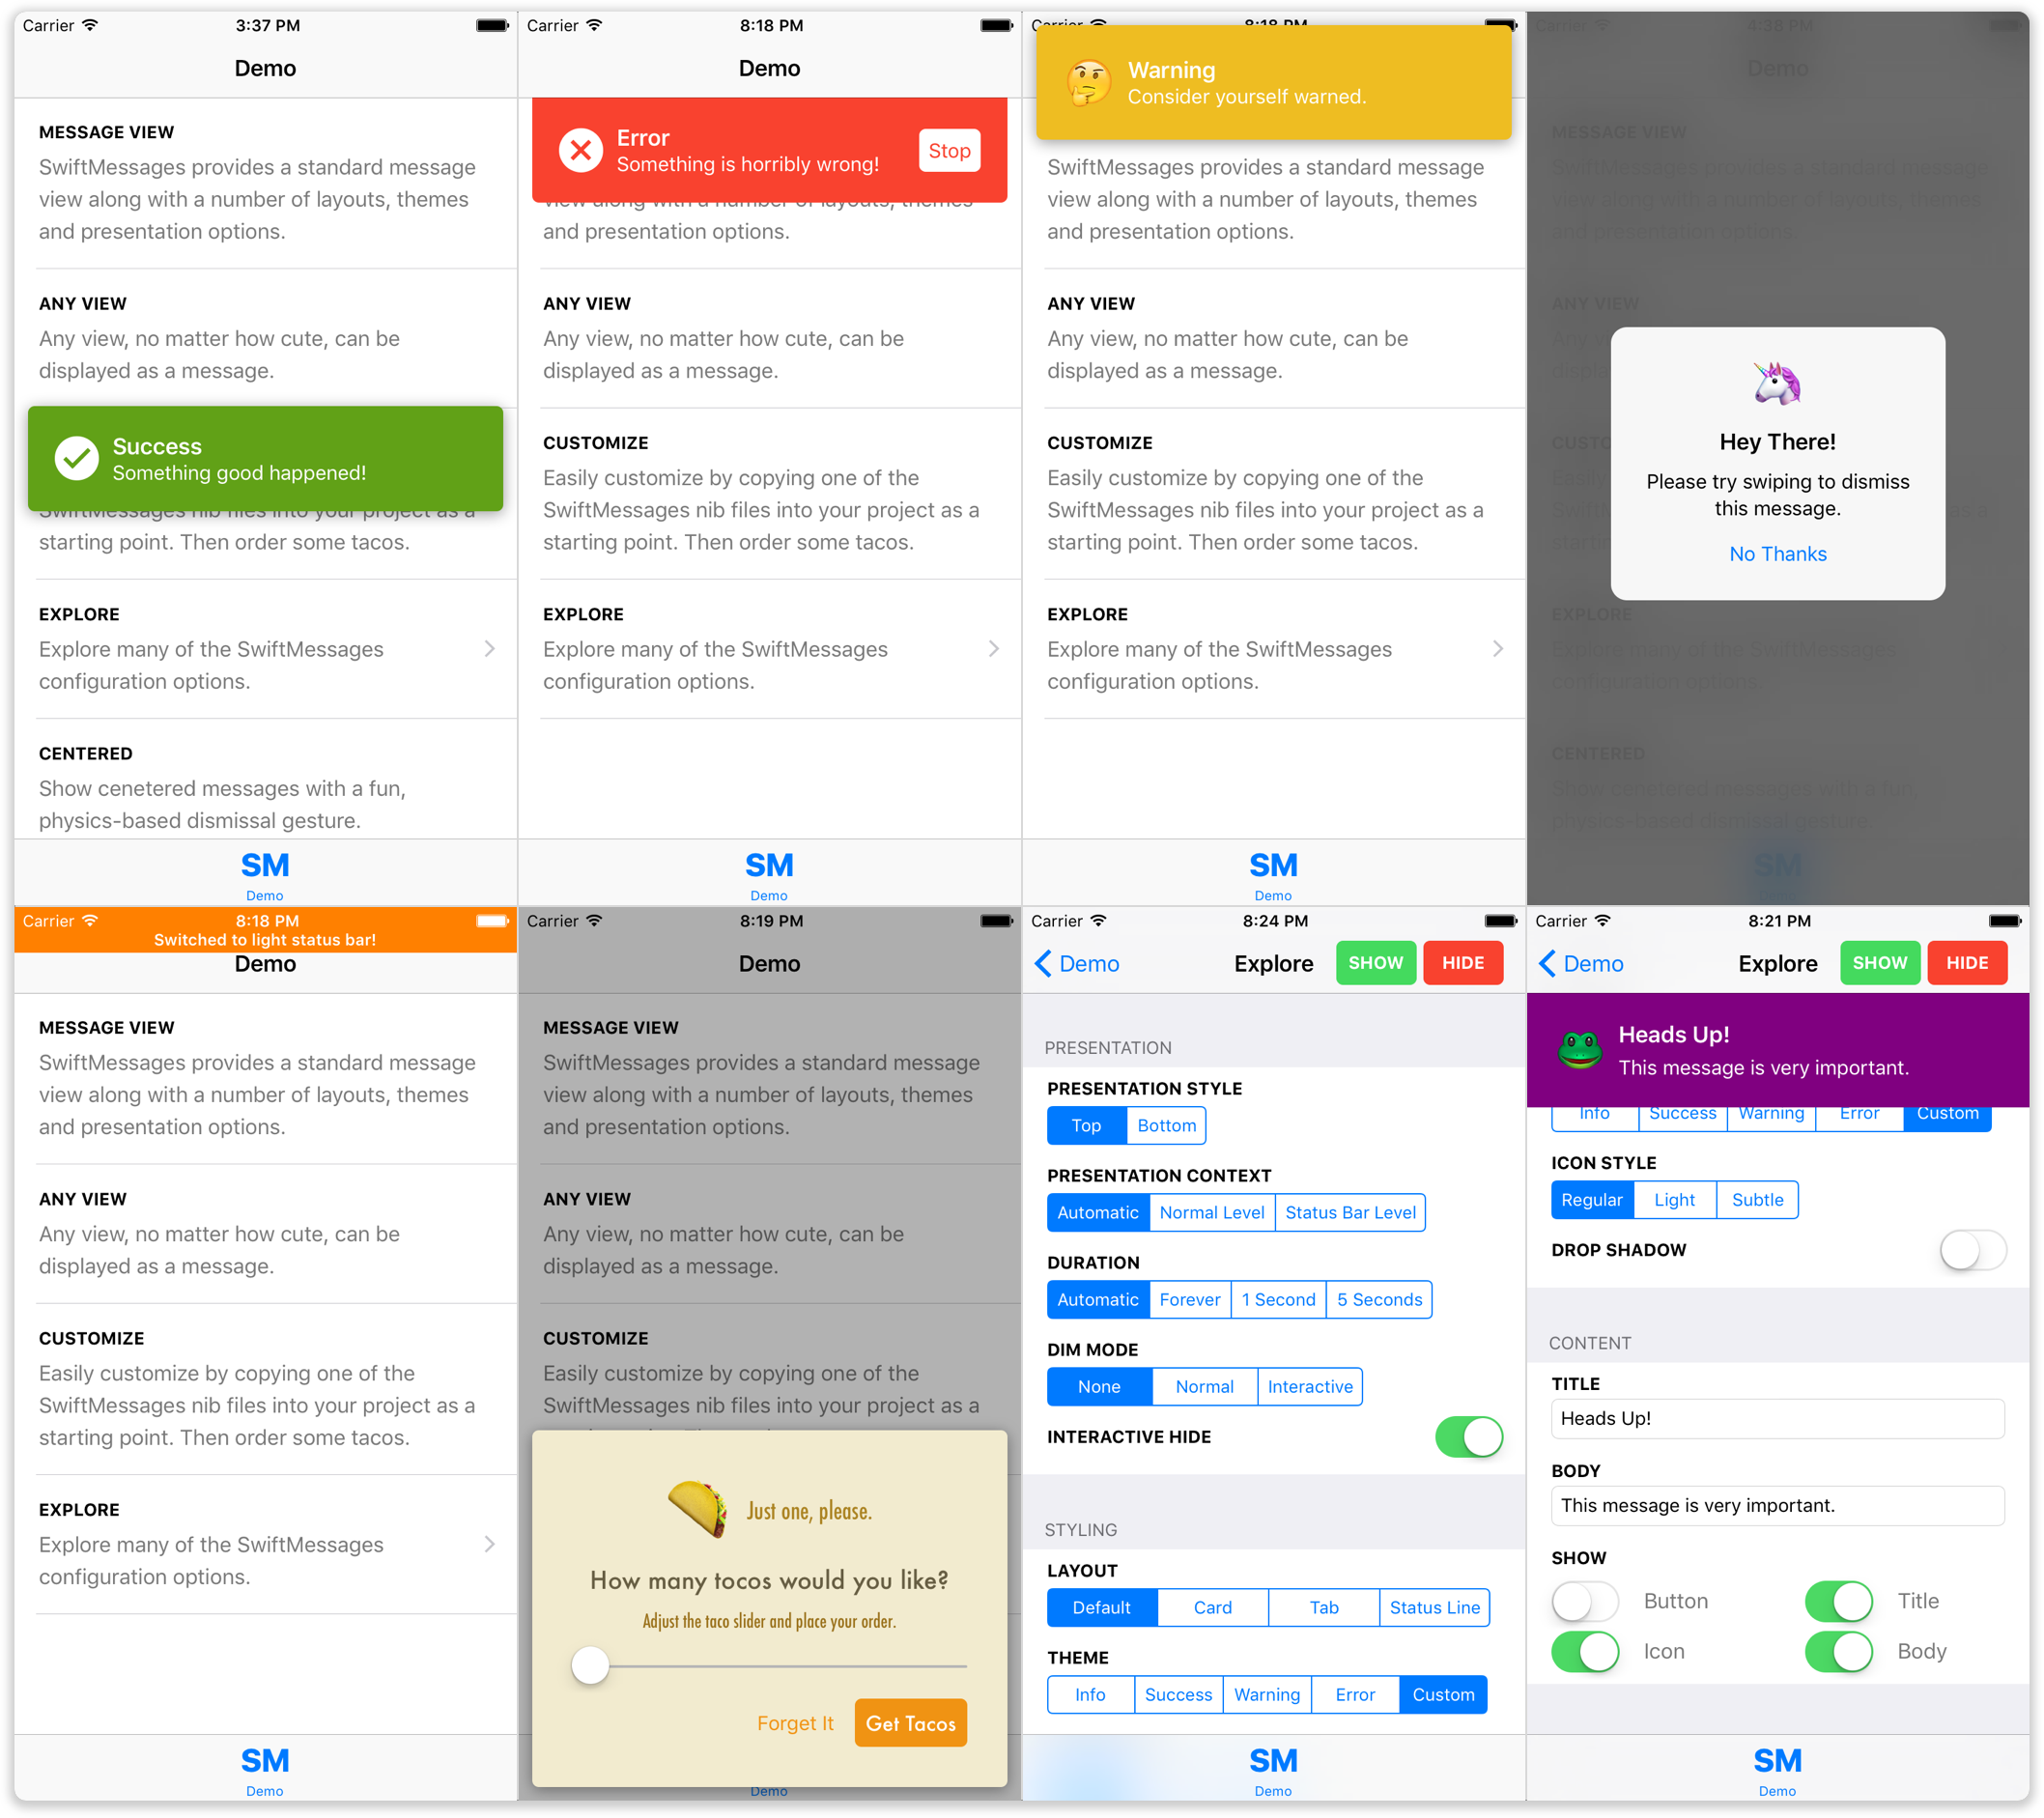
SwiftMessages is a very flexible view and view controller presentation library for iOS.
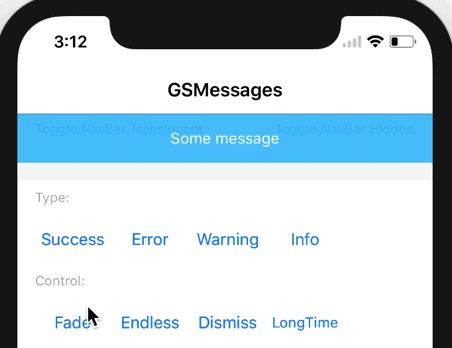
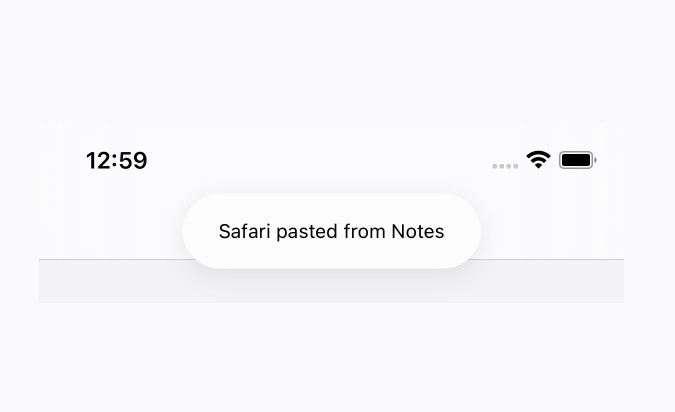
Message views and view controllers can be displayed at the top, bottom, or center of the screen, over or under the status bar, or behind navigation bars and tab bars. There are interactive dismiss gestures including a fun, physics-based one. Multiple background dimming modes. And a lot more!
In addition to the numerous configuration options, SwiftMessages provides several good-looking layouts and themes. But SwiftMessages is also designer-friendly, which means you can fully and easily customize the view:
- Copy one of the included nib files into your project and change it.
- Subclass
MessageViewand add elements, etc. - Or just supply an arbitrary instance of
UIView.
Try exploring the demo app via appetize.io to get a feel for the extensive configurability of SwiftMessages.
Installation
CocoaPods
Add the following line to your Podfile:
pod 'SwiftMessages'
Carthage
Add the following line to your Cartfile:
github "SwiftKickMobile/SwiftMessages"
Manual
- Put SwiftMessages repo somewhere in your project directory.
- In Xcode, add
SwiftMessages.xcodeprojto your project. - On your app's target, add the SwiftMessages framework:
- as an embedded binary on the General tab.
- as a target dependency on the Build Phases tab.
Usage
Basics
SwiftMessages.show(view: myView)
Although you can show any instance of UIView, SwiftMessages provides a MessageView class
and assortment of nib-based layouts that should handle most cases:
// Instantiate a message view from the provided card view layout. SwiftMessages searches for nib
// files in the main bundle first, so you can easily copy them into your project and make changes.
let view = MessageView.viewFromNib(layout: .cardView)

// Theme message elements with the warning style.
view.configureTheme(.warning)

// Add a drop shadow.
view.configureDropShadow()

// Set message title, body, and icon. Here, we're overriding the default warning
// image with an emoji character.
let iconText = ["?", "?", "?", "?"].sm_random()!
view.configureContent(title: "Warning", body: "Consider yourself warned.", iconText: iconText)

// Increase the external margin around the card. In general, the effect of this setting
// depends on how the given layout is constrained to the layout margins.
view.layoutMarginAdditions = UIEdgeInsets(top: 20, left: 20, bottom: 20, right: 20)

// Reduce the corner radius (applicable to layouts featuring rounded corners).
(view.backgroundView as? CornerRoundingView)?.cornerRadius = 10

// Show the message.
SwiftMessages.show(view: view)
You may wish to use the view provider variant show(viewProvider:) to ensure that
your UIKit code is executed on the main queue:
SwiftMessages.show {
    let view = MessageView.viewFromNib(layout: .cardView)
    // ... configure the view
    return view
}
The SwiftMessages.Config struct provides numerous configuration options that can be passed to show():
var config = SwiftMessages.Config()

// Slide up from the bottom.
config.presentationStyle = .bottom

// Display in a window at the specified window level: UIWindowLevelStatusBar
// displays over the status bar while UIWindowLevelNormal displays under.
config.presentationContext = .window(windowLevel: UIWindowLevelStatusBar)

// Disable the default auto-hiding behavior.
config.duration = .forever

// Dim the background like a popover view. Hide when the background is tapped.
config.dimMode = .gray(interactive: true)

// Disable the interactive pan-to-hide gesture.
config.interactiveHide = false

// Specify a status bar style to if the message is displayed directly under the status bar.
config.preferredStatusBarStyle = .lightContent

// Specify one or more event listeners to respond to show and hide events.
config.eventListeners.append() { event in
    if case .didHide = event { print("yep") }
}

SwiftMessages.show(config: config, view: view)
Specify default configuration options:
SwiftMessages.defaultConfig.presentationStyle = .bottom

// Show message with default config.
SwiftMessages.show(view: view)

// Customize config using the default as a base.
var config = SwiftMessages.defaultConfig
config.duration = .forever
SwiftMessages.show(config: config, view: view)
Accessibility
SwiftMessages provides excellent VoiceOver support out-of-the-box.
-
The title and body of the message are combined into a single announcement when the message is shown. The
MessageView.accessibilityPrefixproperty can be set to prepend additional clarifying text to the announcement.Sometimes, a message may contain important visual cues that aren't captured in the title or body. For example, a message may rely on a yellow background to convey a warning rather than having the word "warning" in the title or body. In this case, it might be helpful to set
MessageView.accessibilityPrefix = "warning". -
If the message is shown with a dim view using
config.dimMode, elements below the dim view are not focusable until the message is hidden. Ifconfig.dimMode.interactive == true, the dim view itself will be focusable and read out "dismiss" followed by "button". The former text can be customized by setting theconfig.dimModeAccessibilityLabelproperty.
See the AccessibleMessage protocol for implementing proper accessibility support in custom views.
Message Queueing
You can call SwiftMessages.show() as many times as you like. SwiftMessages maintains a queue and shows messages one at a time. If your view implements the Identifiable protocol (like MessageView), duplicate messages will be removed automatically. The pause between messages can be adjusted:
SwiftMessages.pauseBetweenMessages = 1.0
There are a few ways to hide messages programatically:
// Hide the current message.
SwiftMessages.hide()

// Or hide the current message and clear the queue.
SwiftMessages.hideAll()

// Or for a view that implements `Identifiable`:
SwiftMessages.hide(id: someId)

// Or hide when the number of calls to show() and hideCounted(id:) for a
// given message ID are equal. This can be useful for messages that may be
// shown from  multiple code paths to ensure that all paths are ready to hide.
SwiftMessages.hideCounted(id: someId)
Multiple instances of SwiftMessages can be used to show more than one message at a time. Note that the static SwiftMessages.show() and other static APIs on SwiftMessage are just convenience wrappers around the shared instance SwiftMessages.sharedInstance). Instances must be retained, thus it should be a property of something (e.g. your view controller):
class SomeViewController: UIViewController {
    let otherMessages = SwiftMessages()

    func someMethod() {
        SwiftMessages.show(...)
        otherMessages.show(...)
    }
}
Retrieving Messages
There are several APIs available for retrieving messages that are currently being shown, hidden, or queued to be shown. These APIs are useful for updating messages
when some event happens without needing to keep temporary references around.
See also eventListeners.
// Get a message view with the given ID if it is currently
// being shown or hidden.
if let view = SwiftMessages.current(id: "some id") { ... }

// Get a message view with the given ID if is it currently
// queued to be shown.
if let view = SwiftMessages.queued(id: "some id") { ... }

// Get a message view with the given ID if it is currently being
// shown, hidden or in the queue to be shown.
if let view = SwiftMessages.currentOrQueued(id: "some id") { ... }
Customization
SwiftMessages can display any UIView. However, there are varying degrees of customization that can be done to the bundled views.
Nib Files
All of the message designs bundled with SwiftMessages have associated nib files. You are encouraged to copy any of these nib files into your project and modify them to suit your needs. SwiftMessages will load your copy of the file instead of the original. Nib files may be copied in Xcode using drag-and-drop.
To facilitate the use of nib-based layouts, MessageView provides some type-safe convenience methods for loading the bundled nibs:
let view = MessageView.viewFromNib(layout: .cardView)
In addition, the SwiftMessages class provides some generic loading methods:
// Instantiate MessageView from a named nib.
let view: MessageView = try! SwiftMessages.viewFromNib(named: "MyCustomNib")

// Instantiate MyCustomView from a nib named MyCustomView.nib.
let view: MyCustomView = try! SwiftMessages.viewFromNib()
MessageView
MessageView is a light-weight view that all of the bundled designs use. It primarily consists of the following optional @IBOutlet properties:
| Element | Declaration | Description |
|---|---|---|
| Title | titleLabel: UILabel? |
The message title. |
| Message body | bodyLabel: UILabel? |
The body of the message. |
| Image icon | iconImageView: UIImageView? |
An image-based icon. |
| Text icon | iconLabel: UILabel? |
A text-based (emoji) alternative to the image icon. |
| Button | button: UIButton? |
An action button. |
The SwiftMessages nib file use MessageView as the top-level view with content connected to these outlets. The layouts are done using stack views, which means that you can remove an element by simply hiding it:
view.titleLabel.isHidden = true
A common mistake is attempting to remove an element by setting the corresponding outlet to nil. This does not work because it does not remove the element from the view hierarchy.
Configuration
MessageView provides numerous methods that follow the configure* naming convention:
view.configureTheme(.warning)
view.configureContent(title: "Warning", body: "Consider yourself warned.", iconText: "?")
All of these methods are shortcuts for quickly configuring the underlying view properties. SwiftMessages strives to avoid doing any internal magic in these methods, so you do not need to call them. You can configure the view properties directly or combine the two approaches.
Interaction
MessageView provides an optional block-based tap handler for the button and another for the view itself:
// Hide when button tapped
messageView.buttonTapHandler = { _ in SwiftMessages.hide() }

// Hide when message view tapped
messageView.tapHandler = { _ in SwiftMessages.hide() }
Extending
The suggested method for starting with MessageView as a base and adding new elements, such as additional buttons, is as follows:
- Copy one of the bundled nib files into your project or create a new one from scratch.
- Add new elements to the nib file.
- Sublcass
MessageViewand create outlets for the new elements. - Assign the top-level view in the nib file to the subclass.
- Connect outlets between the nib file and the subclass.
- (recommended) override the implementation of
Identifiableas needed to incorporate new elements into the message's identity. - (recommended) override the implementation of
AccessibleMessageas needed to incorporate new elements into Voice Over. - Use one of the nib-loading methods above to load the view.