CameraEngine


THIS REPOSITORY REFACTORED FROM ( https://github.com/remirobert/CameraEngine ) Speacial thanks for Remi ROBERT
Example
To run the example project, clone the repo, and run pod install from the Example directory first.
Requirements
Installation
CameraEngine is available through CocoaPods. To install
it, simply add the following line to your Podfile:
pod 'CameraEngine'
Author
Remi ROBERT,
winlentia
License
CameraEngine is available under the MIT license. See the LICENSE file for more info.
Original Repository ReadMe.md

? The most advanced Camera framework in Swift ?


CameraEngine is an iOS camera engine library that allows easy integration of special capture features and camera customization in your iOS app.

? Features
| CameraEngine | |
|---|---|
| ☺️ | Support iOS8 – iOS9 |
| ? | Support orientation device |
| ? | Fast capture |
| ? | Photo capture |
| ? | Video capture |
| ? | quality settings presset video / photo capture |
| ? | switch device (front, back) |
| ? | flash mode management |
| ? | torch mode management |
| ? | focus mode management |
| detection face, barecode, and qrcode | |
| ? | GIF encoder |
? Installation
CocoaPods
- Add
pod "CameraEngine"to your Podfile. - Run
pod installorpod update. - import CameraEngine
Carthage
- Add
github "remirobert/CameraEngine"to your Cartfile. - Run
carthage updateand add the framework to your project. - import CameraEngine
Manually
- Download all the files in the CameraEngine subdirectory.
- Add the source files to your Xcode project.
- import CameraEngine
To add the Framework, you can also create a workspace for your project, then add the CameraEngine.xcodeproj, and the CameraEngine, then you should be able to compile the framework, and import it in your app project.
CameraEngine supports swift3, see the development branch for a swift 3 integration.
? Quick start
First let’s init and start the camera session. You can call that in viewDidLoad, or in appDelegate.
override func viewDidLoad() {
  super.viewDidLoad()
  self.cameraEngine.startSession()
}
Next time to display the preview layer
override func viewDidLayoutSubviews() {
  let layer = self.cameraEngine.previewLayer

  layer.frame = self.view.bounds
  self.view.layer.insertSublayer(layer, atIndex: 0)
  self.view.layer.masksToBounds = true
}
Capture a photo
self.cameraEngine.capturePhoto { (image: UIImage?, error: NSError?) -> (Void) in
  //get the picture tooked in the ? image
}
Capture a video
private func startRecording() {
  guard let url = CameraEngineFileManager.documentPath("video.mp4") else {
    return
  }

  self.cameraEngine.startRecordingVideo(url, blockCompletion: { (url, error) -> (Void) in
  })
}

private func stopRecording() {
  self.cameraEngine.stopRecordingVideo()
}
Generate animated image GIF
guard let url = CameraEngineFileManager.documentPath("animated.gif") else {
  return
}
self.cameraEngine.createGif(url, frames: self.frames, delayTime: 0.1, completionGif: { (success, url) -> (Void) in
  //Do some crazy stuff here
})
? configurations
CameraEngine, allows you to set some parameters, such as management of flash, torch and focus. But also on the quality of the media, which also has an impact on the size of the output file.
Flash
self.cameraEngine.flashMode = .On
self.cameraEngine.flashMode = .Off
self.cameraEngine.flashMode = .Auto
Torch
self.cameraEngine.torchMode = .On
self.cameraEngine.torchMode = .Off
self.cameraEngine.torchMode = .Auto
Focus
| CameraEngine focus
————————–|————————————————————
.Locked | means the lens is at a fixed position
.AutoFocus | means setting this will cause the camera to focus once automatically, and then return back to Locked
.ContinuousAutoFocus | means the camera will automatically refocus on the center of the frame when the scene changes
self.cameraEngine.cameraFocus = .Locked
self.cameraEngine.cameraFocus = .AutoFocus
self.cameraEngine.cameraFocus = .ContinuousAutoFocus
Camera presset Photo
self.cameraEngine.sessionPresset = .Low
self.cameraEngine.sessionPresset = .Medium
self.cameraEngine.sessionPresset = .High
...
Camera presset Video
self.cameraEngine.videoEncoderPresset = .Preset640x480
self.cameraEngine.videoEncoderPresset = .Preset960x540
self.cameraEngine.videoEncoderPresset = .Preset1280x720
self.cameraEngine.videoEncoderPresset = .Preset1920x1080
self.cameraEngine.videoEncoderPresset = .Preset3840x2160
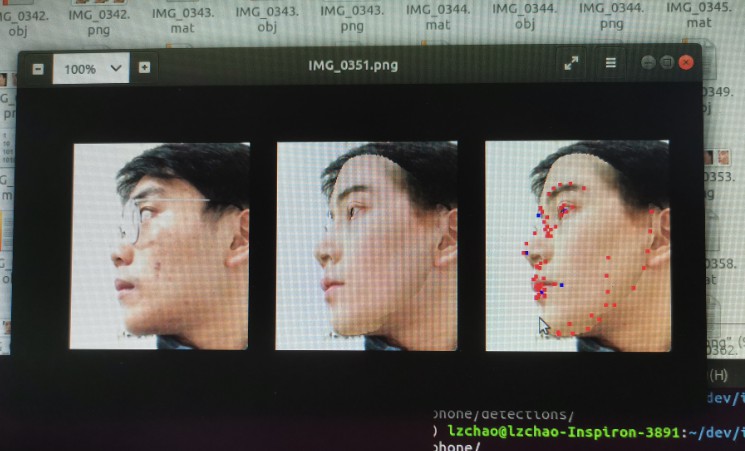
? Object detection
CameraEngine can detect faces, QRcodes, or barcode. It will return all metadata on each frame, when it detects something. To exploit you whenever you want later.
Set the detection mode
self.cameraEngine.metadataDetection = .Face
self.cameraEngine.metadataDetection = .QRCode
self.cameraEngine.metadataDetection = .BareCode
self.cameraEngine.metadataDetection = .None //disable the detection
exploiting face detection
self.cameraEngine.blockCompletionFaceDetection = { faceObject in
  let frameFace = (faceObject as AVMetadataObject).bounds
  self.displayLayerDetection(frame: frameFace)
}
exploiting code detection (barecode and QRCode)
self.cameraEngine.blockCompletionCodeDetection = { codeObject in
  let valueCode = codeObject.stringValue
  let frameCode = (codeObject as AVMetadataObject).bounds
  self.displayLayerDetection(frame: frameCode)
}
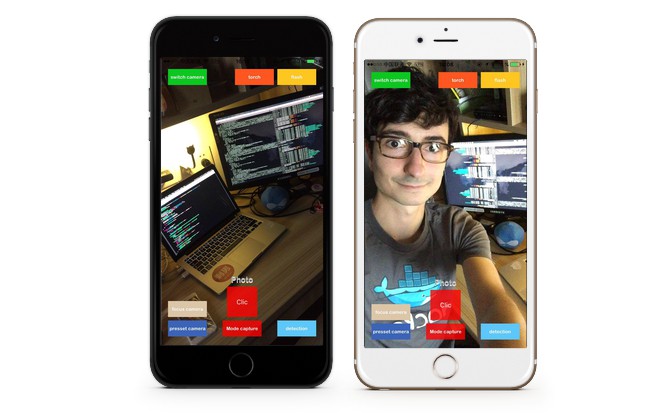
?? Example
You will find a sample project, which implements all the features of CameraEngine, with an interface that allows you to test and play with the settings.
To run the example projet, run pod install, because it uses the current prod version of CameraEngine.

Contributors ?
License
This project is licensed under the terms of the MIT license. See the LICENSE file.
This project is in no way affiliated with Apple Inc. This project is open source under the MIT license, which means you have full access to the source code and can modify it to fit your own needs.
If you want to support the development of this library, feel free to