VideoLab
High-performance and flexible video editing and effects framework, based on AVFoundation and Metal.
Framework design and implementation
Features
- High-performance real-time video editing and exporting.
- Highly free combination of video, image, audio.
- Support audio pitch setting and volume adjustment.
- Support CALayer vector animations, so complex text animations are supported.
- Support keyframe animation.
- Support After Effect-like pre-compose.
- Support transitions.
- Support custom effects. Such as LUT filter, zoom blur, etc.
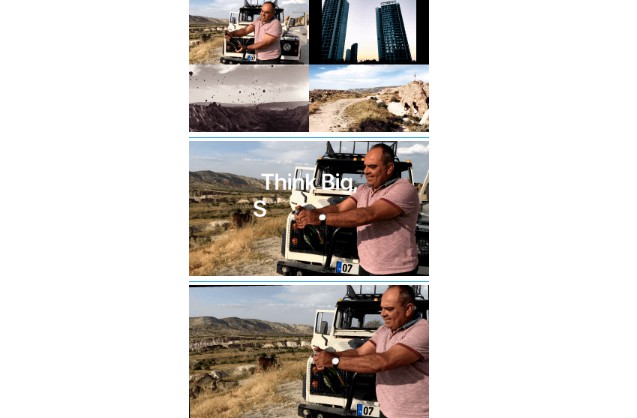
The following are some GIFs of features(multiple layers, text animation, keyframe animation, pre compose, and transition)


![]()
Requirements
- iOS 11.0+
- Swift 5.0+
Installation
VideoLab is available through CocoaPods. Specify the following in your Podfile:
source 'https://github.com/CocoaPods/Specs.git'
platform :ios, '11.0'
use_frameworks!

target '<Your Target>' do
  pod 'VideoLab'
end
Usage
Basic Concept
RenderLayer
RenderLayer is the most basic unit in the VideoLab framework. A video, image, audio can be a RenderLayer, or even just an effect can be a RenderLayer. RenderLayer is more like the concept of the layer in After Effect.
RenderComposition
RenderComposition works as a composite, can set frame rate, canvas size, contains multiple RenderLayers, can set CALayer to support vector animations.
VideoLab
VideoLab can be considered as a lab where AVPlayerItem, AVAssetExportSession, AVAssetImageGenerator can be generated according to RenderComposition.
Basic Usage
// 1. Layer 1
var url = Bundle.main.url(forResource: "video1", withExtension: "MOV")
var asset = AVAsset(url: url!)
var source = AVAssetSource(asset: asset)
source.selectedTimeRange = CMTimeRange(start: CMTime.zero, duration: asset.duration)
var timeRange = source.selectedTimeRange
let renderLayer1 = RenderLayer(timeRange: timeRange, source: source)

// 1. Layer 2
url = Bundle.main.url(forResource: "video2", withExtension: "MOV")
asset = AVAsset(url: url!)
source = AVAssetSource(asset: asset)
source.selectedTimeRange = CMTimeRange(start: CMTime.zero, duration: asset.duration)
timeRange = source.selectedTimeRange
timeRange.start = CMTimeRangeGetEnd(renderLayer1.timeRange)
let renderLayer2 = RenderLayer(timeRange: timeRange, source: source)

// 2. Composition
let composition = RenderComposition()
composition.renderSize = CGSize(width: 1280, height: 720)
composition.layers = [renderLayer1, renderLayer2]

// 3. VideoLab
let videoLab = VideoLab(renderComposition: composition)

// 4. Make playerItem
let playerItem = videoLab.makePlayerItem()
- Create
RenderLayer - Create
RenderComposition, setrenderSizeandlayers - Create
VideoLabwithrenderComposition - Make
AVPlayerItemorAVAssetExportSession
More Advanced Usage
Transform
var center = CGPoint(x: 0.25, y: 0.25)
var transform = Transform(center: center, rotation: 0, scale: 0.5)
renderLayer1.transform = transform
- Create
Transformwithcenter,rotationandscale RenderLayersettransform
Audio Configuration
let audioConfiguration = AudioConfiguration()
let volumeRampTimeRange = CMTimeRange(start: CMTime.zero, duration: CMTime(seconds: 5, preferredTimescale: 600))
let volumeRamp1 = VolumeRamp(startVolume: 0.0, endVolume: 0.0, timeRange: volumeRampTimeRange)
audioConfiguration.volumeRamps = [volumeRamp1]
renderLayer2.audioConfiguration = audioConfiguration
- Create
AudioConfiguration - Create
VolumeRampwithstartVolume,endVolumeandtimeRange AudioConfigurationsetvolumeRampsRenderLayersetaudioConfiguration
CALayer Animation
For exporting set your customized CALayer for RenderComposition
composition.animationLayer = <Your customized CALayer>
For playback add AVSynchronizedLayer to your view’s layer, See more detail in Text Animation Demo.
Keyframe Animation
// 1. Keyframe animation
let keyTimes = [CMTime(seconds: 2, preferredTimescale: 600),
                CMTime(seconds: 4, preferredTimescale: 600),
                CMTime(seconds: 6, preferredTimescale: 600)]
let animation = KeyframeAnimation(keyPath: "blendOpacity",
                                  values: [1.0, 0.2, 1.0],
                                  keyTimes: keyTimes, timingFunctions: [.linear, .linear])
renderLayer1.animations = [animation]

var transform = Transform.identity
let animation1 = KeyframeAnimation(keyPath: "scale",
                                   values: [1.0, 1.3, 1.0],
                                   keyTimes: keyTimes, timingFunctions: [.quadraticEaseInOut, .quadraticEaseInOut])
let animation2 = KeyframeAnimation(keyPath: "rotation",
                                   values: [0, Float.pi / 2.0, 0],
                                   keyTimes: keyTimes, timingFunctions: [.quadraticEaseInOut, .quadraticEaseInOut])
transform.animations = [animation1, animation2]
renderLayer1.transform = transform
- Create
KeyframeAnimationwithkeyPath,values,keyTimesandtimingFunctions - Set
animationsfor astructorclassthat implements theAnimatableprotocol (e.g.Transformstruct,RenderLayerclass)
RenderLayerGroup (After Effect-like pre-compose)
let layerGroup = RenderLayerGroup(timeRange: timeRange)
layerGroup.layers = [renderLayer1, renderLayer2]
- Create
RenderLayerGroupwithtimeRange - Set sub
layersforlayerGroup. See more detail in Layer Group Demo.
Transition
We don’t have a transition layer, so instead, you can add a transform or operations to each RenderLayer to create a transition. See more detail in Transition Demo.
Custom Effects
// Filter
var filter = LookupFilter()
filter.addTexture(lutTextures[0], at: 0)
renderLayer.operations = [filter]

// Zoom Blur
var zoomblur = ZoomBlur()
animation = KeyframeAnimation(keyPath: "blurSize",
                              values: [0.0, 3.0],
                              keyTimes: keyTimes, timingFunctions: [.quarticEaseOut])
zoomblur.animations = [animation]
layerGroup1.operations = [zoomblur]
- Create customize
Operationinherited fromBasicOperation.BasicOperationalso conforms to theAnimatableprotocol - Set
operationsforRenderLayer.
TODO
- Support Open GL render
- Add speed adjustment for
RenderLayer. - Provide a more convenient way to use transitions, possibly providing
TransitionLayer. - Add log system.
- Improve the demo and provide UI interactions.
Author
BearRuan, [email protected]
License
VideoLab is available under the MIT license. See the LICENSE file for more info.