Recipes
Driving changes in your UI with state and bindings
Indicate data dependencies in a view using state, and share those dependencies with other views using bindings.
The user interface of a SwiftUI app is a composition of views that form a view hierarchy. Each view has a dependency on some data. As that data changes, either due to external events or because of actions taken by a person using the app, SwiftUI automatically updates the view to reflect those changes.
This sample shows examples of using State variables to indicate data dependencies, and sharing data with other views using the Binding property wrapper.
Separate properties and imperative code from the view
When a view needs to manage more than a single piece of state data, it can be helpful to manage that data in a separate view-specific structure. This approach helps make the declarative interface code of a view more readable by moving properties and imperative code outside of the view. It also helps make unit testing state changes easier to implement.
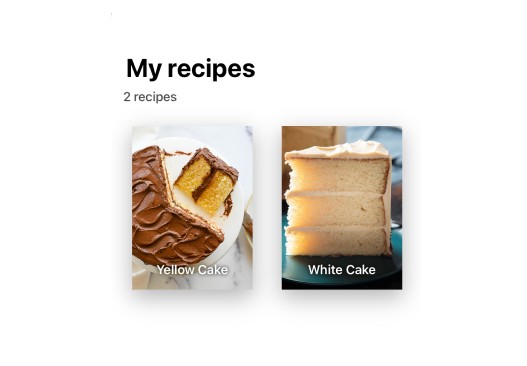
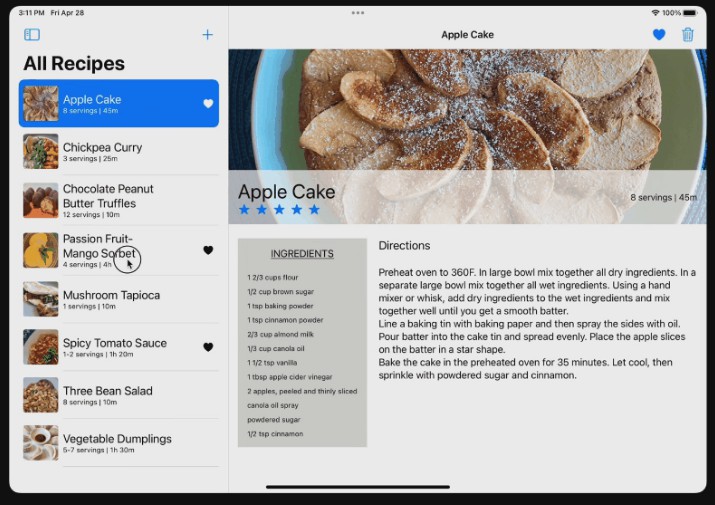
This sample app displays a collection of cooking recipes. A person using the app can view the details of a recipe and add new ones. To add a recipe, the sample presents the custom view RecipeEditor, which needs three pieces of state data: a recipe, a flag indicating whether to save the changes, and a flag indicating whether to present the RecipeEditor view.
The sample app separates its state data and imperative code from RecipeEditor by defining a structure, RecipeEditorConfig.
Bind the view to its state data
With a structure in place that contains the data that the recipe editor needs, and methods that change the state of the editor, look at the RecipeEditor view to see how it uses RecipeEditorConfig.
Create a state variable in another view
The RecipeEditor view has a binding to an instance of RecipeEditorConfig. The editor can read and write the data but it doesn’t own the recipe data. Instead, the view ContentListView creates and owns the data, and SwiftUI manages that data for the lifespan of the content list view.
Creating a custom input control that binds to a value
Provide interactions that are unique to your app with custom controls that bind to a value.
SwiftUI provides input controls like Slider, TextField, and many others that bind to a value and can change the value as a person’s interacts with the control. But every app is different. You may find that you need a custom control that provides behavior unique to your app.
SwiftUI provides the building blocks you need to create a custom input control for your app. This tutorial walks through an example of one such control, a rating control. The sample app uses this control to let people rate recipes from 1 to 5 stars.
Design a custom control
Before implementing a custom control, ask yourself what data does the control need, what does it do with that data, and how it does it represent that data visually within the app. The sample app, for instance, needs an Int property that represents the rating of a recipe. The control needs to be able to change the value of this property. And because the control shows the rating of a recipe, it needs to display a set of stars that reflects the rating value; for instance, the control displays five stars when the rating value is 5.
Make the control interactive
StarRating is able to display a set of stars to indicate the rating of a recipe. For instance, if the recipe’s rating is 4, the control displays four filled stars, followed by one empty star. To make StarRating interactive, it uses the onTapGesture(count:perform:) action.
Display the custom control in other views
StarRating is ready to go. It has the data it needs, it can apply changes to that data, and it can visually represent the current state of the data in the app’s user interface. The next step is to make use of the custom input control.
Defining the source of truth using a custom binding
Provide an alternative to a state variable by using a custom binding.
The most common way to define a source of truth that binds to other views in your app is to declare a state variable using the State property wrapper. However, there may be those rare occasions when the source of truth is dynamic and can’t be defined using the @State attribute. For instance, this sample app needs to retrieve a recipe as the source of truth using the recipe’s id. The app accomplishes this by creating a computed property that returns a custom binding.
Specifying the source of truth
This sample app displays the details of a recipe in the custom view DetailView. The view only knows the recipe id, but not the recipe, so it uses the id to retrieve the recipe from the recipe box (a data store that contains all the recipes). Because the view needs to retrieve the recipe, it uses a custom binding as the source of truth of the recipe instead of declaring a state variable for the recipe.
Using a custom binding is a useful feature of SwiftUI, but isn’t always the best option. Limit its use to use cases where using a state variable or object isn’t possible. In most cases, define the source of truth as either a
Statevariable (for state local to the view) orStateObject(for shared data models) to let SwiftUI manage the value or object for you.