ElegantCalendar
![]()
![]()
![]()
ElegantCalendar is an efficient and customizable full screen calendar written in SwiftUI.
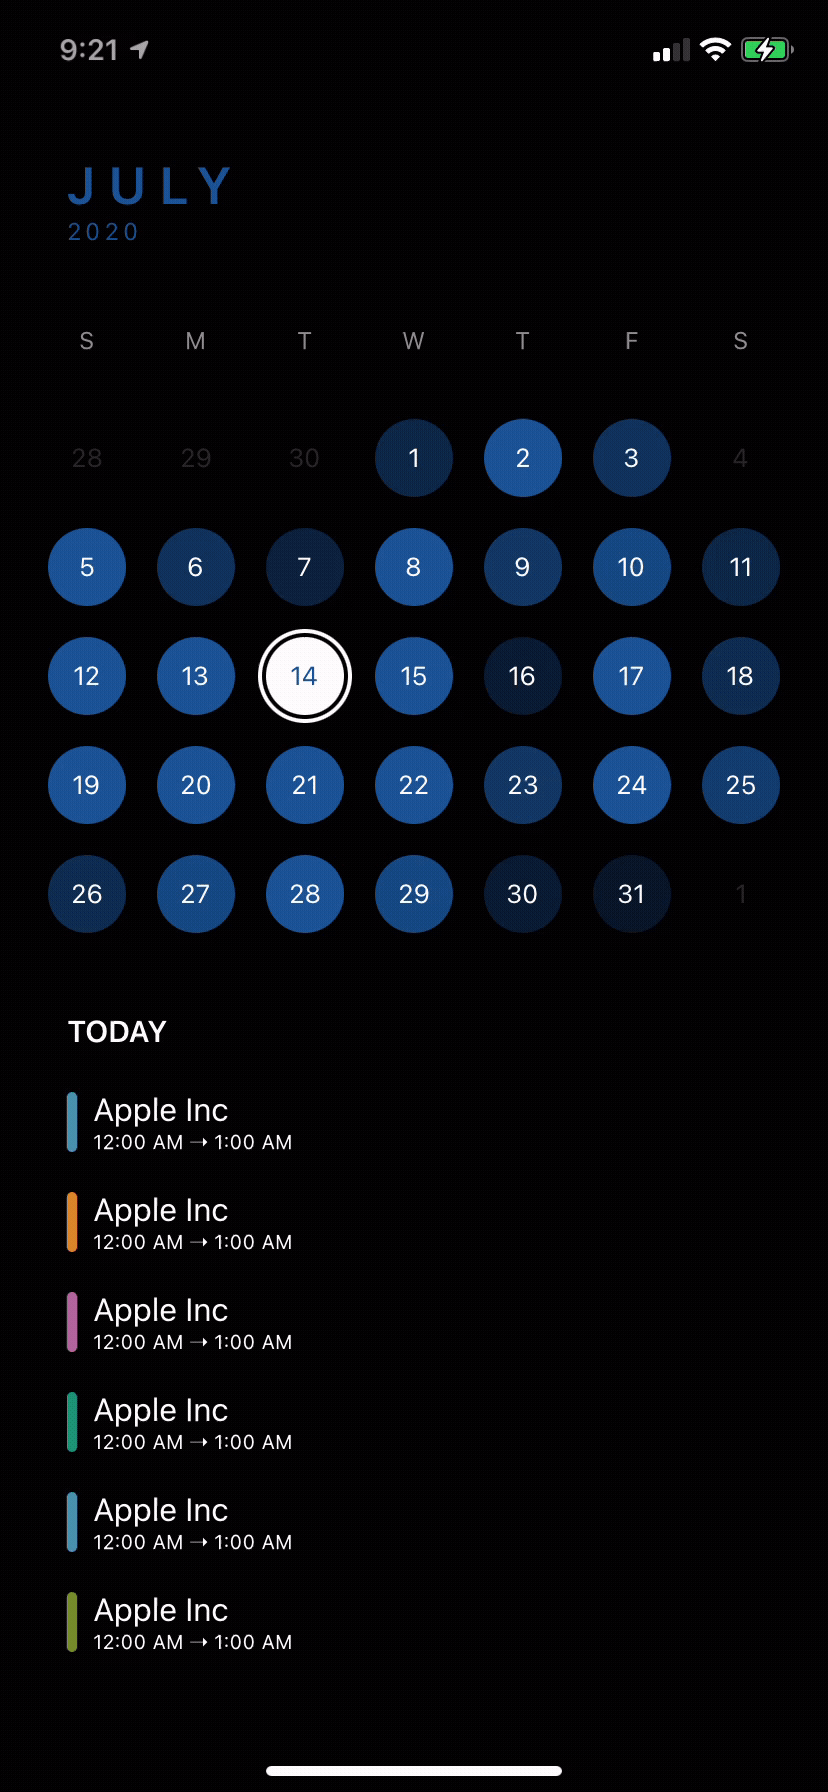
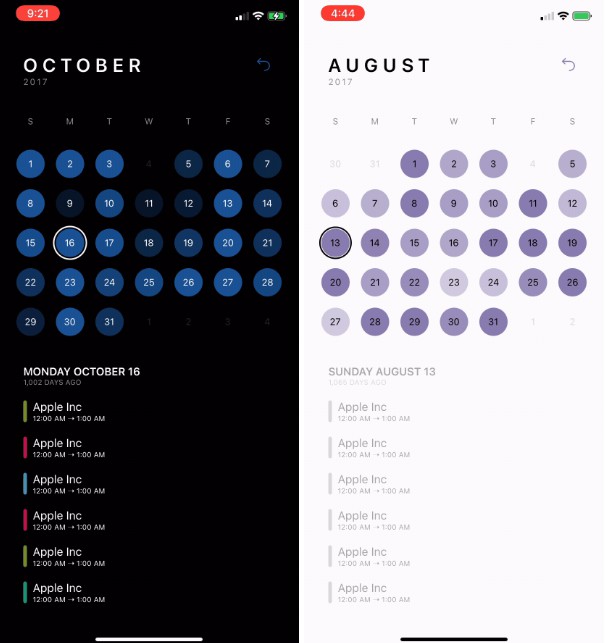
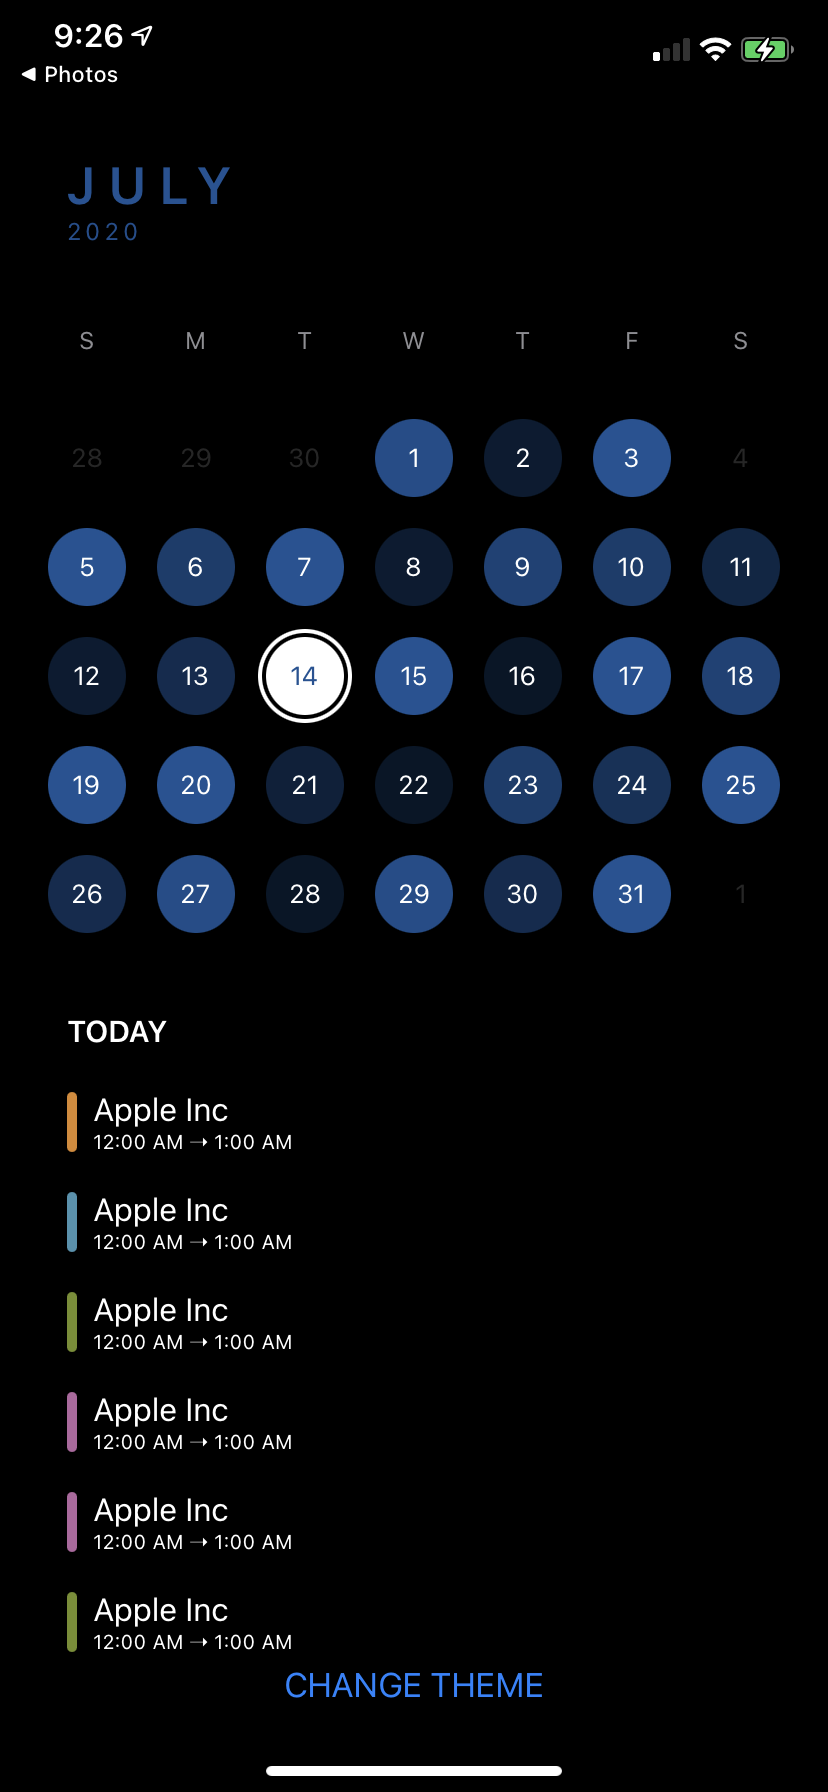
ElegantTimeline - Shows what's possible using ElegantCalendar

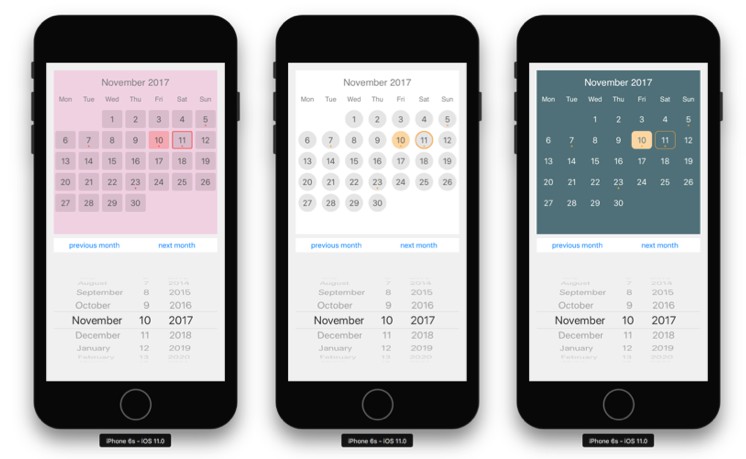
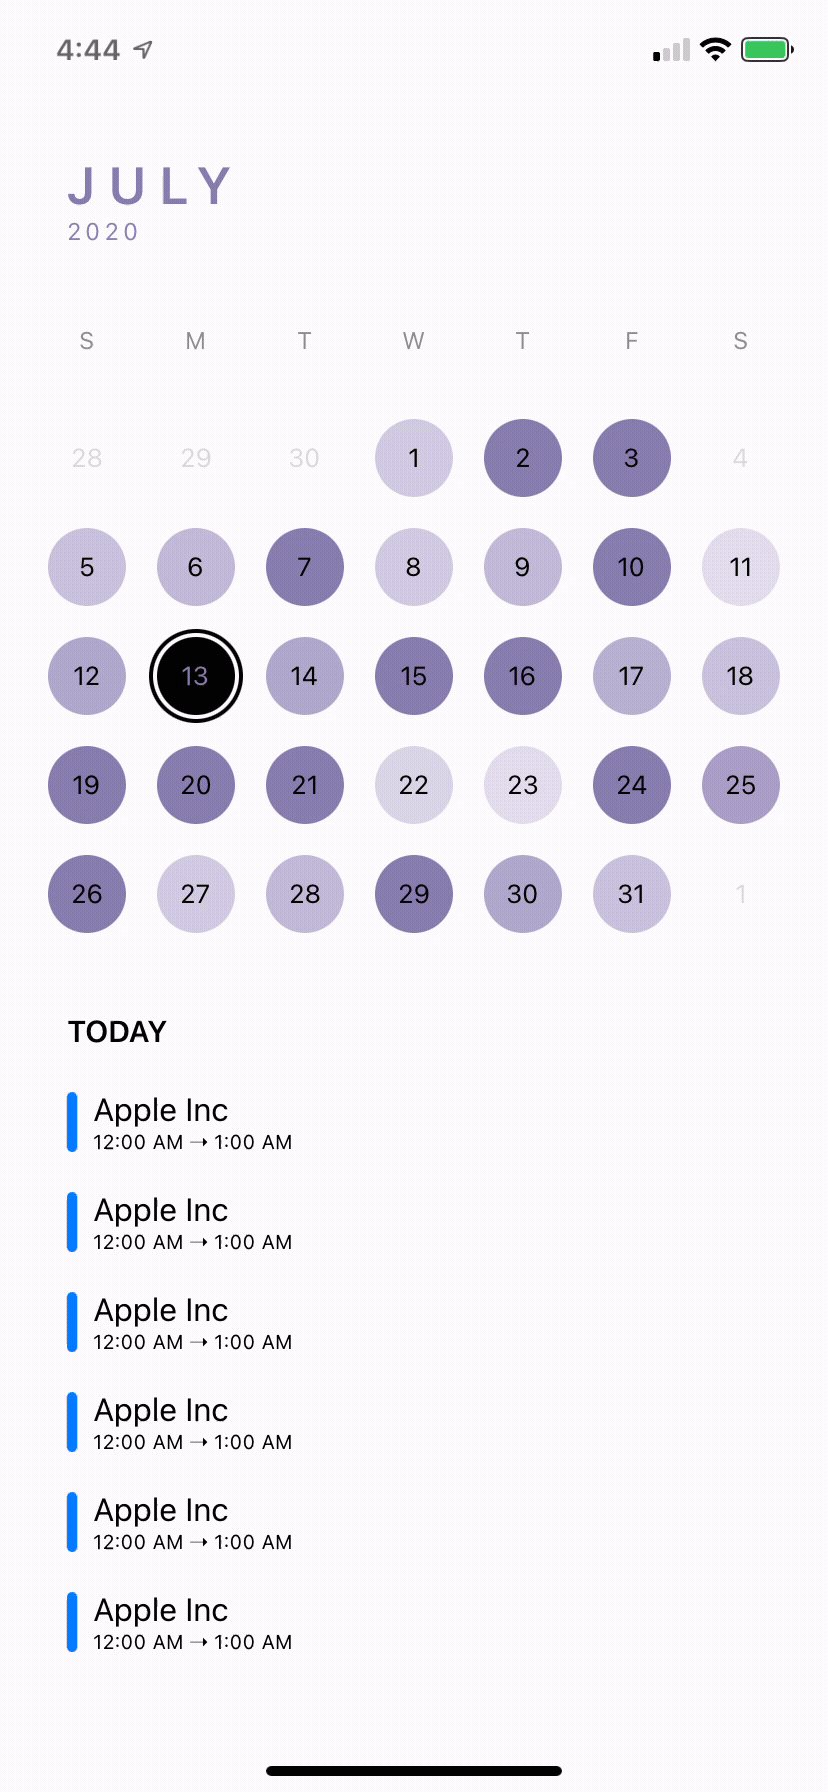
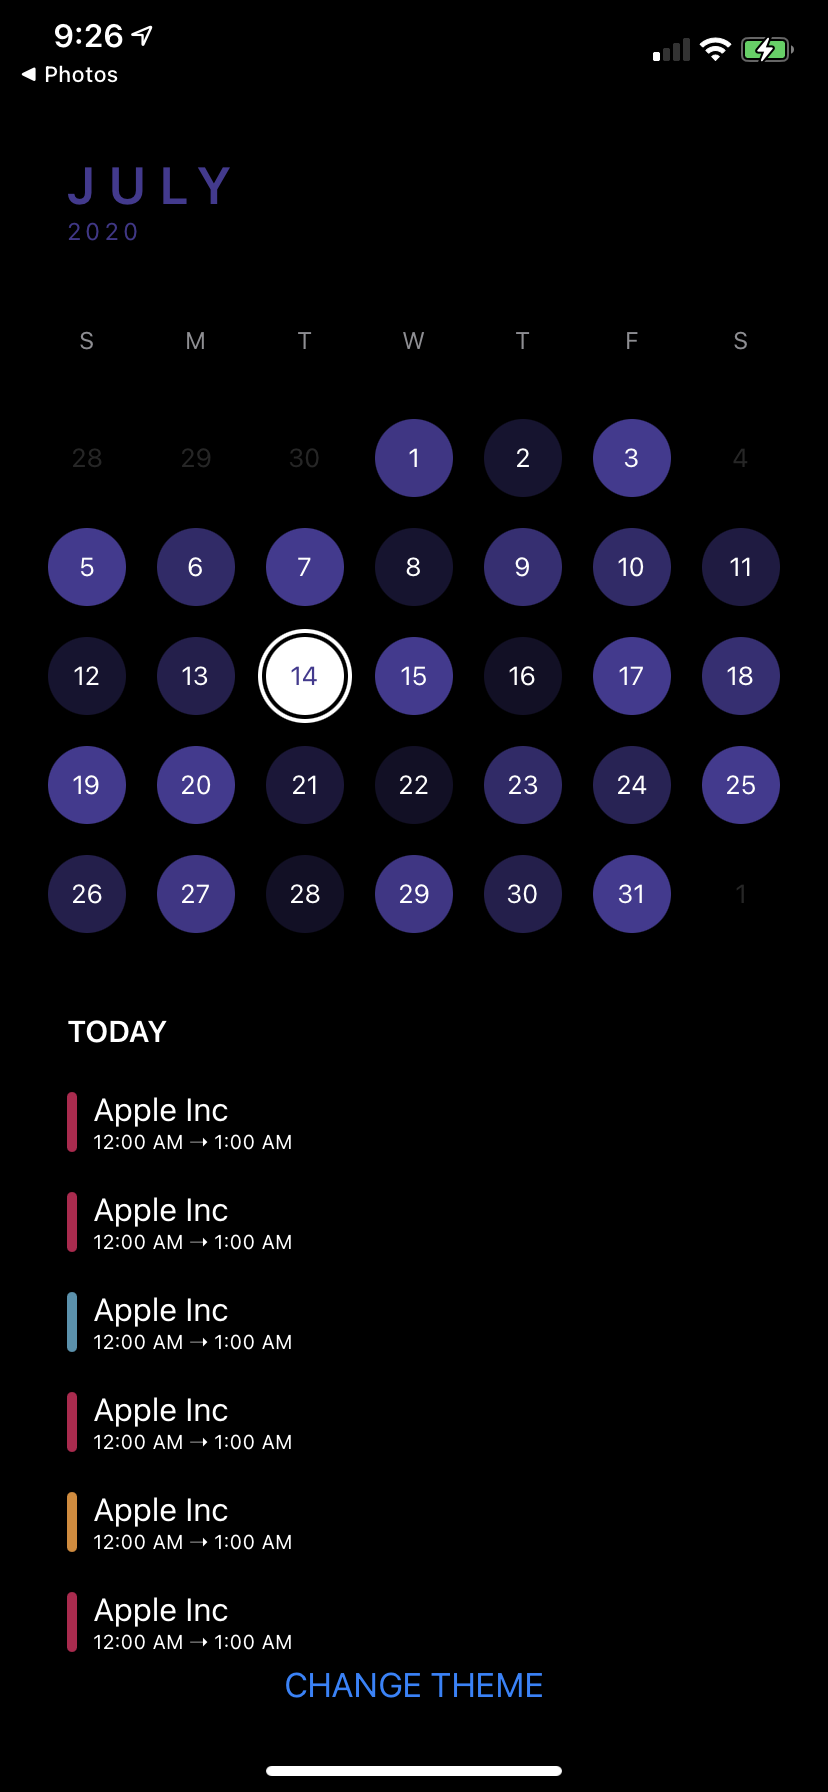
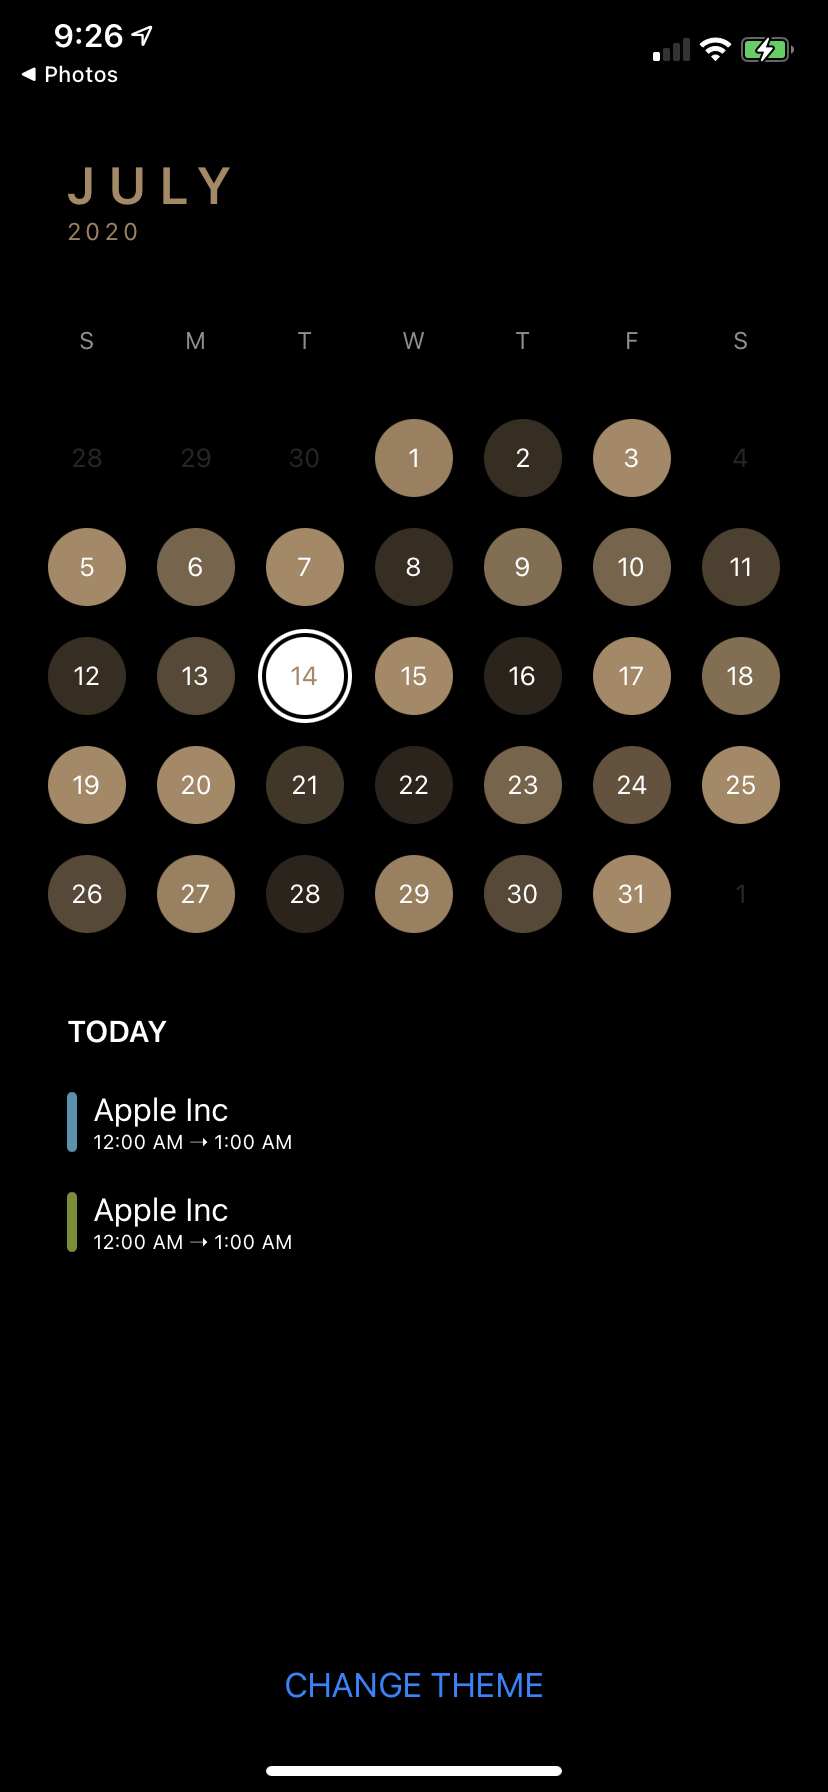
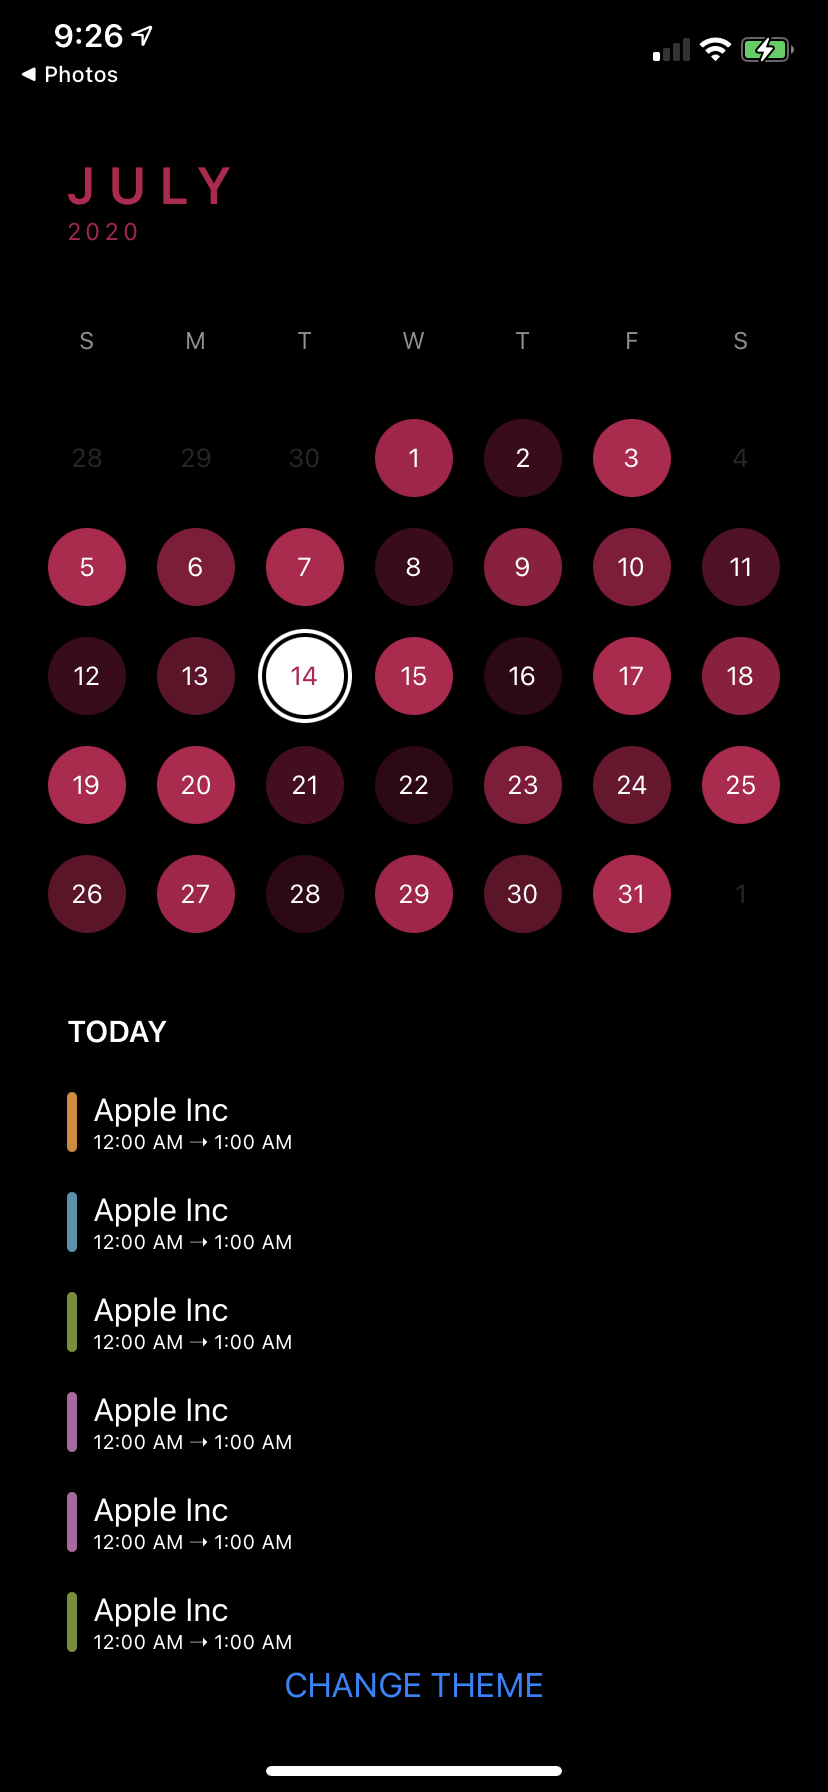
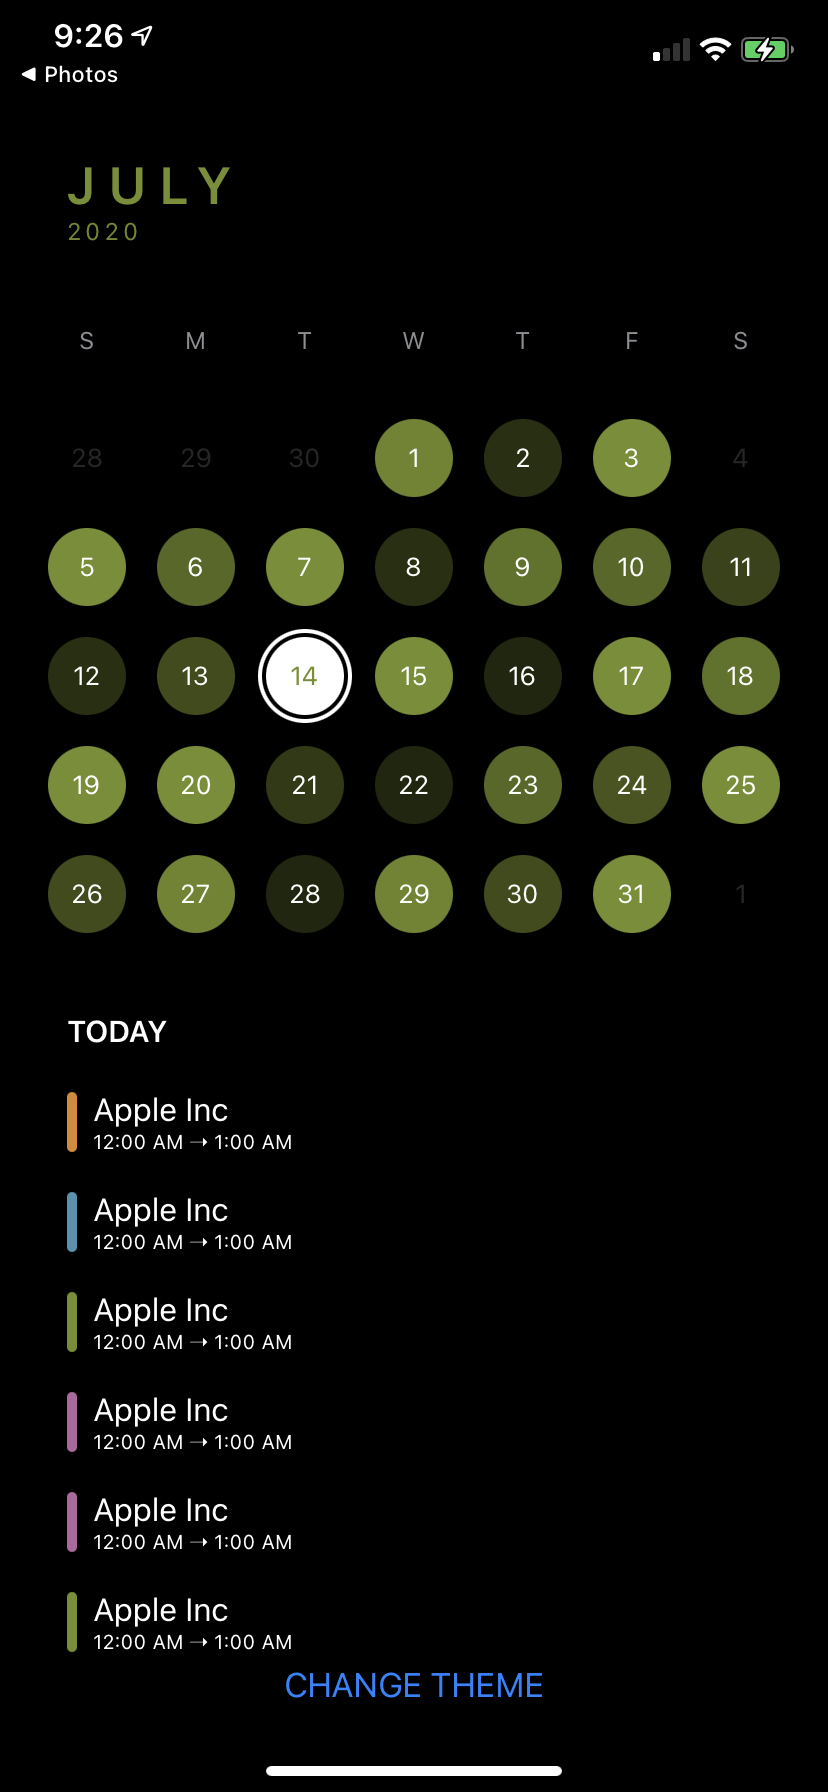
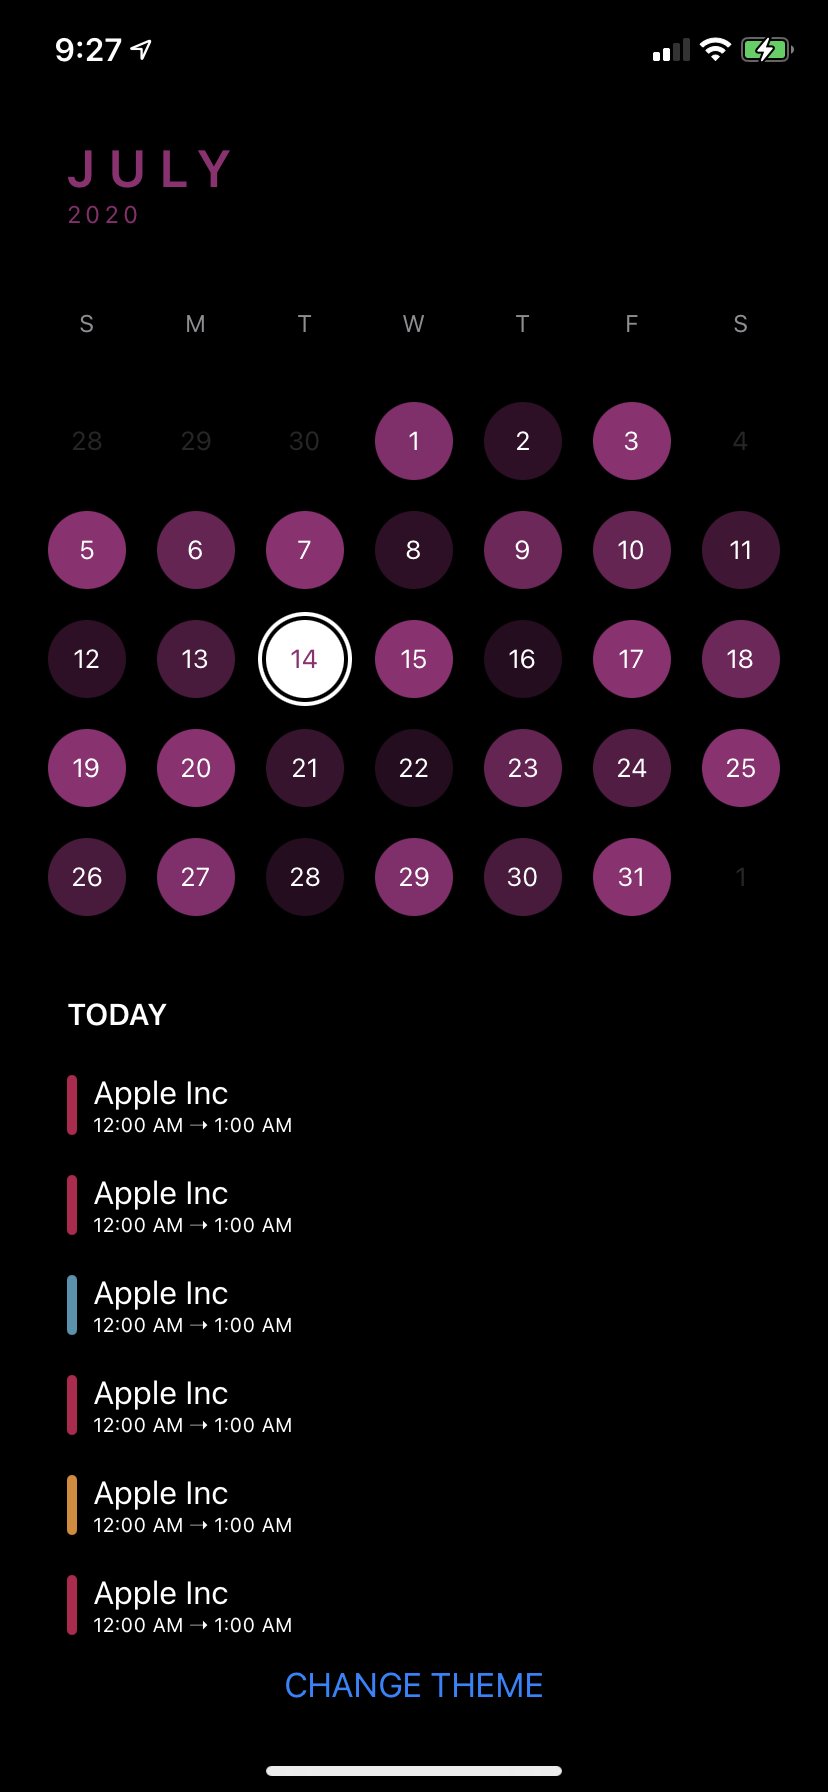
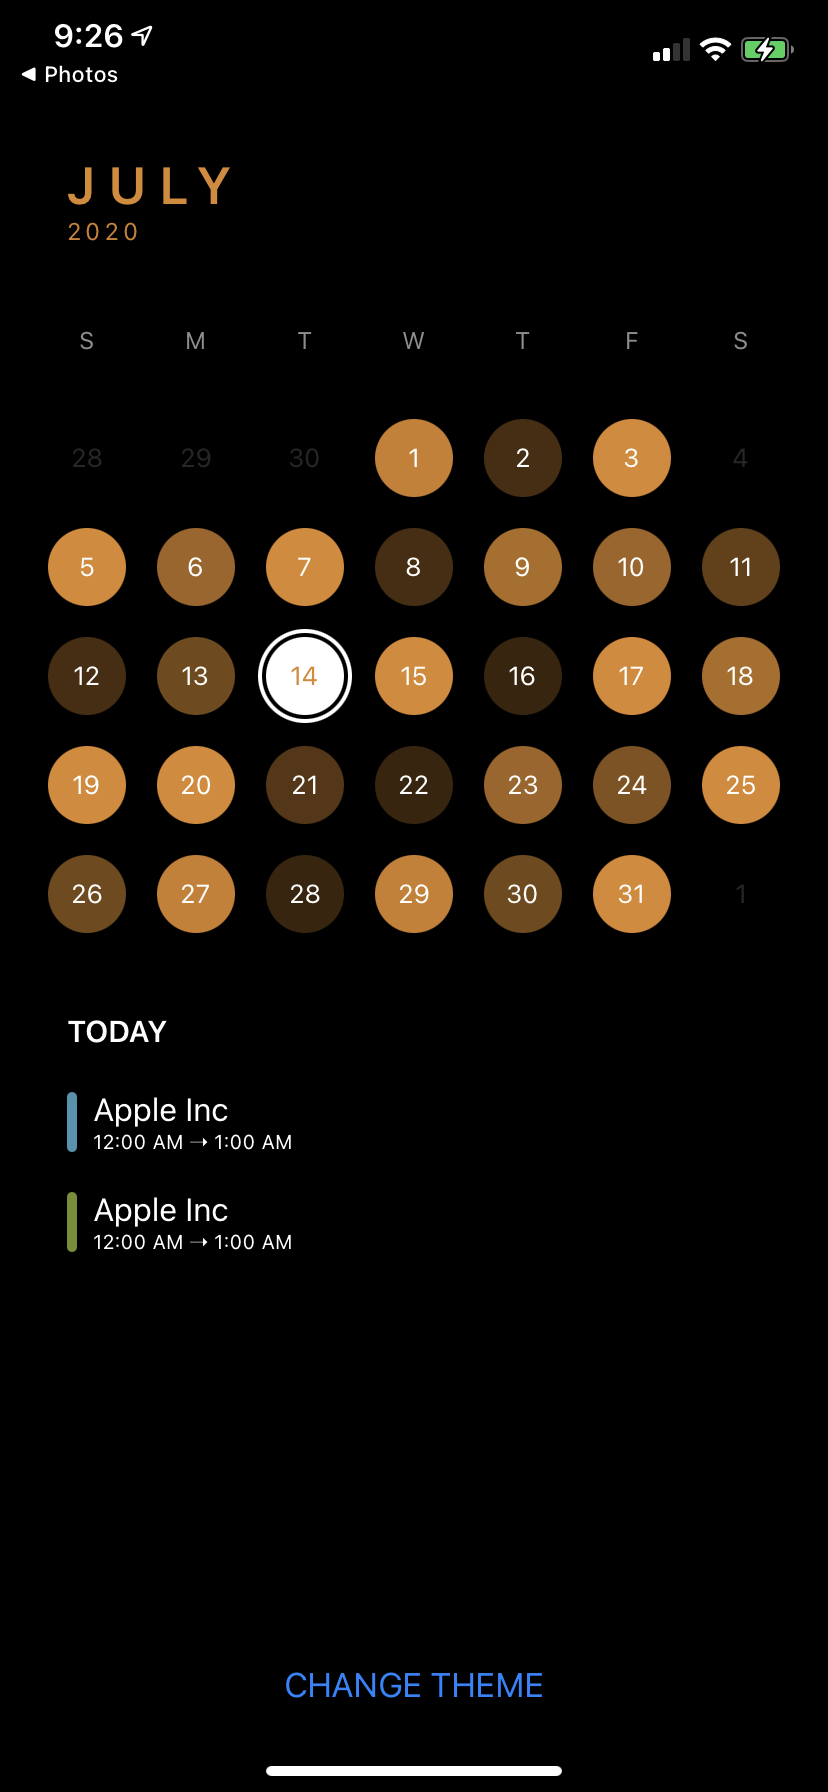
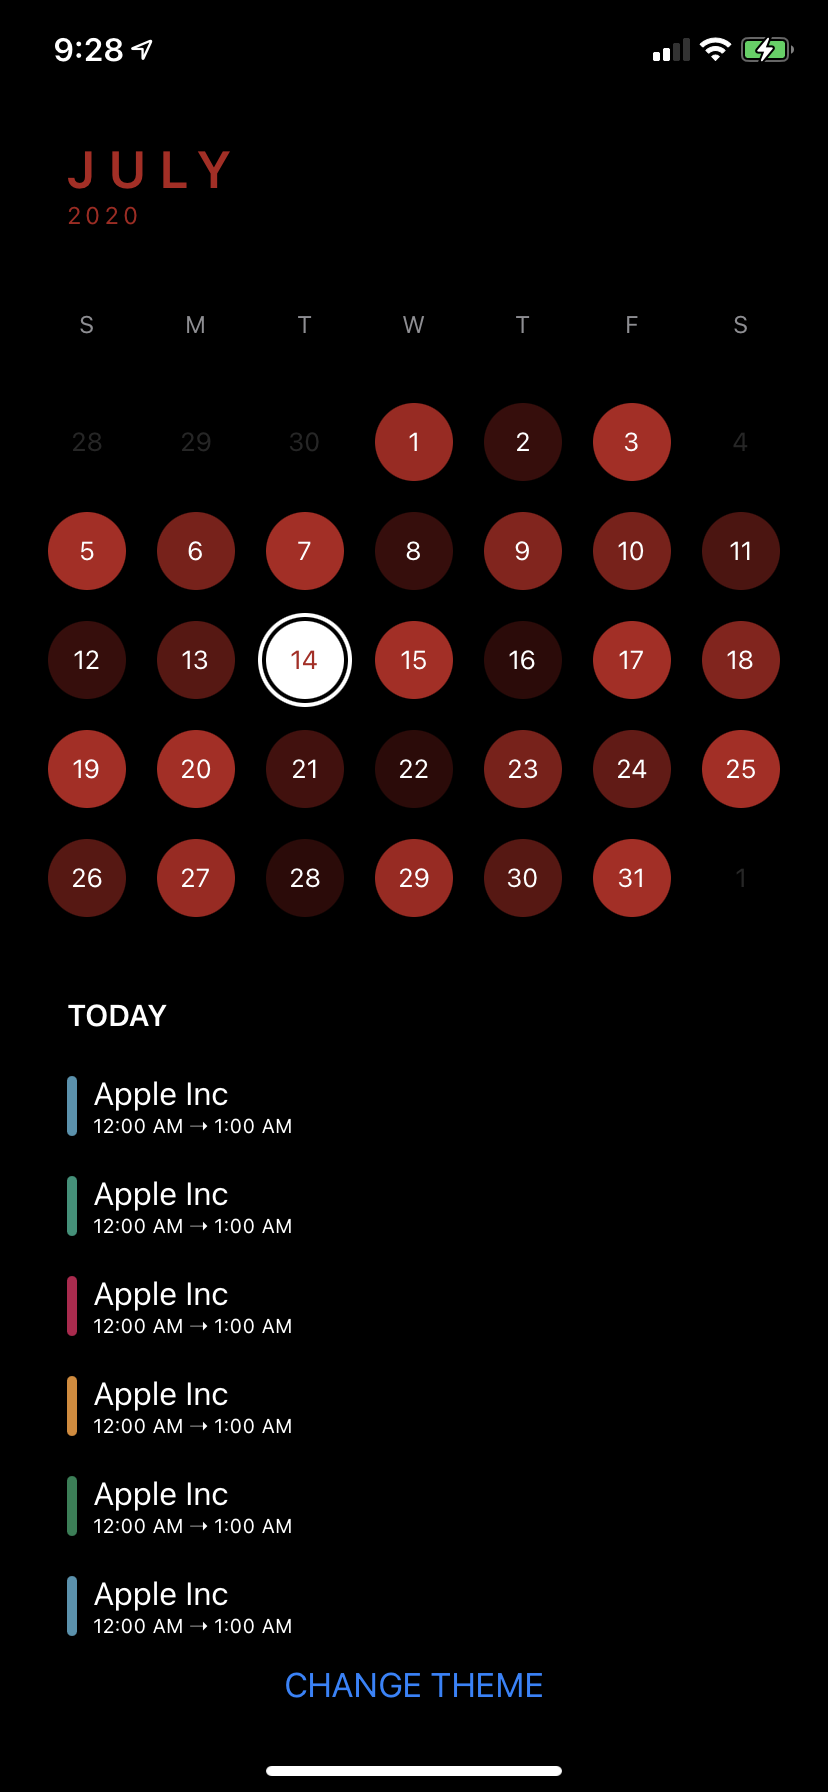
Comes with 8 default themes. You can also configure your own theme. Read more to find out.
Introduction
ElegantCalendar is inspired by TimePage and is part of a larger repository of elegant demonstrations like this: TimePage Clone. It uses ElegantPages, another library I wrote specifically for paging so check that out :)
It is mainly meant to be used with apps that require the use of a calendar to function(like ElegantTimeline), not as a full screen date picker(the demo demonstrates how to do so if you really want to).
Features:
- Display months and years in a full screen vertical scrolling layout
- Custom layout system that allows virtually infinite date ranges with minimal increasing memory usage
- Customization of individual day views
- Customization of the calendar color scheme, light and dark
- Customization of the accessory view displayed when selecting a day
- Excluding certain days from being selectable on the calendar
- Scrolling to a particular day, month, or year with or without animation
- Built in button that scrolls back to today’s month or year
- Flexibility in either using the full calendar view that has both the monthly and yearly view or just one of the individual views
- Haptics when performing certain actions
- Intuitive navigation between the yearly and monthly view: swipe between views or tap on the month header to navigate to the yearly view
- Elegant default themes
Basic usage
Using ElegantCalendar is as easy as:
import ElegantCalendar

struct ExampleCalendarView: View {

    // Start & End date should be configured based on your needs.
    let startDate = Date().addingTimeInterval(TimeInterval(60 * 60 * 24 * (-30 * 36)))
    let endDate = Date().addingTimeInterval(TimeInterval(60 * 60 * 24 * (30 * 36)))

    @ObservedObject var calendarManager = ElegantCalendarManager(
        configuration: CalendarConfiguration(startDate: startDate,
                                             endDate: endDate))

    var body: some View {
        ElegantCalendarView(calendarManager: calendarManager)
    }

}
However, if you just want an individual view, not the entire calendar view, you can do either:
import ElegantCalendar

struct ExampleMonthlyCalendarView: View {

    // Start & End date should be configured based on your needs.
    let startDate = Date().addingTimeInterval(TimeInterval(60 * 60 * 24 * (-30 * 36)))
    let endDate = Date().addingTimeInterval(TimeInterval(60 * 60 * 24 * (30 * 36)))

    @ObservedObject var calendarManager = MonthlyCalendarManager(
        configuration: CalendarConfiguration(startDate: startDate,
                                             endDate: endDate))

    var body: some View {
        MonthlyCalendarView(calendarManager: calendarManager)
    }

}

struct ExampleYearlyCalendarView: View {

    // Start & End date should be configured based on your needs.
    let startDate = Date().addingTimeInterval(TimeInterval(60 * 60 * 24 * (-30 * 36)))
    let endDate = Date().addingTimeInterval(TimeInterval(60 * 60 * 24 * (30 * 36)))

    @ObservedObject var calendarManager = YearlyCalendarManager(
        configuration: CalendarConfiguration(startDate: startDate,
                                             endDate: endDate))

    var body: some View {
        YearlyCalendarView(calendarManager: calendarManager)
    }

}
How it works
ElegantCalendarView uses the ElegantHPages view from ElegantPages. Essentially, it's just a swipable HStack that loads all the views immediately. And it's also for this reason that it is not recommended that ElegantCalendarView should not be used as a date picker. Here's why.
Let's first talk about the monthly calendar where you can swipe up and down to see the next/previous month. This view uses ElegantVList and is really efficient memory and performance wise. When it comes to the yearly calendar, performance is just as amazing. However, the catch is that all the year views have to be loaded into memory and drawn onto the screen first. This takes a few seconds depending on your date range, the wider the longer. However, once this loading process is over, the calendar functions smoothly and elegantly.
So how can this be fixed? Either create a simpler yearly calendar that doesn't require as much CoreGraphics drawing as the current one or load the year views on demand. The problem with the second approach is that SwiftUI is just inefficient at making views, as it spends a LOT of CPU on rendering. Hopefully, in future iterations of SwiftUI, the rendering becomes smoother. As for the former approach, it seems the most feasible and I will consider implementing it if enough people display interest. Just make an issue about it so I can tell.
Customization
ElegantCalendarManager
configuration: The configuration of the calendar view
public struct CalendarConfiguration: Equatable {

    let calendar: Calendar
    let ascending: Bool // reverses the order in which the calendar is laid out
    let startDate: Date
    let endDate: Date

}
initialMonth: The initial month to display on the calendar. If not specified, automatically defaults to the first month.
datasource: The datasource of the calendar
public protocol ElegantCalendarDataSource: MonthlyCalendarDataSource, YearlyCalendarDataSource { }

public protocol MonthlyCalendarDataSource {

    func calendar(backgroundColorOpacityForDate date: Date) -> Double
    func calendar(canSelectDate date: Date) -> Bool
    func calendar(viewForSelectedDate date: Date, dimensions size: CGSize) -> AnyView

}

public protocol YearlyCalendarDataSource { }
This allows you to customize the opacity of any given day, whether you want a day to be tappable or not, and the accessory view that shows when a day is tapped.
delegate: The delegate of the calendar
public protocol ElegantCalendarDelegate: MonthlyCalendarDelegate, YearlyCalendarDelegate { }

public protocol MonthlyCalendarDelegate {

    func calendar(didSelectDay date: Date)
    func calendar(willDisplayMonth date: Date)

}

public protocol YearlyCalendarDelegate {

    func calendar(didSelectMonth date: Date)
    func calendar(willDisplayYear date: Date)

}
This is just a convenience to handle the shortcomings of the @Published wrapper which doesn't support didSet. Conform to this if you need to do things when a month is displayed or date changes.
theme: The theme of various components of the calendar. Default is royal blue. Available for ElegantCalendarView & YearlyCalendarView & MonthlyCalendarView.
public struct CalendarTheme: Equatable, Hashable {

    let primary: Color

}

public extension CalendarTheme {

    static let brilliantViolet = CalendarTheme(primary: .brilliantViolet)
    static let craftBrown = CalendarTheme(primary: .craftBrown)
    static let fluorescentPink = CalendarTheme(primary: .fluorescentPink)
    static let kiwiGreen = CalendarTheme(primary: .kiwiGreen)
    static let mauvePurple = CalendarTheme(primary: .mauvePurple)
    static let orangeYellow = CalendarTheme(primary: .orangeYellow)
    static let red = CalendarTheme(primary: .red)
    static let royalBlue = CalendarTheme(primary: .royalBlue)

}

ElegantCalendarView(...)
    .theme(.mauvePurple)
To configure your own theme, just pass in your color into the CalendarTheme initializer. To have dynamic appearance, make sure your Color has both a light and dark appearance.
horizontal or vertical: The orientation of the calendar. The default is horizontal, as shown in the GIF. Available for ElegantCalendarView & YearlyCalendarView & MonthlyCalendarView.
ElegantCalendarView(...)
    .vertical()
allowsHaptics: Whether haptics is enabled or not. Default is enabled. Available for ElegantCalendarView & MonthlyCalendarView
ElegantCalendarView(...)
    .allowsHaptics(false)
Users get haptics whenever they tap a day, scroll to a new month, or press the scroll back to today button.
frame: Custom width for the monthly calendar view. Available for MonthlyCalendarView
MonthlyCalendarView(...)
    .frame(width: ...)
Use Cases
The following aspects of ElegantCalendarManager can be used:
var currentMonth: Date - The current month displayed on the calendar view.
var selectedDate: Date? - The date selected on the calendar view, if any.
var isShowingYearView: Bool - Whether the year view is showing. If false, the month view is showing.
func scrollToMonth(_ month: Date, animated: Bool = true) - Scroll back to a certain month, animated or not. No date is selected in the process.
func scrollBackToToday(animated: Bool = true) - Scroll back to today, animated or not. Today's date is selected in the process.
func scrollToDay(_ day: Date, animated: Bool = true) - Scroll back to a certain date, animated or not. The date is selected in the process.
Demos
The demos shown in the GIF can be checked out on example repo.
Installation
ElegantCalendar is available using the Swift Package Manager:
Using Xcode 11, go to File -> Swift Packages -> Add Package Dependency and enter https://github.com/ThasianX/ElegantCalendar
If you are using Package.swift, you can also add ElegantCalendar as a dependency easily.
let package = Package(
  name: "TestProject",
  dependencies: [
    .package(url: "https://github.com/ThasianX/ElegantCalendar", from: "4.2.0")
  ],
  targets: [
    .target(name: "TestProject", dependencies: ["ElegantCalendar"])
  ]
)
Inside whatever app is using ElegantCalendar or your Swift Package that uses ElegantCalendar as a dependency:
- Scroll the project navigator down to the
Swift Package Dependenciessection. InsideElegantCalendar, you'll see a directory calledElegantCalendar.xcassets. - After you've located it, open your project's settings and navigate to your target's build phases in a parallel window.
- Drag
ElegantCalendar.xcassetsinto your target'sCopy Bundle Resources. Make sure thatCopy items if neededis unticked andCreate groupsis ticked. This step is crucial becauseElegantCalendaruses custom icons, whichSPMwill support in Swift 5.3. - This last step is for making sure that when others clone your repository, the assets will be available to them as well. Click the
ElegantCalendar.xcassetsthat has appeared in your project navigator and in the inspector on the right, selectIdentity and Type. Inside, make sure thatLocationis set toRelative to Build Products.
If you don't know how to do this, refer to the Demo.
Requirements
- iOS 13.0+
- Xcode 11.0+
Contributing
If you find a bug, or would like to suggest a new feature or enhancement, it'd be nice if you could search the issue tracker first; while we don't mind duplicates, keeping issues unique helps us save time and considates effort. If you can't find your issue, feel free to file a new one.
Resources
Also, here's a dump of resources I found useful when working on this
License
This project is licensed under the MIT License - see the LICENSE file for details